 ASPNetWorld

Version 26.5 brings a set of guide improvements that will matter most when you are lining up elements across a complex composition. You can now position guides using percentages, pin them to edges, and assign custom colours — small changes that genuinely speed up layout work. Behind the scenes, Object Matte results can be cached to disk between sessions, so a demanding rotoscoping job doesn't have to start from scratch every time you reopen the project.
Bringing static assets from Illustrator and Photoshop into motion
Think of After Effects as the place where prepared assets come to move. A still illustration from Illustrator, a logo from Photoshop, or a soundtrack from Audition can all be brought into a composition and animated. You might build a title sequence frame by frame, or drop a preset style onto text and tweak it from there. Because it works with layers and masks, foreground elements can be isolated from their backgrounds and combined with other footage — a process called compositing — which is the same principle that makes green-screen work possible.
What you can actually do with it
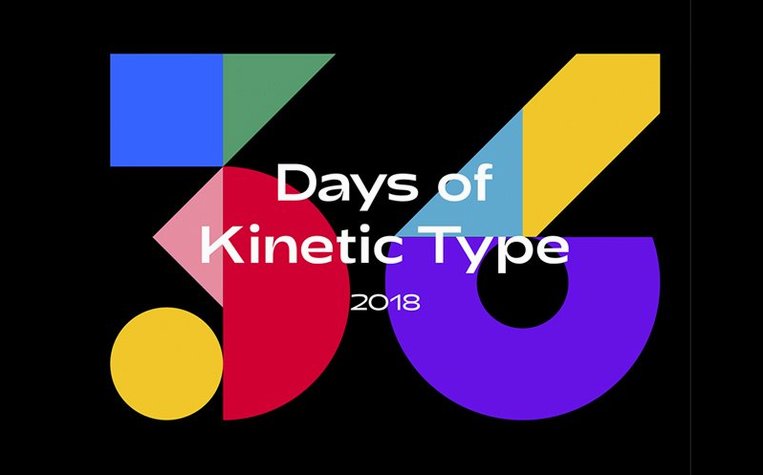
Motion graphics design is the obvious starting point: animated logos, explainer videos, kinetic typography where words slide and bounce into place. But the toolkit goes further. You can remove unwanted objects from a shot, stabilise shaky handheld video, or generate motion where none existed. Template compositions and preset styles are included, so you are never staring at a blank canvas without a starting point. On a Mac, it expects macOS 14 Sonoma or later, 16 GB of RAM, and a display of at least 1440x900 — reasonable requirements for an application that pushes pixels around at this level.
Switch spatial interpolation to linear before you animate
Out of the box, After Effects makes a few assumptions about how you like to work, and some of them are worth overruling straight away. Head to Preferences > General and switch on Default Spatial Interpolation to Linear. Without this, new keyframes use Auto Bézier, which applies a smooth curve to the motion path. That sounds helpful until a logo drifts lazily towards its mark instead of arriving with a crisp stop. Linear keyframes give you mechanical precision; you can always ease them later with the graph editor when the timing needs finesse.
Next, turn off Hardware Accelerate Composition, Layer, and Footage Panels if your Mac shows any flickering during previews. The feature is meant to speed up the viewer, but on certain machines — particularly those driving external displays — it can introduce glitchy redraws that make it impossible to judge a composition accurately. You lose a little smoothness and gain dependable feedback, which matters more.
Finally, drop into Media & Disk Cache and bump the disk cache size as high as your free space allows. The 26.5 update’s ability to cache Object Matte results to disk makes this setting more important than ever. After Effects writes temporary frames to this cache during RAM previews, and once the folder fills up, it discards older work. A large cache means fewer re-renders of frames you already waited for, especially when you are hopping between multiple compositions in a single session.
Why the spacebar doesn't give you real-time playback
One of the first things you will notice is that hitting the spacebar does not play back your composition in real time the way it would in Premiere Pro. After Effects needs to build a RAM preview first. Press the Numpad 0 key with nothing selected and wait for the green bar to fill across the timeline. If the spacebar seems to do nothing, that is the snag — you are asking for a real-time playback without having cached the frames. Once the preview is in RAM, the spacebar works as expected.
CCXProcess errors during installation — the dreaded “error #1” — almost always mean Rosetta is missing. The remedy is a single Terminal command: /usr/sbin/softwareupdate --install-rosetta --agree-to-license. Press Enter, let the process finish, then run the After Effects installer again. It is a one-time job, and it only applies to Macs with Apple Silicon that have not already run an Intel-based application before.
Another headache that catches people out is the Missing Footage dialogue that appears when you open a project you moved between drives or received from a collaborator. Rather than clicking through each file, right-click any offline footage item in the Project panel and choose Replace Footage > File. Point it to the correct folder and After Effects will often find the rest automatically if the folder structure matches. If it does not, the File > Dependencies > Consolidate All Footage command moves everything into a single directory, making future relocations painless.
Footage that sits loose on your desktop will break your project
The most expensive mistake is working with footage that sits loose on the desktop or scattered across different drives. After Effects does not embed video files into the project; it references them. Move a source file later and you have broken links. Create a dedicated project folder before you import a single asset. Inside it, keep subfolders for footage, audio, and exports. That structure travels intact, and you will never face a timeline full of colour bars.
Another classic slip is scaling a raster layer well beyond 100% and not understanding why it goes soft. After Effects honours the original pixel dimensions of imported images. A 500-by-500-pixel logo blown up to fill a 4K composition is being stretched across four times its intended area. Either start with larger source files, or tick the Continuously Rasterize switch — the little sunburst icon on the layer — for vector layers from Illustrator. That switch tells After Effects to sample the vector paths at the composition resolution, so scaling stays sharp. For raster artwork, you need more pixels from the start; there is no workaround.
Newcomers also tend to ignore the Resolution/Down Sample Factor pop-up at the bottom of the Composition panel. Leaving it on Full while building complex scenes forces the machine to calculate every pixel of every frame during previews. Dropping it to Half or Third during layout work keeps the interface responsive, and the final render still outputs at full resolution. It is a preview setting, not a quality choice, and it saves an enormous amount of waiting.
Building a 15-second podcast bumper from folder structure to export
You sit down with a brief: a 15-second animated bumper for a podcast, using the show’s logo and colour palette. The first thing you do is create the project folder — Podcast_Bumper — with subfolders for Assets and Exports. You drag the logo Illustrator file and a short WAV music sting into the Assets folder, then launch After Effects and save the project file into the main folder immediately. That reference chain is now solid.
You create a new composition: 1920 by 1080, 24 frames per second, 15 seconds long. The logo is imported as footage — Import Kind set to Composition - Retain Layer Sizes so that individual elements stay separate. You drop the logo composition into the main timeline, scale it down with the Continuously Rasterize switch active, and add a gentle scale-up over two seconds by setting a keyframe at frame 0 and another at 2:00. The graph editor lets you pull the velocity curve so the movement slows as it settles, a trick that makes the animation feel deliberate rather than robotic.
Next, you drag the audio file onto the timeline. With the layer selected, you twirl open the Audio properties and set a fade-out over the final second so the sting does not cut off abruptly. You preview the work with Numpad 0, spot that the logo could use a soft shadow to separate it from the background, and add a Drop Shadow layer style from the Layer > Layer Styles menu. The shadow’s softness and opacity are adjusted in the Effect Controls panel until the logo pops without looking like it is floating on glass.
Finally, you add the new percentage-based guides to check vertical centring. You set a guide to 50% on the Y-axis, watch the logo snap into place, and confirm it is pixel-perfect. The composition is sent to the Render Queue with the High Quality output preset and lands in the Exports folder as a ProRes file, ready for the client.
Looping a 30-second conference backdrop with a subtle particle field
A motion designer at a small events company is tasked with creating a looping 30-second backdrop for a conference stage screen. The brief calls for the event name, date, and a subtle particle field that suggests energy without distracting from the speakers. She builds the text in a separate pre-comp so she can swap out the event details for next year’s conference without rebuilding the entire animation. The particle field is generated with the built-in CC Particle World effect, its birth rate and velocity tuned so the particles drift gently upward rather than spraying like a firework.
She uses an adjustment layer above the particle field to apply a fast blur and a slight tint, softening the particles so they read as atmospheric haze rather than sharp dots. The percentage-based guides introduced in version 26.5 let her pin the event name to a horizontal guide set at 10% from the bottom edge, guaranteeing consistent placement even if the stage crew runs the video on a display with a different aspect ratio. She tests the placement by changing the composition size to a wider 21:9 canvas and confirms the text holds its relative position without manual adjustment.
During the final review, the client asks for the background colour to shift from a deep navy to a warm teal over the loop. She drops a Fill effect onto a solid-colour layer and keyframes the colour property at the start and end of the timeline. The loop is rendered as a QuickTime file with alpha channel transparency enabled, making it trivial for the AV team to layer lower-thirds and live camera feeds behind it. A day later, the same project file is reopened, the event name text edited, and the loop delivered for the next city on the tour — a workflow that took ten minutes instead of starting from scratch.
Version 26.5 introduces a reworked guide system alongside performance caching improvements.
- Guides now support percentage-based positioning, edge pinning, and custom colours, with improved editing controls for faster layout work.
- Object Matte results can be cached to disk, preserving rotoscoping progress between sessions.
- A batch of smaller fixes rides along with the headline changes.
- macOS 14 Sonoma or later
- 16 GB RAM
- 8 GB available disk space for installation
- 1440x900 display
- Supports Intel and Apple Silicon Macs
Questions I keep hearing
What is After Effects actually used for?
It is used for video compositing, motion graphics design, and animation — everything from animated text and logo reveals to removing objects from footage and stabilising shaky video.
Questions from the class 0
Sign in or join the class to ask a question.
Nobody has asked anything yet. If you have used it on a real job, say what the file did.
Also on the Adobe shelf
The whole Adobe shelf Adobe Animate
Creates vector animation for games, apps and web banners.
Adobe Animate
Creates vector animation for games, apps and web banners.
 Adobe Audition
Cleans and polishes audio with spectral editing and noise reduction.
Adobe Audition
Cleans and polishes audio with spectral editing and noise reduction.
 Adobe Bridge
Browses, previews and organises your Adobe project files in one place.
Adobe Bridge
Browses, previews and organises your Adobe project files in one place.
 Adobe Dimension
Stages product shots and packaging in photorealistic 3D scenes.
Adobe Dimension
Stages product shots and packaging in photorealistic 3D scenes.
 Adobe Dreamweaver
Lets you code and visually edit web pages side by side.
Adobe Dreamweaver
Lets you code and visually edit web pages side by side.
 Adobe Illustrator
Builds logos and artwork that stay sharp at any size.
Adobe Illustrator
Builds logos and artwork that stay sharp at any size.
 Adobe InCopy
Lets writers edit text while a designer lays out the same document.
Adobe InCopy
Lets writers edit text while a designer lays out the same document.
 Adobe InDesign
Assembles long documents into print-ready pages and layouts.
Adobe InDesign
Assembles long documents into print-ready pages and layouts.