 ASPNetWorld

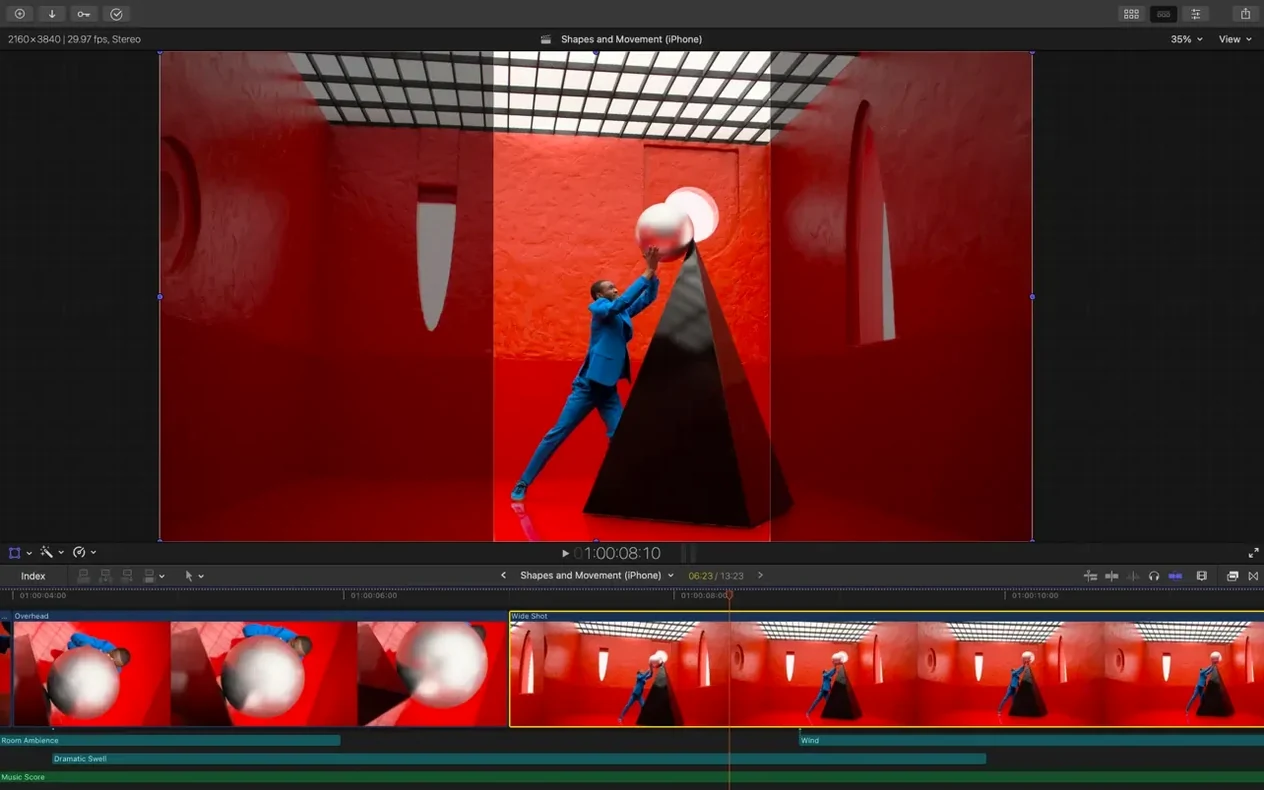
Object Tracker is the feature that quietly saves an afternoon. You select a face or a moving car, attach a title or a blur, click analyse, and the tracker follows it through the frame without keyframing a single motion path. It is one of those tools that makes a complex job feel like a checkbox.
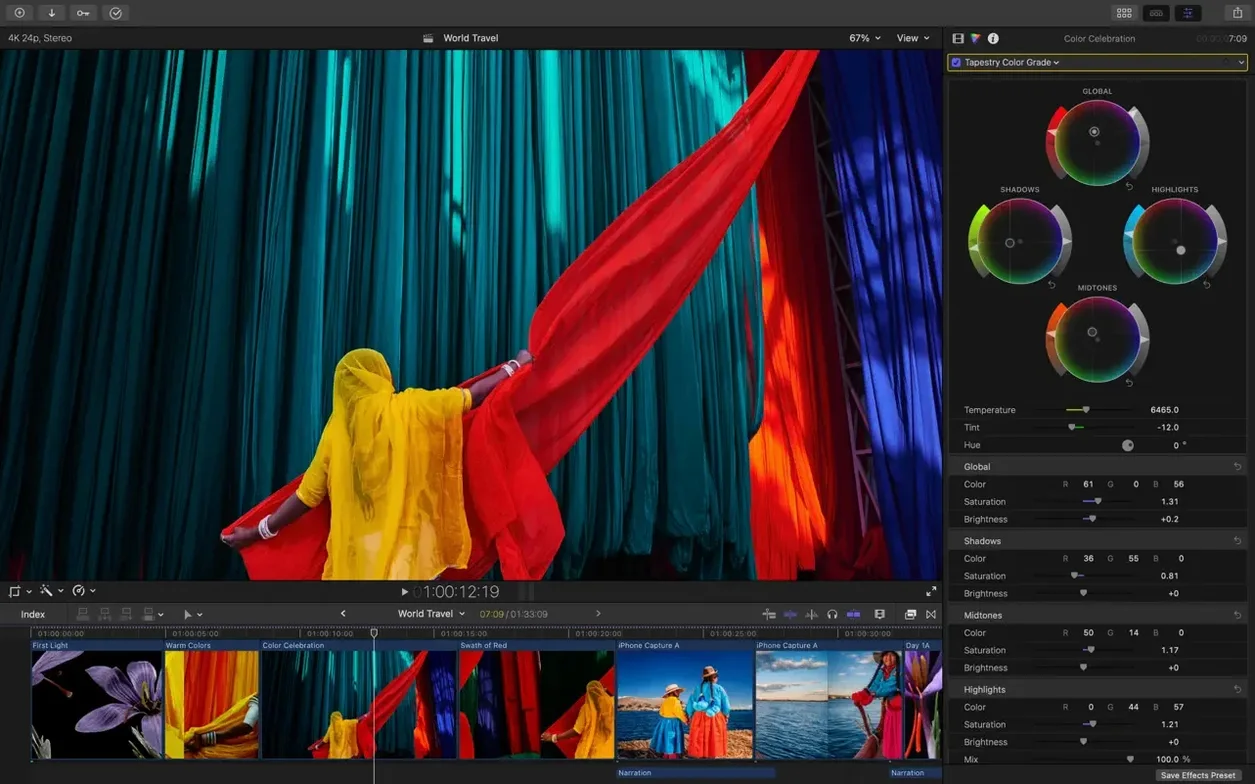
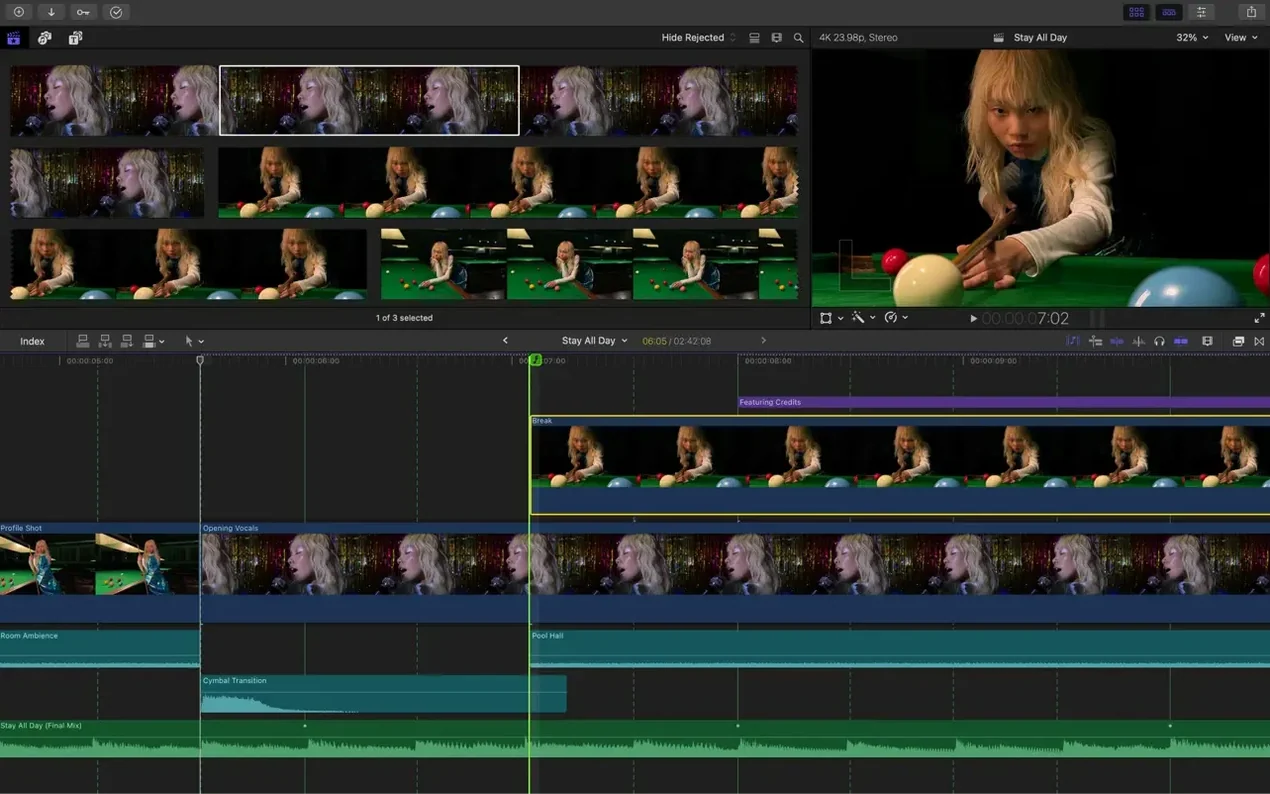
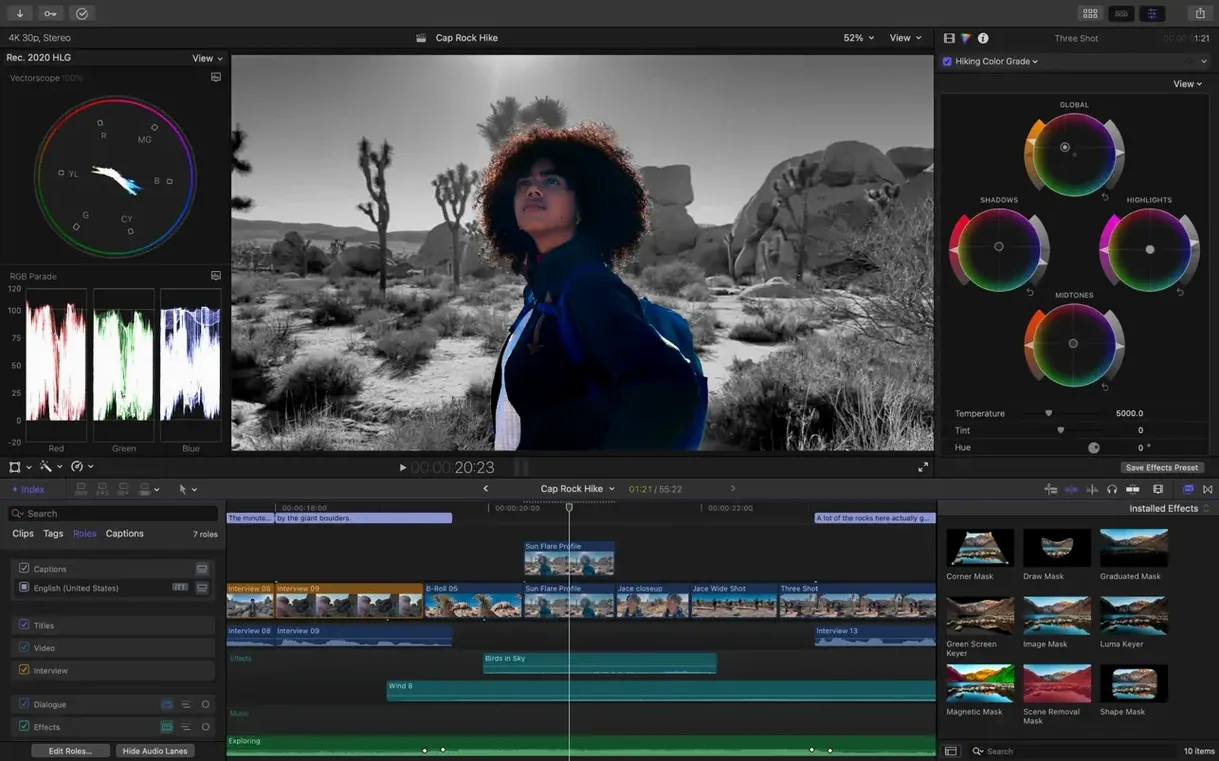
Final Cut Pro is Apple's professional video editor, built around a magnetic timeline that keeps clips from colliding. It works natively with a broad spread of formats — ProRes, RED, XAVC, AVCHD, Avid DNxHR, H.264 and HEVC all play without transcoding. The colour tools cover standard colour spaces, Rec. 2020 and HLG, so grading for HDR delivery is part of the same timeline, not a separate round-trip.
Good for
- Editors who juggle multi-camera shoots — waveform-based sync lines up clips by their audio fingerprint in seconds.
- Productions that need to deliver in multiple aspect ratios — Smart Conform can reframe a 16:9 project into a square or vertical cut automatically.
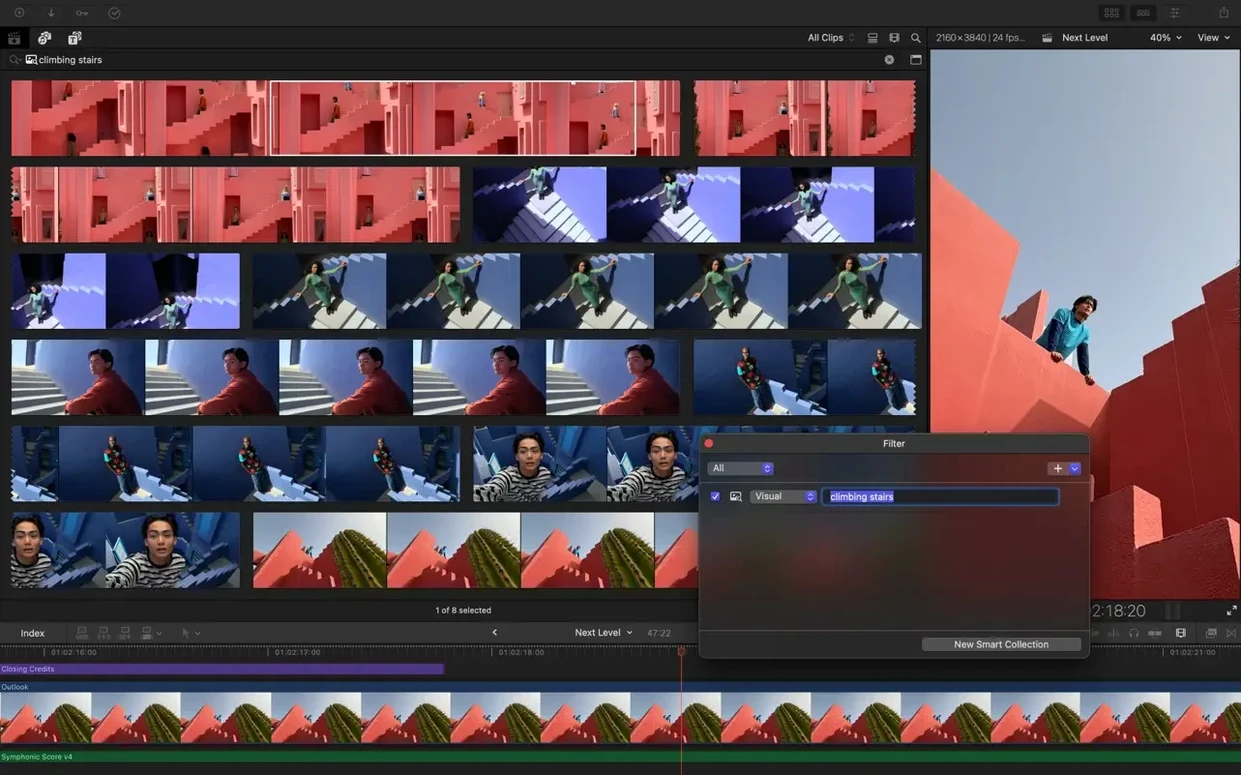
- Anyone building a searchable media library — custom keywords can be assigned to clip ranges, not just whole files, and Smart Collections update as new material arrives.
Keep in mind
- Needs macOS 15.6 or later, 8 GB of RAM, and a Metal-capable graphics card on Intel machines.
- Some features, including certain machine-learning tasks, require an Apple silicon Mac and an internet connection.
Incoming footage from two cameras hits the timeline in 90 seconds
Imagine you have just come back from a two-camera interview shoot. The footage is sitting on an external SSD, a mix of 4K ProRes from the A-cam and 10-bit H.264 from the B-cam. You open Final Cut Pro, create a new library on the SSD, and set the storage location so media stays on the drive rather than filling your internal disk. A small checkbox at the bottom of the library properties pane — Copy to library storage location — is worth unchecking if you want to keep files where they are.
You drag the card folder straight into the browser. The import window opens; you tick Create proxy media because the MacBook Air on the kitchen table will thank you later, then let the files roll in. While proxies generate in the background, you skim through clips with the J-K-L keys — J to shuttle backwards, L forwards, K to pause. Tapping L twice speeds playback up, holding K and tapping L nudges a frame at a time. Four minutes in, you have marked favourites on both angles with the F key and added a few keyword ranges by selecting a span and pressing Cmd-K.
The multicam clip takes thirty seconds. You highlight both camera angles in the browser, right-click, choose New Multicam Clip, and leave the sync option on Use audio for synchronization. Final Cut Pro reads the scratchy guide-track waveforms, lines the clips up, and hands you a single compound clip with an angle viewer. You drop it onto the timeline, press Shift-Cmd-7 to open the angle viewer, and cut live by clicking between angles as the playhead moves. It feels like switching cameras in a gallery.
After a rough cut, you notice the B-cam white balance skews warm. Select the clip, open the inspector, find the Match Color button — new in 12.3 — and click the frame of the A-cam you want to match. The correction lands close enough that you only tweak a quarter-stop of exposure. Next, you add lower-thirds. One of them needs to follow a speaker who leans side to side. You open the inspector's Tracker tab, drag a tracker region over her face, click Analyze, and the text glides with her. No keyframes touched.
Finally, you need captions. The Generate Captions command under the Edit menu transcribes the timeline audio and drops a caption track onto the project. You scrub through, correct three words the transcription garbled, adjust the font to match your lower-third style, and export an SRT sidecar alongside the master file. The whole session — import to captioned export — runs under two hours, and a surprising amount of that time is spent simply watching the material.
The spinning beach ball returns every time you open a library
Every editor hits a wall at some point. Here are the walls that appear most often and what to do about them.
Media going offline after moving a library
This happens when files are stored outside the library bundle and the link breaks. The fix is almost always in the Relink Files command. Select the offline clips in the browser, go to File > Relink Files, point to the new folder, and let it search. If you have moved the media to a differently named drive, click Locate All rather than picking files individually. A habit that prevents the problem outright: before moving anything, consolidate the library using File > Consolidate Library Media, which copies referenced files into the bundle.
Proxy files taking far longer than expected
Final Cut Pro generates proxies in the background, but it respects system resources. If you have half a dozen apps open and a timeline playing, the proxy task throttles back. The quickest way to speed it up is to close the project, quit anything that does not need to be running, and let the Mac sit. You can check progress in the Background Tasks window (Cmd-9). A second snag: the default proxy format is ProRes Proxy, which is light but still heavy for 8K RED footage. You can switch to H.264 proxies in the import settings or in the library inspector under Transcode, and that halves the file size again.
Magnetic Timeline fighting your edit
The magnetic timeline prevents clip collisions by sucking everything together, which is brilliant until you need to leave a deliberate gap. Press P to switch to the Position tool, and clips stay where you put them. Press A to return to the standard Select tool when you want magnetism back. If the timeline keeps pushing connected clips downstream when you ripple-delete, check that the connected clip has its anchor point set to the right primary clip. Hold Cmd-Option and click a connected clip to see where the little grey anchor dot sits.
Captions not appearing on export
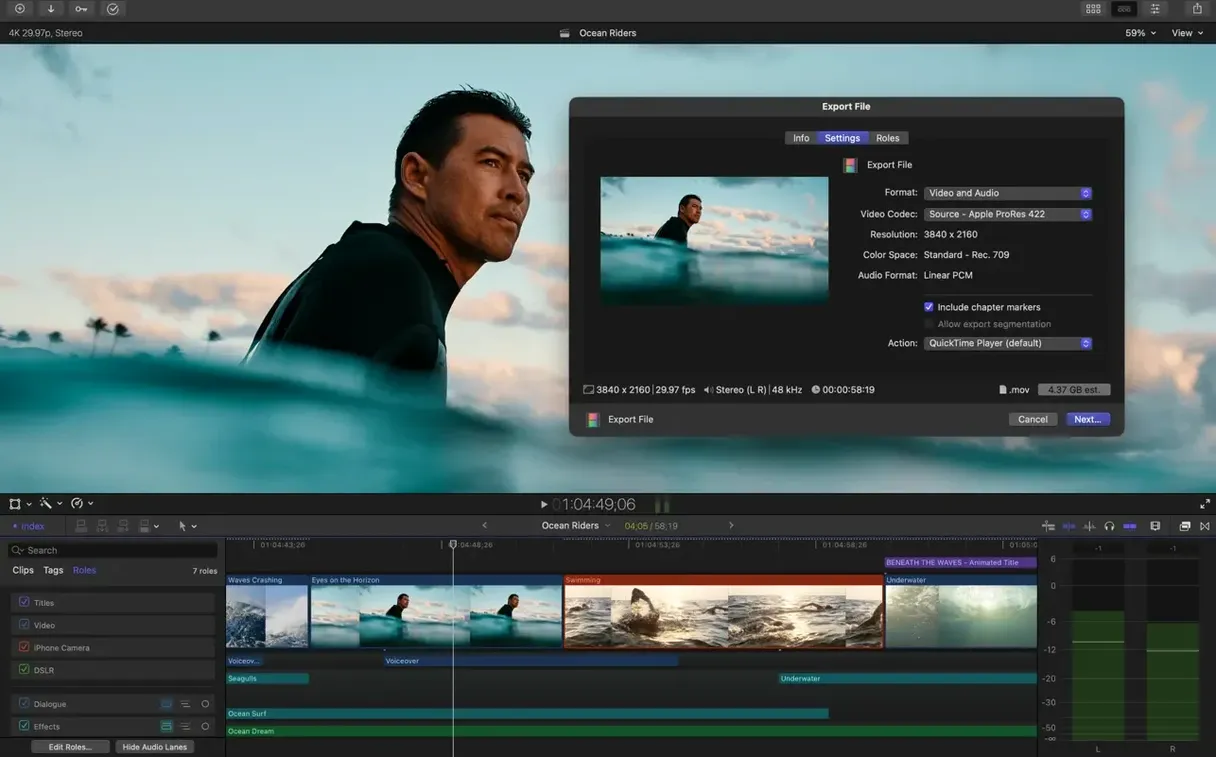
With the 12.3 Generate Captions feature, the caption track sits in the timeline just like any other role. If you export a master file and the captions are missing, open the export window and check the Roles tab. The captions role needs its checkbox ticked and the format set correctly — Embed in output file for burned-in subtitles, or Export as separate file for an SRT. A surprisingly common oversight is having the caption track muted. Look for the small role colour indicator on the left of the timeline; if the captions role is dimmed, click it to toggle it back on.
Performance stuttering on Intel machines
Some of the 12.3 additions — Auto Mask, the machine-learning parts of Object Tracker — lean on the Neural Engine in Apple silicon. On an Intel Mac with a Metal-capable GPU, those features still run, but they fall back to the GPU compute path, which is slower and can cause timeline stutter. The best workaround is to render the affected section with Cmd-R before playback. The render file sits in the library and smooths everything out. Also check that Better Quality is selected in the viewer options, not Better Performance, when you need to judge the final look.
Turn off background rendering before it drains your laptop battery
Final Cut Pro ships with sensible defaults, but a few preferences are worth adjusting before you cut a single frame. Open Preferences with Cmd-comma and head to the Playback tab first. Untick Background render if you work on a laptop and want to save battery, or leave it on and set the delay to 30 seconds if you prefer renders to happen between thoughts. Either way, tick Create optimized media for multicam clips — it adds a transcode step but makes switching angles feel instant.
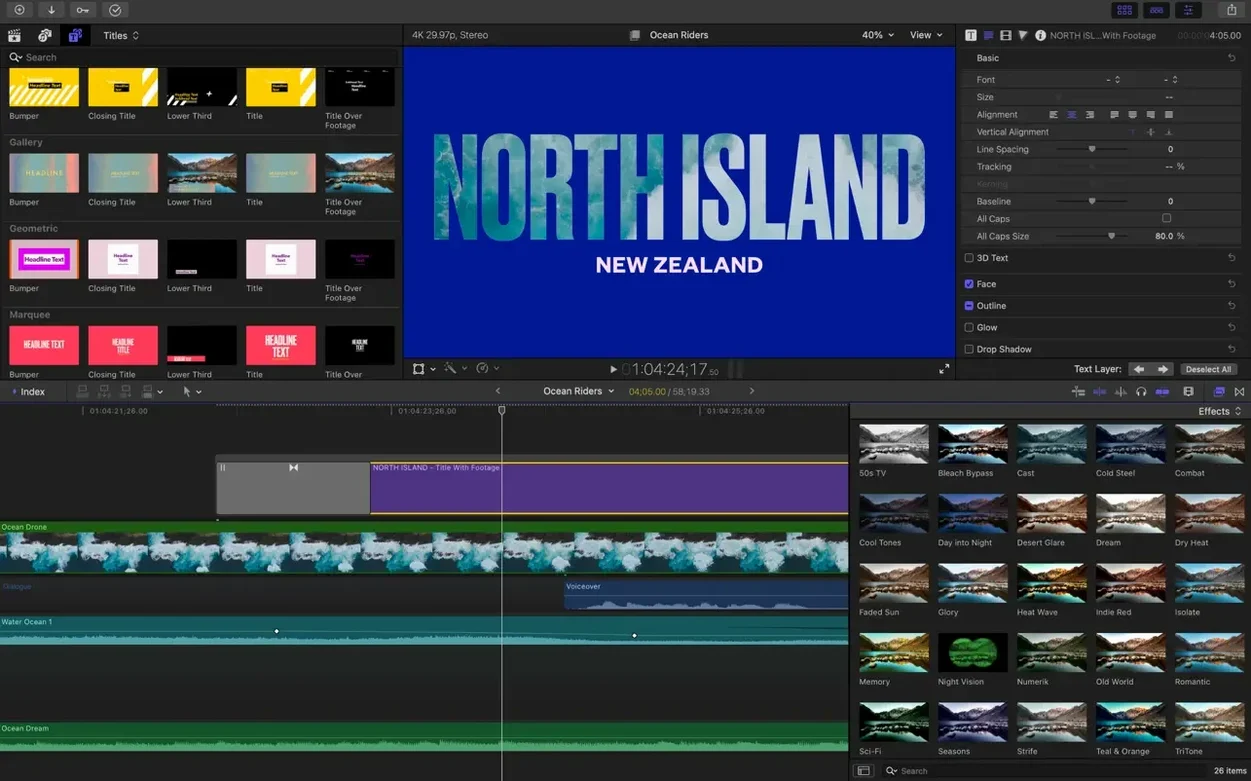
In the Editing tab, switch Auditions to Show in browser rather than the default popover if you find the floating window distracting. The same tab holds the Still image duration — drop it from 4 seconds to something shorter if you work with photo slideshows. A hidden gem here: Trim start and stop defaults to one frame, but bumping it to two frames makes rolling trims feel less twitchy with a trackpad.
Under Import, the Keywords section lets you tick From folders. If you organise your shoot by folder name — interviews, b-roll, aerials — this setting turns every folder name into a keyword applied automatically as clips come in. It costs nothing and builds a searchable structure before you have even watched the rushes.
Finally, open the Destinations pane (the tab next to General in the export preferences, or found via the share menu). Add a preset for ProRes 422 HQ if you send files to a colourist, and another for H.264 at a fixed bitrate for client review uploads. Once saved, those appear in the share menu with a single shortcut each.
Give every client their own library on a fast external drive
New editors often treat the library like a single bucket. It works, but it gets messy fast. Create a separate library for each project, or at least each client, and store it on a fast external drive formatted as APFS. Inside the library, use events like folders: one for dailies, one for selects, one for music and graphics. The Smart Collection feature earns its keep here — set one to gather all clips with the keyword pickup or all clips rated as favourites, and it updates as you tag more material through the edit.
A ritual that pays off: before cutting, spend ten minutes skimming every clip and hitting F on usable takes. The favourites filter (Cmd-F, then choose Favorites from the dropdown) strips the browser down to only marked sections, so you are never hunting through unusable footage again. Combine that with keyword ranges — select a portion of a clip, press Cmd-K, type a word — and you can find the two-second reaction shot from the B-cam in February that you only half-remember.
Get comfortable with roles early. Every clip has an audio and video role — dialogue, music, effects, titles — and assigning them properly in the inspector means you can export a dialogue-only stem or a music-and-effects mix without touching the timeline. The Edit Roles button at the top of the timeline index lets you create custom roles and colour-code them. A colour stripe down the left edge of each timeline lane makes complex projects readable at a glance.
If you collaborate, export an XML copy at the end of every session. File > Export XML stores a snapshot of the project that can be opened in DaVinci Resolve for colour grading or sent to a sound mixer. It is tiny, it saves arguments, and it has bailed out more edits than anyone cares to admit.
Hold the tilde key to slip a clip past the magnetic timeline
Every application has shortcuts and affordances that are never explained, and Final Cut Pro keeps a few of its best ones tucked away.
- Hold the Tilde key (~) while dragging a clip in the timeline, and you override the magnetic behaviour for that single move. It is the Position tool, without switching tools.
- Double-click a title in the viewer to edit the text directly on screen rather than in the inspector. It sounds trivial, but it changes the rhythm of laying out lower-thirds.
- The Solo button in the timeline index (the little headphone icon next to a role) isolates that role's audio. Click it to hear only dialogue, for instance, then click again to restore the full mix.
- Press Shift-Z to fit the entire timeline into the window. After zooming deep into a four-frame trim, this shortcut brings you back to the big picture in one keystroke.
- In the browser, Cmd-Option-F opens the filter search bar with the cursor ready. Type a format — ProRes or 30fps — and the browser instantly filters without building a Smart Collection first.
- The Comparison Viewer (Cmd-Option-7) shows a side-by-side view of the current frame and the playhead frame. It is built for matching colour between shots, but it is just as useful for checking continuity of an actor's hand position across two takes.
- Blade trim: select a blade point between two clips and press Shift-Delete to ripple-delete the gap in one move rather than three.
- Hold down Cmd while dragging a volume keyframe in the timeline to adjust it in finer increments.
Version 12.3 adds a handful of genuinely practical tools. Generate Captions builds subtitles on the timeline with control over typeface and placement. Auto Mask isolates a recognised object — a person, a car — so you can grade or sharpen it independently. Match Color balances shots across different cameras with a single click, and Edit Detection scans a rendered file and splits it back into separate clips for re-editing.
- macOS 15.6 or later
- 8 GB RAM minimum
- 5.8 GB of available disk space
- Metal-capable graphics card (Intel Macs)
- Some features require an Apple silicon Mac
- Some features require an internet connection
Questions I keep hearing
Can Final Cut Pro generate subtitles automatically?
Yes, version 12.3 introduced Generate Captions, which creates subtitles with customizable appearance directly on the timeline.
Does Final Cut Pro support third-party plugins?
It supports FxPlug extensions, so you can add third-party effects, transitions and workflow tools from a range of developers.
Can Final Cut Pro match colour between different cameras?
The Match Color feature, added in version 12.3, lets you balance shots from different cameras and lighting conditions with a single click.
Questions from the class 0
Sign in or join the class to ask a question.
Nobody has asked anything yet. If you have used it on a real job, say what the file did.
Also on the Mac Apps shelf
The whole Mac Apps shelf FileMaker Pro
Helps you build custom databases without writing all the code yourself.
FileMaker Pro
Helps you build custom databases without writing all the code yourself.
 Find Any File
Scans your disks directly to find files the Finder misses.
Find Any File
Scans your disks directly to find files the Finder misses.
 Flicker Free
Removes flicker and strobing from your video footage.
Flicker Free
Removes flicker and strobing from your video footage.
 Folder Preview Pro
Lets you peek inside folders without fully opening them.
Folder Preview Pro
Lets you peek inside folders without fully opening them.
 FontLab
Lets you design and refine your own typefaces.
FontLab
Lets you design and refine your own typefaces.
 ForkLift
Moves files between folders and servers in a dual-pane view.
ForkLift
Moves files between folders and servers in a dual-pane view.
 FotoMagico
Builds timed slideshows that feel more like short films.
FotoMagico
Builds timed slideshows that feel more like short films.
 Exposure X7
Lets you brush photo adjustments onto selected areas without baking them in.
Exposure X7
Lets you brush photo adjustments onto selected areas without baking them in.