 ASPNetWorld

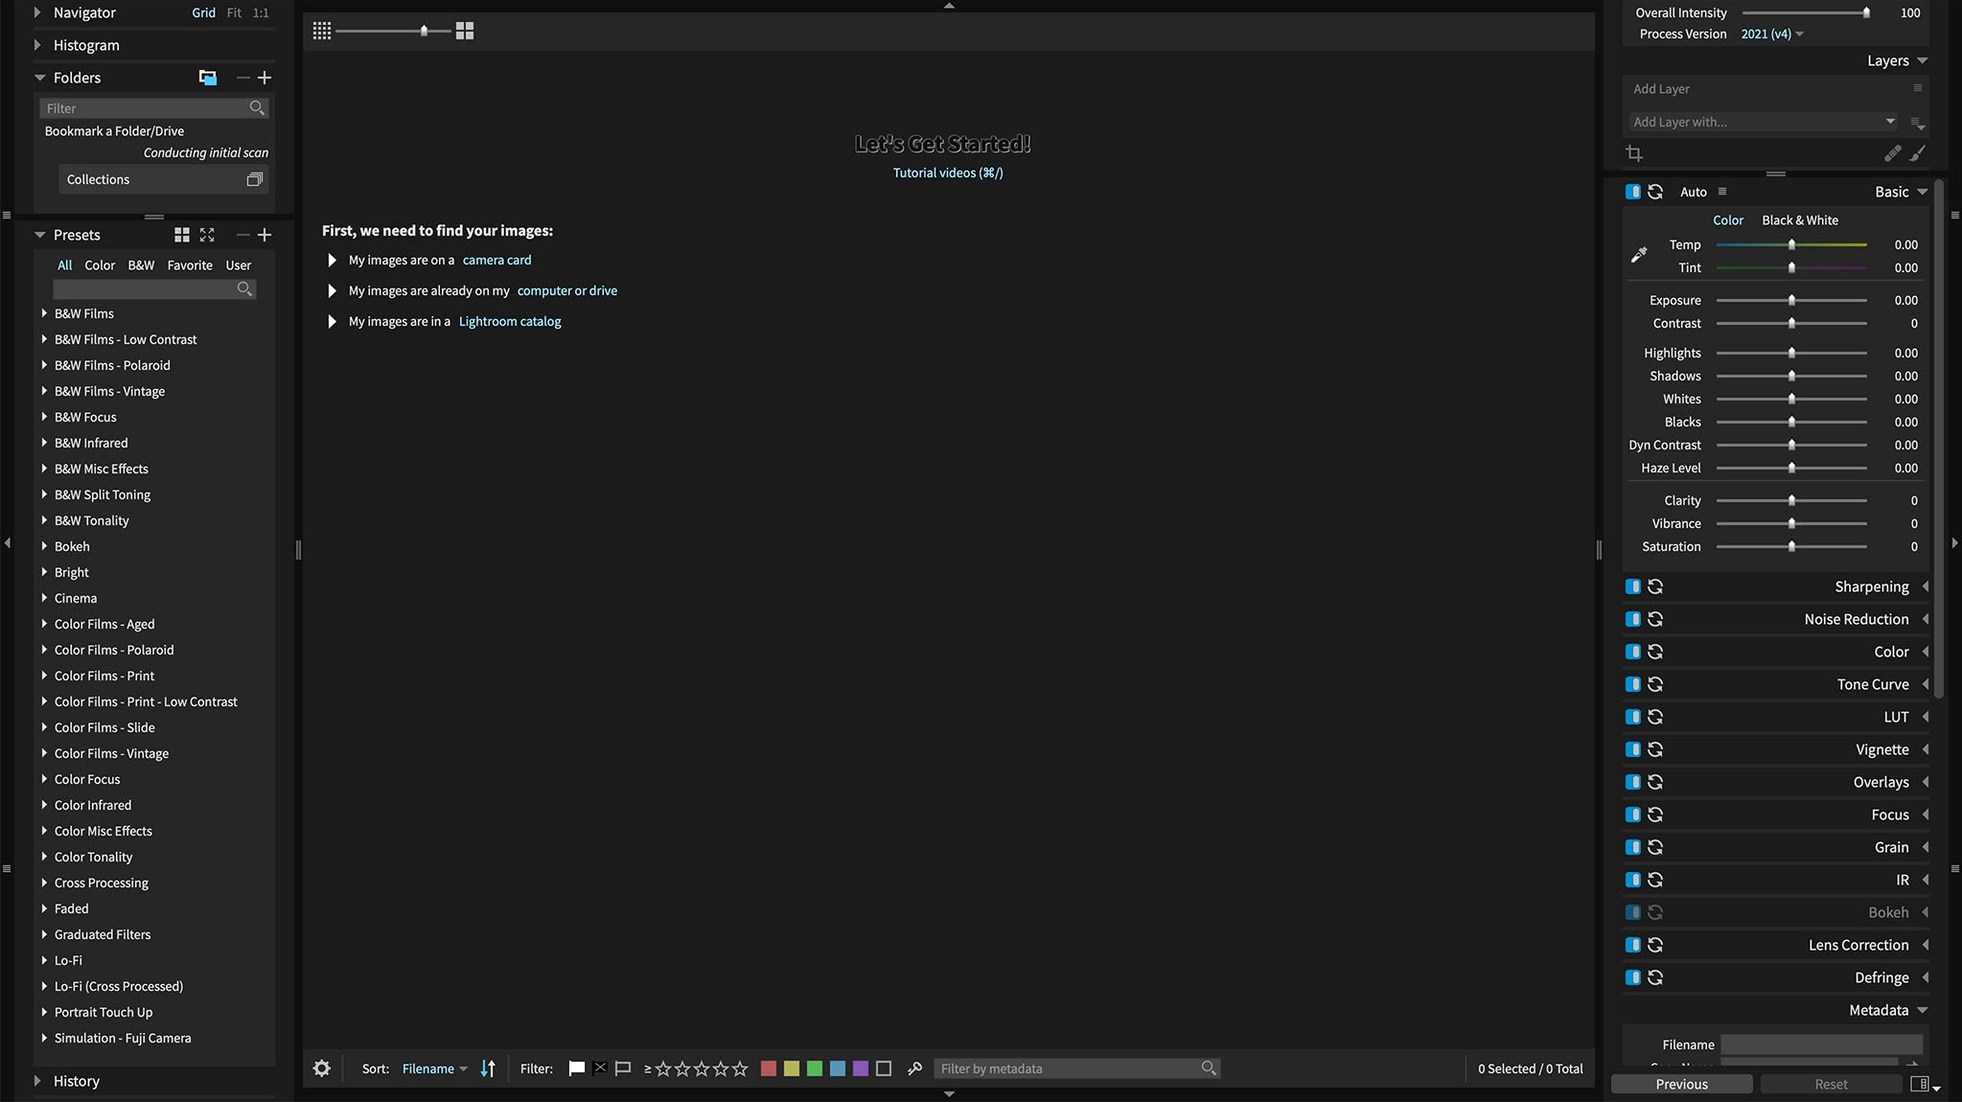
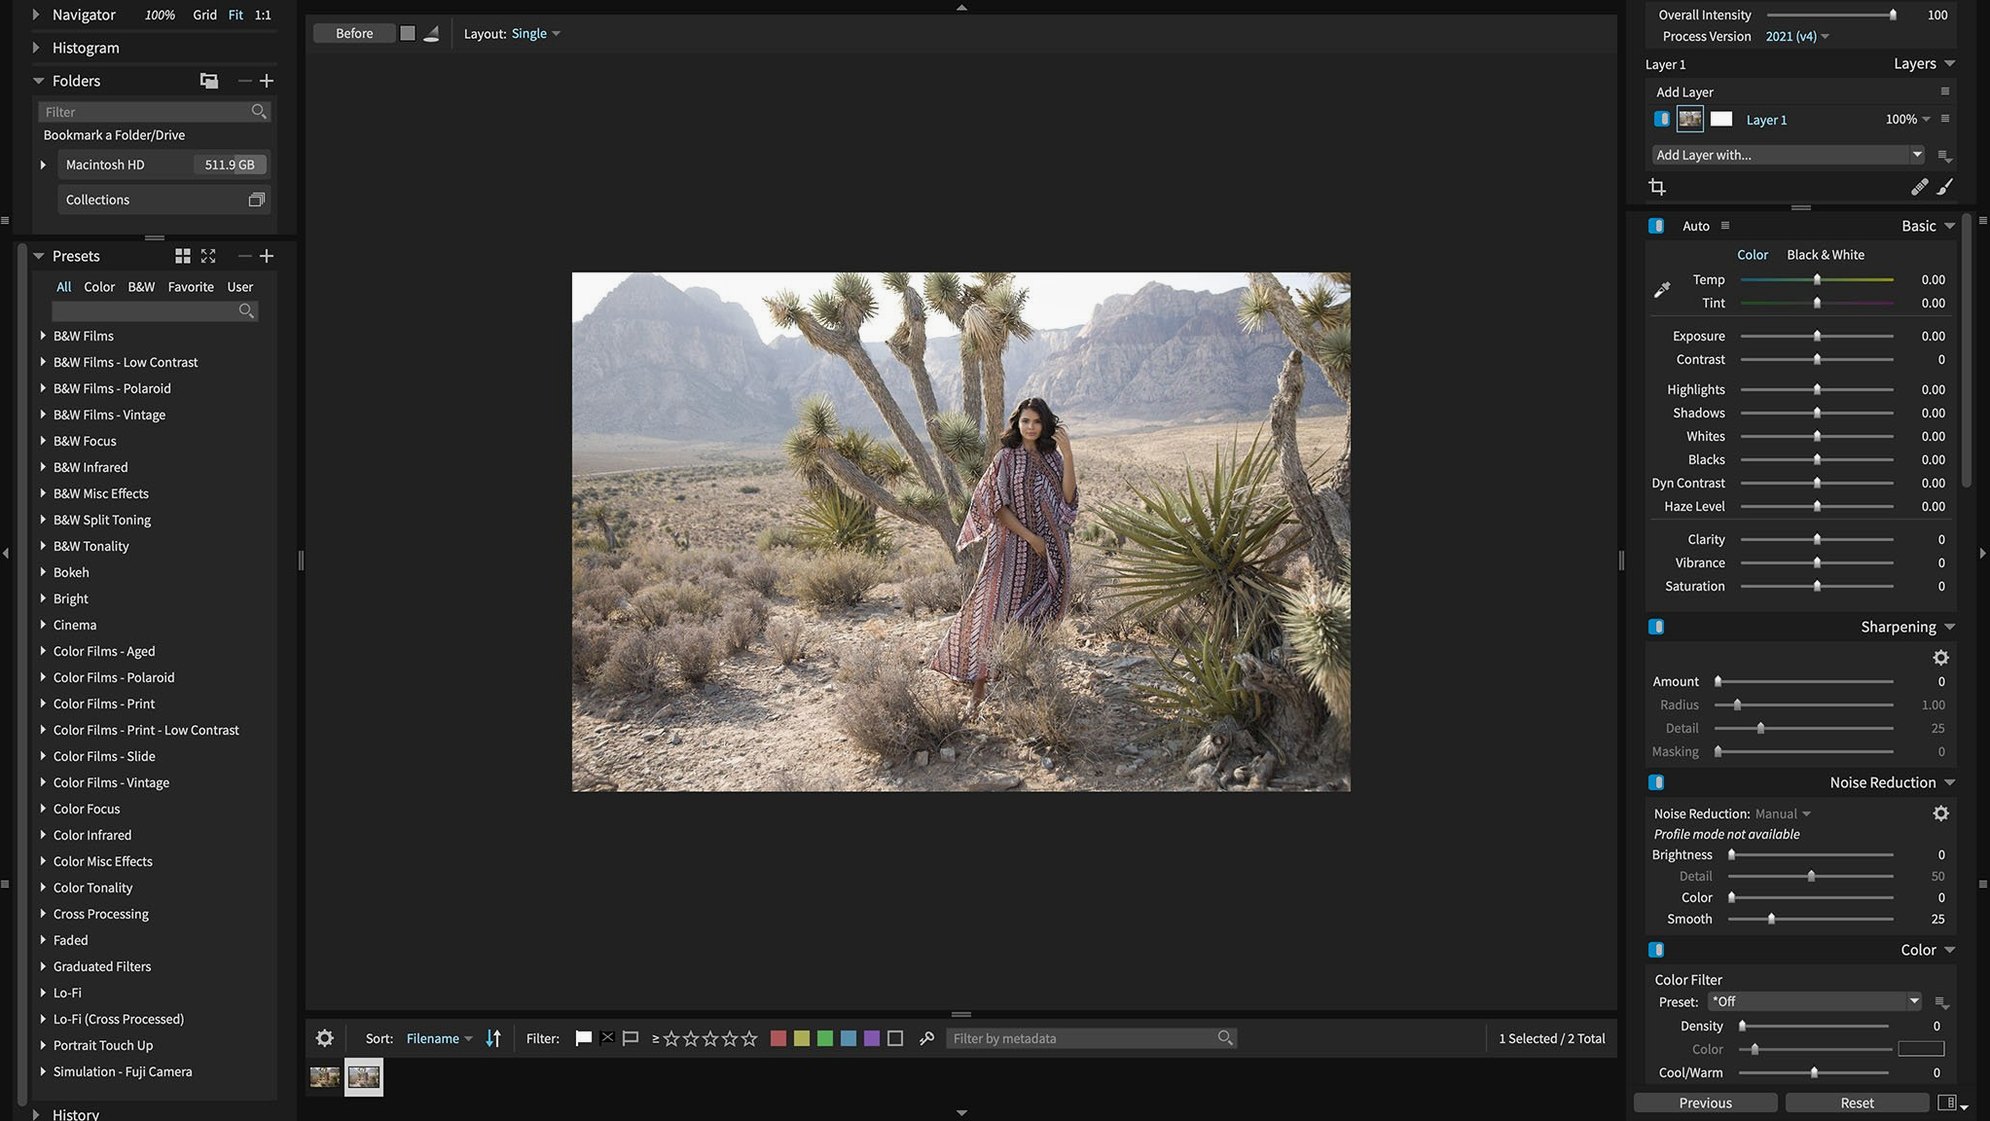
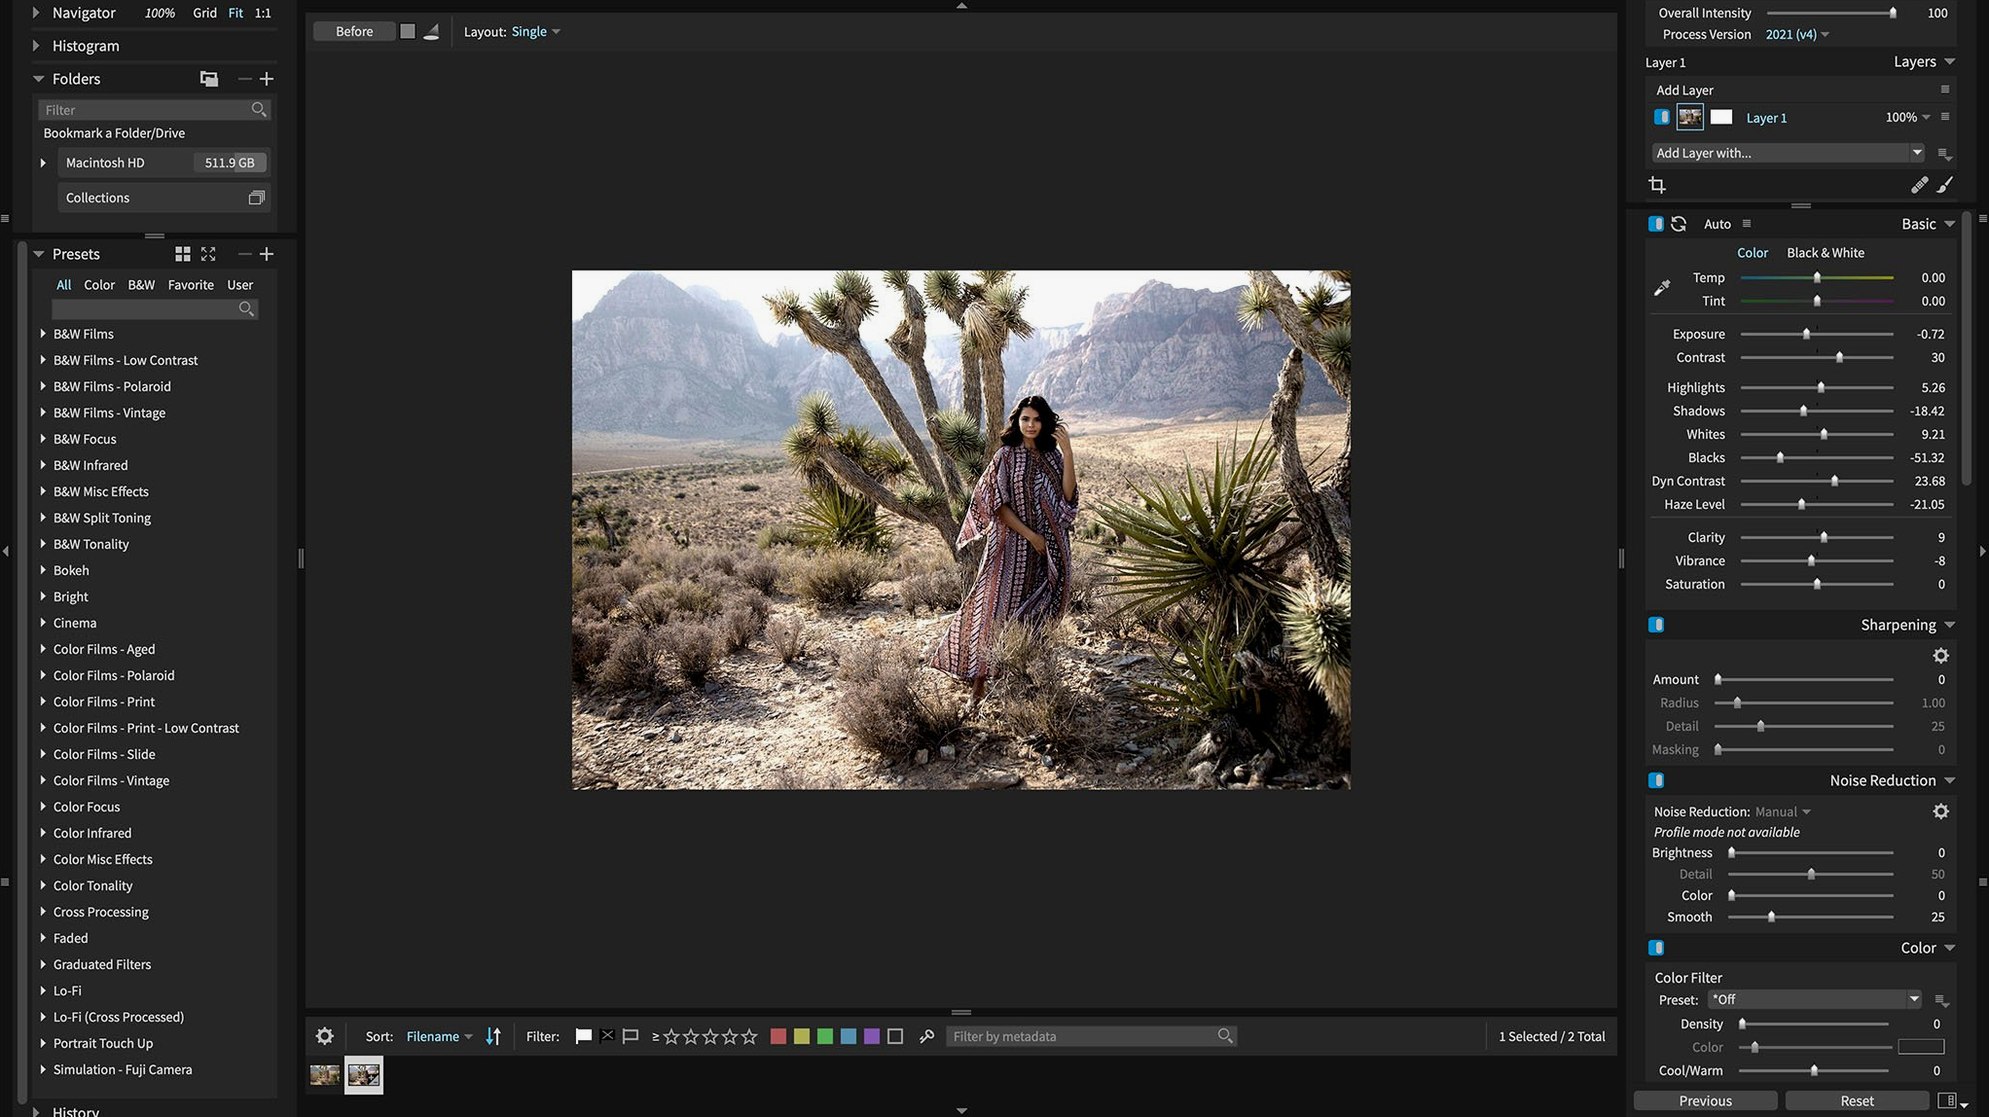
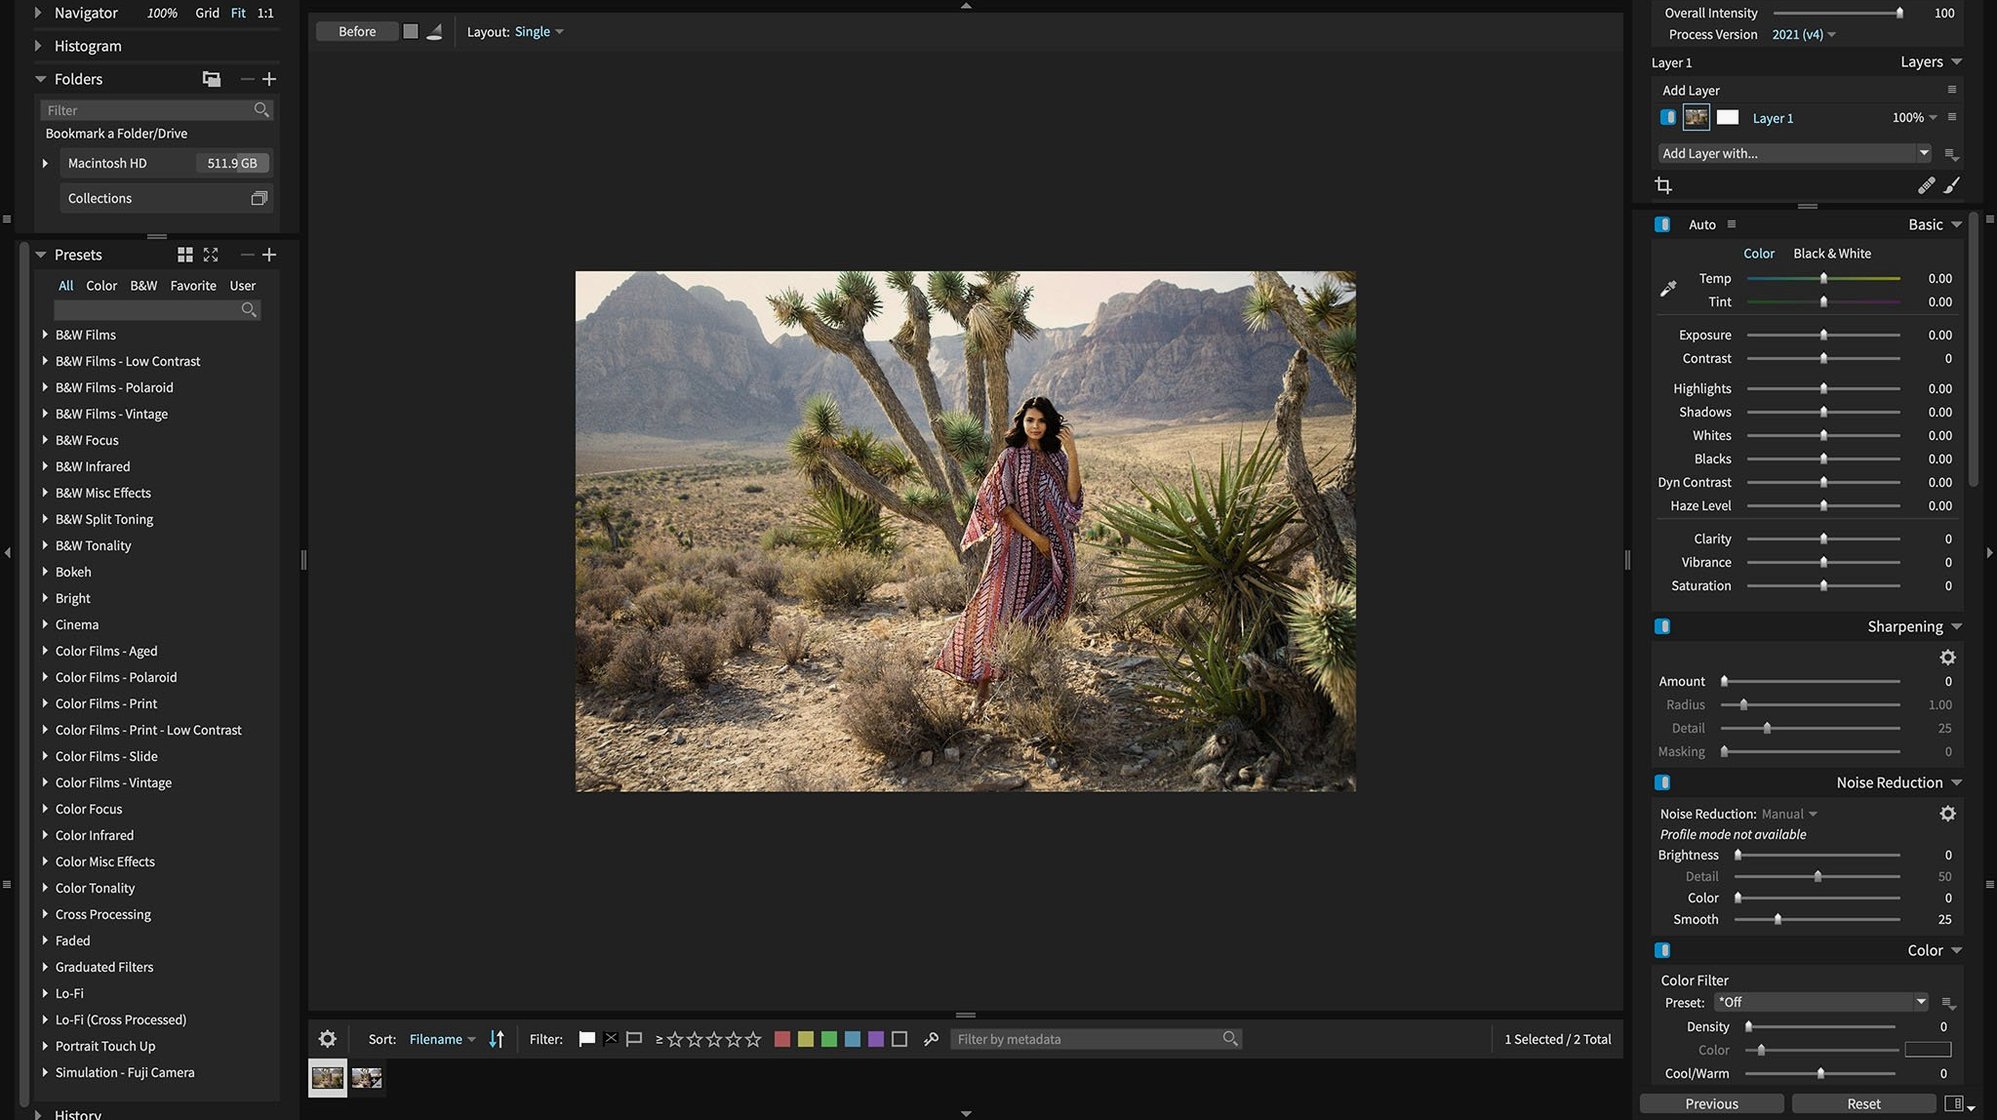
The masking brush in Exposure X7 feels like the moment a mix engineer finds the exact EQ cut that makes a track breathe. You can paint an adjustment onto a specific area of a photograph, then go back three hours later and shift the feathering or opacity without having baked anything in. That non-destructive ethos runs through the whole application: layers, crops, spot-healing, even the one-click automatic adjustments all live as editable instructions rather than permanent changes.
- Non-destructive RAW engine — push exposure, shadows and colour temperature on a RAW file, close the project, and reopen it six months later with every edit still floating and tweakable.
- Layers with blend modes — stack local adjustments or entire preset looks, then dial back the opacity of a layer to control how much of that contrast punch hits the final image.
- Plug-in mode for Photoshop and Lightroom — send a layered TIFF or a RAW file across, apply Exposure’s grain engine or film emulation, and return it neatly to your host library.
- GPU-accelerated processing — brush strokes track without lag on high-resolution monitors, and export times stay sensible even with a stack of adjustment layers.
- One-click automatic adjustment — useful as a starting-point suggestion rather than a finished look; pull it back with the strength slider if the algorithm got overenthusiastic with the highlights.
- HEIC and expanded camera support — version 7.3 reads HEIC files from current iPhones and adds raw decoding for the Panasonic Lumix S5 IIX, G95D and Sony RX100M7.
You can treat Exposure X7 as the only app you open for a shoot, or as a plug-in that handles the heavy-lifting on tonal work while your main cataloguer keeps track of the files. Either way, the edit decisions stay liquid, and that is rare enough to be worth noticing.
The real choice between this, Capture One, and DxO PhotoLab
People hunting for an exposure x7 free download are often weighing it against Capture One, DxO PhotoLab or the default Raw engine built into Apple Photos. The differences are not about which one is "better" — they are about which one fits the way your hands already work.
Against Capture One, Exposure X7 occupies a narrower lane and owns it. Capture One is a full digital asset manager with tethering, live view and a famously steep learning curve for its colour tools. Exposure leaves the tethering out and concentrates on the editing and organising you do after the shoot. Its colour grading feels more analogue out of the box: the film grain presets are genuinely modelled on specific emulsions, not just a generic noise overlay. If you already have a Lightroom catalog you love, dropping Exposure in as a plug-in gives you those film-stock textures without abandoning your library. Capture One wants you to move in permanently.
DxO PhotoLab shares Exposure’s pixel‑level obsession but expresses it differently. PhotoLab’s signature is lens‑specific optical corrections and its DeepPRIME noise reduction, which can rescue a severely underexposed RAW frame. Exposure X7 does not chase the same computational‑photography crown; its masking engine and layering feel more fluid for local adjustments. Where PhotoLab gives you a single‑image powerhouse, Exposure gives you a workflow that can hold fifty layered edits across a session without ever flattening anything. Both support Photoshop and Lightroom plug‑in workflows, so you can cherry‑pick each one’s party trick.
Compared with Apple Photos’ built‑in editor, Exposure X7 is a different species. Apple’s tools are clean and responsive, but they edit destructively once you move to a different app. Exposure preserves every slider position, every brush stroke and every layer blend mode inside its own project file, which is why photographers who grew up burning and dodging in the darkroom often feel more at home here.
First days with Exposure X7 — where to point your attention
After you complete the exposure x7 download and the brief Gatekeeper dance, the application opens to a clean three‑panel layout: folders on the left, image browser across the bottom and the editing tools on the right. Resist the urge to jump straight into the presets panel. Spend your first afternoon with a single RAW file you know well — perhaps a portrait with mixed window light — and follow a short loop that teaches your hands the rhythm of the application.
- Bookmark the “Edit History” panel. It lives on the left side of the editing workspace and records every adjustment as a clickable step. Click any entry to jump back to that point without losing later work. That safety net encourages bold slider pushes early on, because you know you can always hop backwards.
- Duplicate a layer before heavy retouching. Right‑click the background layer and choose “Duplicate.” Paint out blemishes or stray hairs on the copy, then toggle the layer off and on to check whether you have over‑smoothed the skin. Keeping the original intact underneath costs nothing in disk space and saves the sinking feeling of having gone too far.
- Drag a preset onto a new adjustment layer. The 500‑plus presets are not just global Instagram filters. Drag one onto a fresh layer and immediately pull the layer opacity down to around 40%. Many of the film‑stock looks that appear heavy at full strength mellow into something subtle and printable when you back them off.
- Set up a watched folder. In the Folders panel, point Exposure at the directory where your camera or card‑reader drops its files. The application will show new imports without forcing you to click through a modal import dialogue every time, which mirrors the way a Lightroom user expects a session to behave.
Flip the GPU switch and two other preferences before your catalog grows
Exposure X7 ships with sensible defaults, but three preferences are worth changing while your photo collection is still small.
First, open the Performance tab and confirm that GPU acceleration is enabled and pointing at the right graphics hardware. On a Mac with dual GPUs, the automatic selection sometimes picks the integrated chip. Forcing the discrete GPU makes brush work on a 5K display feel properly immediate. Second, visit the Colour Management section and set your working colour space to ProPhoto RGB if you export to Lightroom or Photoshop for print; keep it at sRGB if your images mostly land on the web. Third, under File Handling, switch the sidecar XMP preference to “always write” — this writes edit metadata alongside your RAW files so that Lightroom can read basic exposure and white‑balance adjustments without opening Exposure at all.
The black-and-white preset crash is finally gone in 7.3.0
The shift to version 7.3.0 was not a dramatic interface overhaul, but it fixed three crashes that had been annoying working photographers for months. The black‑and‑white film preset crash had a habit of appearing when someone rapidly clicked through the Tri‑X and HP5 emulations; that is now gone. The Quick Export crash, triggered by reordering export presets, had forced people to rebuild their export list after every update — also fixed. On the RAW‑support side, Sony A7 IV users who shoot lossless compressed RAW can now open their files without magenta‑tinted corruption creeping into the shadows, and the HEIC pipeline means you can pull iPhone shots straight into the same edit workflow without converting them to JPEG first. None of these items show up in a feature‑comparison table, but together they make the difference between an app you recommend and one you warn people away from when they search for exposure x7 mac advice on forums.
Version 7.3.0 broadens the camera compatibility list and tidies up a handful of stability issues that users had flagged with certain raw formats and presets.
- Raw support added for the Panasonic Lumix G95D, Panasonic Lumix S5 IIX and Sony Cyber-shot DSC-RX100M7.
- HEIC photos from current iPhone models now open directly in the editor.
- Translations refreshed for Chinese, German, French and Japanese.
- Fixed corrupted rendering of Sony A7 IV lossless compressed raw files.
- Fixed a crash that could occur when applying black and white film presets.
- Fixed a crash when opening the Quick Export menu after reordering export presets.
- macOS 10.13 or newer
- Apple silicon or Intel 64-bit processor
- 8 GB RAM recommended for working with large RAW files
Questions I keep hearing
Can Exposure X7 run on an Apple silicon Mac?
Yes, version 7.3.0 runs natively on both Apple silicon and Intel 64-bit Macs, so you get the full GPU acceleration benefit on newer machines.
What versions of Photoshop does the plug-in work with?
The plug-in supports Adobe Photoshop CS6 and Adobe Photoshop CC 2015 or any newer release.
Does the software handle iPhone photos?
It does — Exposure X7 version 7.3.0 can open HEIC files from current iPhone models alongside its RAW editing toolset.
Questions from the class 0
Sign in or join the class to ask a question.
Nobody has asked anything yet. If you have used it on a real job, say what the file did.
Also on the Mac Apps shelf
The whole Mac Apps shelf Elmedia Player Pro
Plays almost any video or audio file format without needing extra codecs.
Elmedia Player Pro
Plays almost any video or audio file format without needing extra codecs.
 Element 3D
Imports true 3D models into After Effects so you can light and animate them on the timeline.
Element 3D
Imports true 3D models into After Effects so you can light and animate them on the timeline.
 DynamicLake Pro
Puts a slim pill-shaped panel near your Mac’s notch for music, calendar, and system toggles.
DynamicLake Pro
Puts a slim pill-shaped panel near your Mac’s notch for music, calendar, and system toggles.
 FileMaker Pro
Helps you build custom databases without writing all the code yourself.
FileMaker Pro
Helps you build custom databases without writing all the code yourself.
 Final Cut Pro
Tracks moving objects so titles and blurs follow them automatically.
Final Cut Pro
Tracks moving objects so titles and blurs follow them automatically.
 DxO ViewPoint
Corrects distorted perspective and volume deformation in wide-angle architectural shots.
DxO ViewPoint
Corrects distorted perspective and volume deformation in wide-angle architectural shots.
 Find Any File
Scans your disks directly to find files the Finder misses.
Find Any File
Scans your disks directly to find files the Finder misses.
 DxO PhotoLab
Processes raw photos with lens-specific corrections and local adjustment masks.
DxO PhotoLab
Processes raw photos with lens-specific corrections and local adjustment masks.