 ASPNetWorld

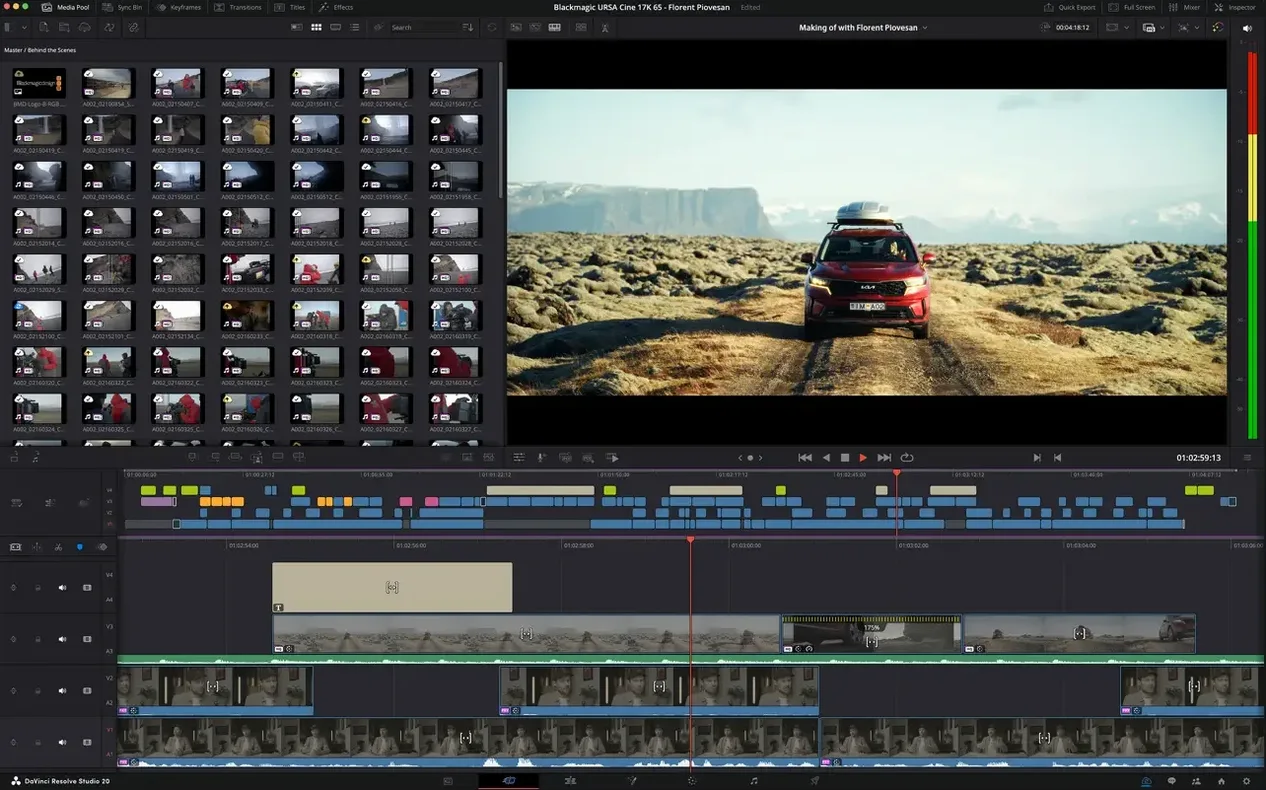
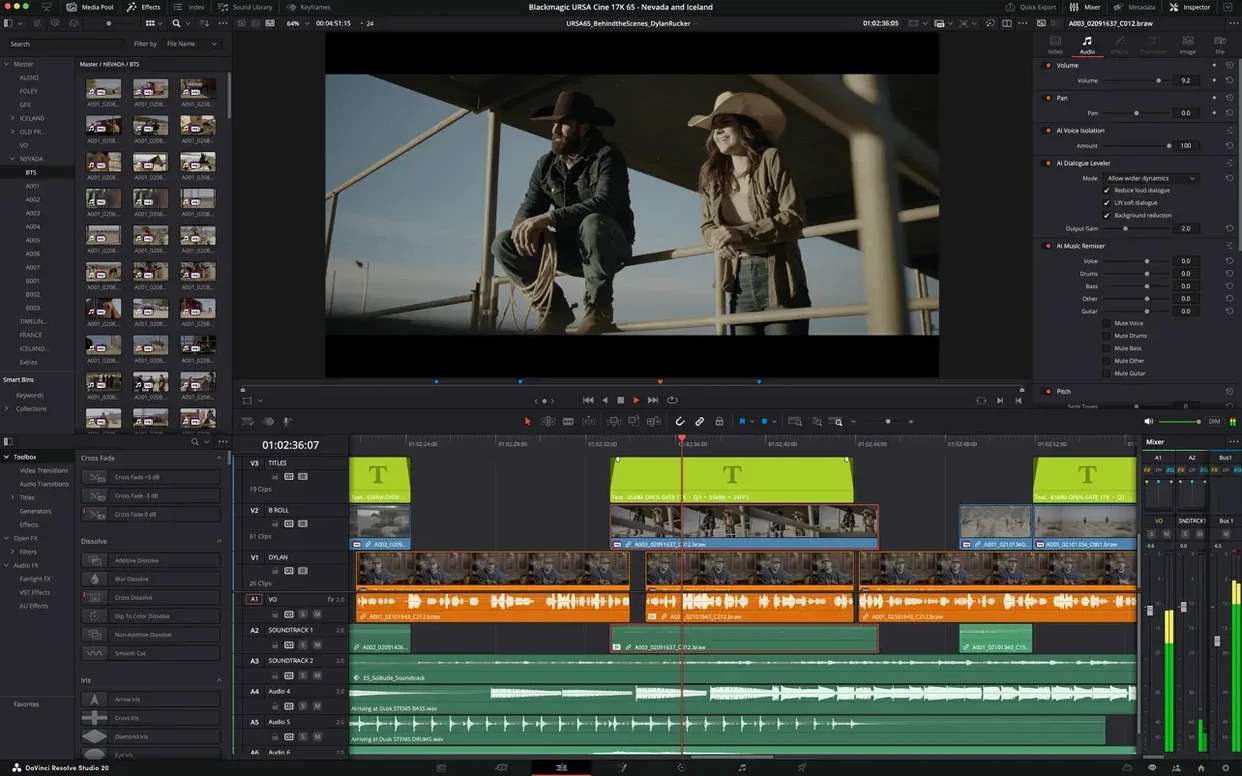
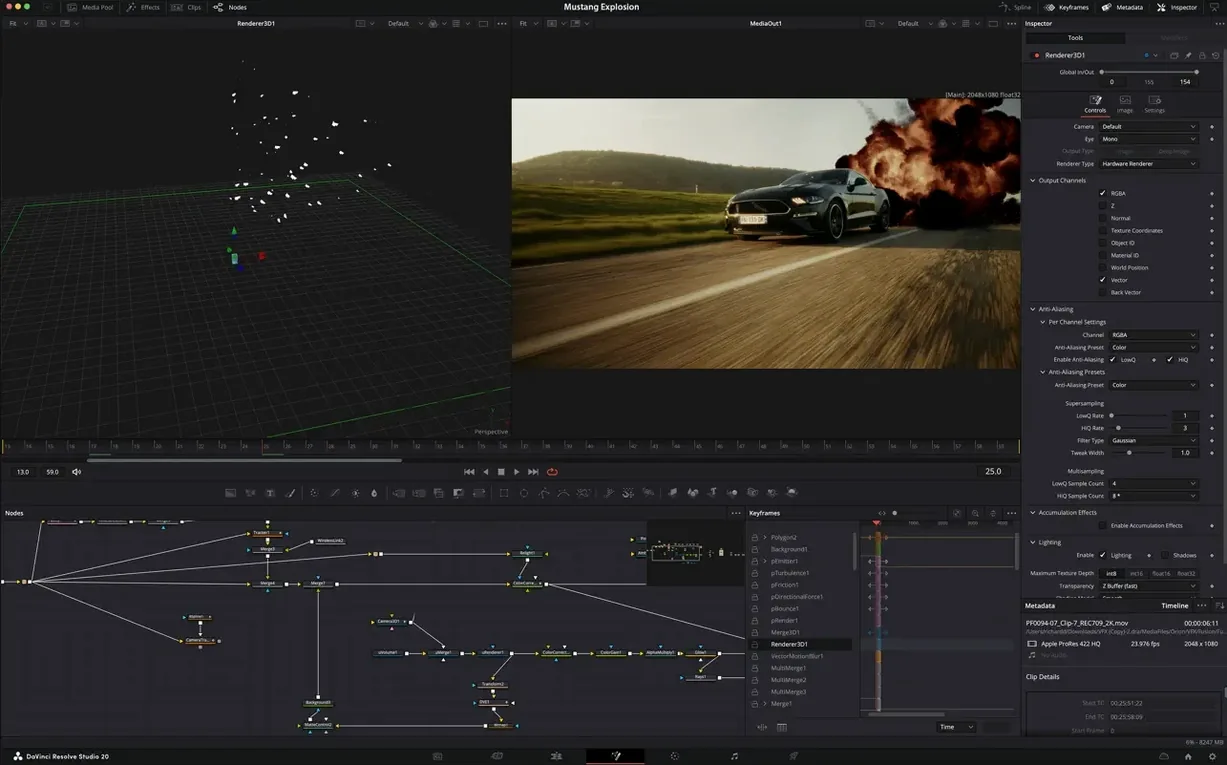
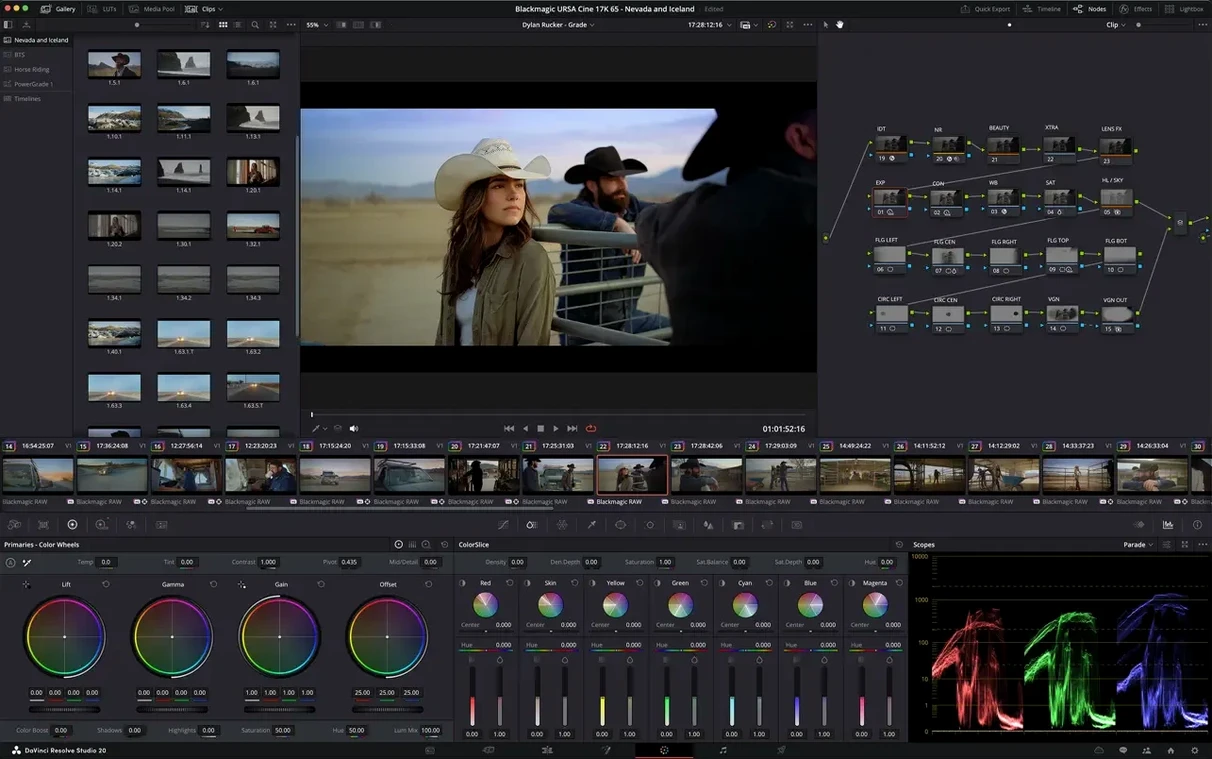
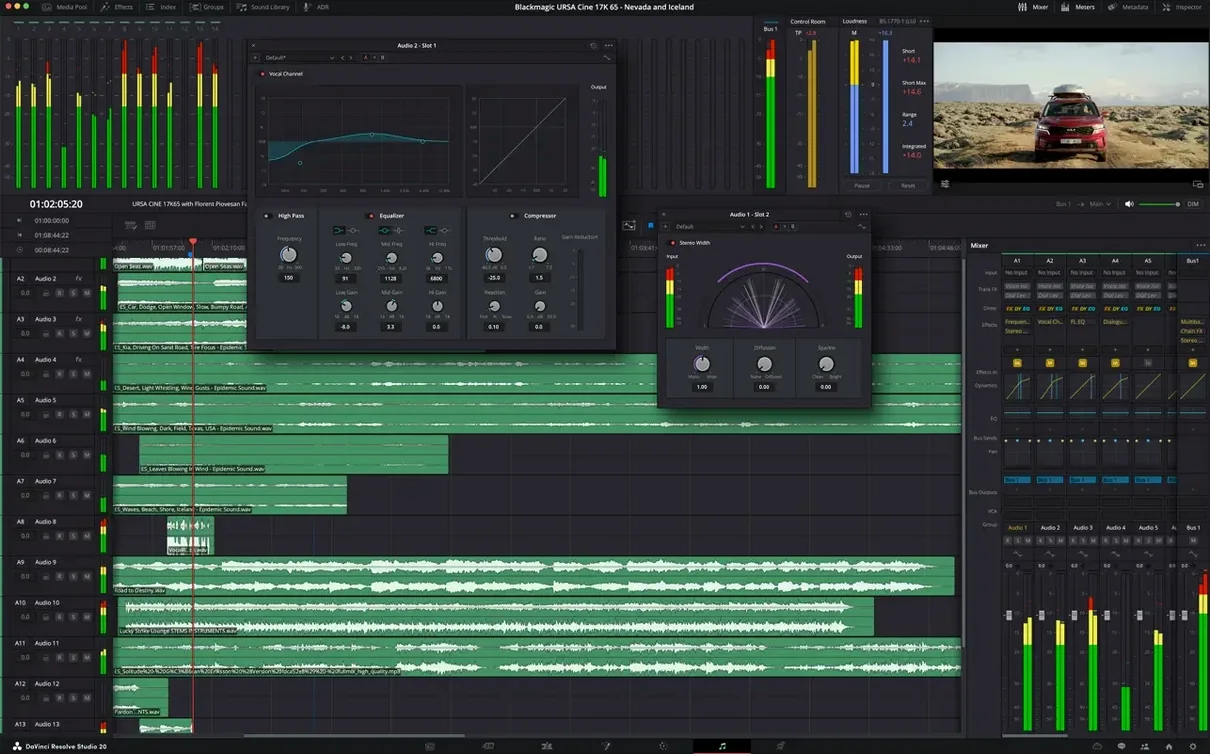
Version 21.1 arrived with more than 100 new editing and colour tools, GPU-accelerated HTJ2K decoding, and a noticeably expanded set of graphics utilities — over 25 new Krokodove nodes now live inside Fusion. If you are about to install it, a few practical questions tend to surface first.
Does the single application really replace a whole post-production chain?
It genuinely does. Editing, compositing, motion graphics, colour correction, and audio post all live under one roof, which means you are not round-tripping between half a dozen specialist programs. The timeline hands clips straight to the Fairlight mixer or the Fusion page without conforming or flattening anything first — the workflow feels designed by people who have done the multi-app dance and got tired of it.
What does the Studio version unlock that the free version does not?
Studio adds HDR grading toolkits, temporal and spatial noise reduction, lens correction, film grain emulation, and the neural engine features. If you work with HDR deliverables or need to clean up noisy footage shot in low light, those additions stop being luxuries and become the reason you install Studio.
How deep is the colour processing under the hood?
Everything runs through a 32-bit floating-point YRGB colour pipeline, so grades stack without banding or clipping artefacts. That is the same processing architecture used in the grading theatres that finish Hollywood features — the math does not round off halfway through a node tree just because you are working on a MacBook.
Does version 21.1 make media organisation any less tedious?
Yes, and this is one of the updates I was most pleased to see. The new AI assistant integration can sort and tag media automatically, then feed straight into batch rendering. Combined with the expanded camera format support on the Photo page, it cuts down the housekeeping that usually eats the first hour of a project.
What hardware combination runs the neural engine features without grinding to a halt?
Apple Silicon machines with a Media Engine block handle the heavy lifting for HEIC and H.265 footage natively, and the 21.1 update adds hardware-accelerated HEIC decoding specifically for those chips. On the Intel side, a discrete GPU with enough VRAM to hold a 4K timeline plus node cache makes the difference between real-time playback and a slide show. The neural noise reduction and the new AI assistant both lean on the GPU, so a machine with unified memory — essentially an M-series Mac with 16 GB or more — skips the transfer bottlenecks that separate CPU and GPU setups endure.
Can I open a project started in the free version without losing work?
Projects move across without a hiccup. The database structure is identical, and the Studio-only features simply become available the moment you open the timeline. The one caveat is that if you used third-party OpenFX plug-ins that are not licensed for Studio, you will need to re-link them, but that is a plug-in licensing issue, not a Resolve one.
Set your project-wide image scaling before you cut a single frame
A fresh install of a tool this large can feel like unpacking a flight case full of gear you half recognise. A few deliberate setup moves in the first afternoon pay back hours later.
Set your project-wide image scaling options before you import anything. Under Project Settings, the "Image Scaling" section offers several resize filter presets, and the default is often sharper than you expect. If you are working with archival footage or upscaling old material, a gentler filter like Gaussian or Lanczos can save you from aliasing you will not spot until you are deep into the grade.
Next, spend twenty minutes inside Fusion with the new Krokodove nodes. They do not announce themselves — you will find them waiting in the Effects Library under the Krokodove folder. The 21.1 update added over 25, and several duplicate functionality you would previously have needed a script or a multi-node workaround to achieve. The "Krokodove Camera" node alone gives you physical camera controls inside a 3D comp without touching a separate 3D application. Drag a few onto the node tree just to see what they expose; you will remember them when the right shot appears.
The Fairlight page also benefits from a pre-flight check. Open the Fairlight menu, choose "Patch Input/Output," and confirm your audio interface routing. Resolve maps a default stereo bus, but if you work in 5.1 or need a dedicated monitoring path, setting that up before a client sits down next to you is infinitely less stressful.
A typical session, walked through from ingest to export
Imagine a short corporate project: two interviews, some b-roll, a logo sting, and a social cut-down. You launch Resolve and land on the Media page. Rather than manually creating bins, you point the AI assistant at a card dump folder and let it group clips by shot type and face detection while you make tea. When you return, the bins are populated and the talking-head clips already have metadata tags.
You switch to the Cut page — or the Edit page, depending on your keyboard preference — and rough out the interview selects. Trimming is fast because the magnetic timeline on the Cut page snaps clips together without overwriting, yet you can pop over to the Edit page for a traditional track-based assembly when the edit needs more deliberate structure. You drop a few b-roll shots onto a track above the interview and use the new editing tools from the 21.1 toolbox to ripple-trim without reaching for the mouse.
The logo sting needs motion. You right-click the graphic in the timeline and choose "Open in Fusion." Inside the Fusion page, you chain a Transform node through one of the new Krokodove blur tools, keyframe the opacity, and pipe the output back to the Media Out. You close Fusion and the composite sits live on the timeline — no rendering, no XML exchange.
Colour comes next. You move to the Colour page and establish a node tree: a primary balance node, a secondary for skin tones, a parallel node for the window behind the subject. The 32-bit float pipeline means you can push the window qualifier aggressively without introducing banding. You grab a still from the first interview and use the Shot Match feature to ripple the look across the second interview with a click, then fine-tune manually.
Finally, the Fairlight page. The dialogue track gets a light compressor and a de-esser from the built-in Fairlight FX rack. You set your loudness target to -23 LUFS for broadcast and hit the Fairlight loudness analyser to confirm the mix. The master bus already routes to your audio interface because you patched it on day one. You move to the Deliver page, queue a ProRes master and an H.264 social version, and let the render farm — even if your "farm" is a single Mac Studio — chew through the jobs while you write the invoice.
Middle mouse button pans the timeline and other unadvertised shortcuts
Resolve is packed with shortcuts and behaviours that do not advertise themselves in the menus. Here are a few I find myself showing students over and over.
The middle mouse button pans the timeline when you click and drag in the ruler area, but it also works as a jog wheel if you hold Control while rotating a scroll wheel — precise frame-by-frame stepping without the dedicated hardware panel.
On the Colour page, holding the Option key while adjusting a control resets it to default. That works for the colour wheels, the curves, and the primaries bars. It is the fastest way to clear a parameter you have nudged too far.
In Fusion, pressing Shift and dragging a connection wire detaches it and lets you drop it onto a different input without deleting the pipe first. It is a tiny thing, but once you know it, the node graph feels less like a puzzle box.
The Deliver page can render multiple outputs from a single queue item if you use the "Add to Render Queue" button with different presets selected. You do not need to duplicate the timeline or create separate timelines for a master and a preview copy — just queue the same job twice with different settings.
Fairlight has a "Listen" bus that you can solo without affecting the mix. If a client asks to hear just the dialogue stem mid-session, you toggle it with one click rather than muting half the tracks.
The sweet spot where colour, edit, and audio overlap on one timeline
DaVinci Resolve Studio is not a jack-of-all-trades that compromises on each discipline. The users who feel most at home are those who need at least two of its core skillsets to overlap on the same timeline, and who are willing to learn one interface deeply rather than juggle several.
Colourists who also finish projects benefit from never leaving the grading environment to add titles or mix audio. The fact that the Colour page talks directly to Fairlight — with clip-level audio keyframes visible in both — means a grade change that affects a clip's perceived loudness can be compensated in the same application, often on the same screen.
Independent filmmakers and small post houses get the most obvious value. One licence covers editing, compositing, grading, and mixing, so the budget that would normally be split across an NLE, a compositor, and a DAW stays in one place. The 21.1 scripting APIs and built-in console open the door to custom pipeline automation that used to require a developer or a third-party integration tool.
Educators teaching post-production also gravitate toward Resolve Studio. A classroom can demonstrate the full chain — ingest to delivery — without switching applications mid-lesson, and the free version means students can practise at home. The Studio version's neural features and HDR toolkits then become the bridge to professional workflows when students are ready.
Photographers who also deliver video for clients will appreciate the Photo page's expanded camera format support in 21.1. You can bring raw stills straight into the timeline, grade them with the same tools you use on motion footage, and deliver slide shows with motion graphics without ever opening a separate photo editor.
Any user who has searched for a davinci resolve studio mac torrent or a davinci resolve studio 20 crack mac hoping to test the full feature set before committing will find the free version of Resolve genuinely generous — it omits the Studio-only neural tools and HDR but leaves the edit, colour, and Fairlight pages largely intact. A davinci resolve download from the official site gives you a working application that can open and grade projects, which is enough to decide whether the Studio-exclusive additions — noise reduction, film grain, the AI assistant — justify the upgrade. The same logic applies to anyone hunting a davinci resolve studio 20 crack or a davinci resolve 20 crack: the free version demonstrates the core workflow so transparently that many editors happily stay on it for years, while those who want the extra toolkits can test a cracked copy and simply make sure the GPU drivers and Metal settings are current so the neural features run smoothly.
- macOS 15 (Sequoia) or later
- Apple Silicon or Intel 64‑bit Mac
Questions I keep hearing
Can you work with HDR footage from start to finish?
Yes — the app supports HDR formats throughout the pipeline, from ingest and grading to final delivery, without needing external conversion tools.
Questions from the class 0
Sign in or join the class to ask a question.
Nobody has asked anything yet. If you have used it on a real job, say what the file did.
Also on the Mac Apps shelf
The whole Mac Apps shelf DaisyDisk
Scans your drive and draws an interactive map so you can spot the files eating your space.
DaisyDisk
Scans your drive and draws an interactive map so you can spot the files eating your space.
 dBpoweramp Music Converter
Converts batches of audio files between formats while keeping your metadata intact.
dBpoweramp Music Converter
Converts batches of audio files between formats while keeping your metadata intact.
 Cursor Pro
Highlights your Mac pointer with a configurable glow so an audience never loses it on screen.
Cursor Pro
Highlights your Mac pointer with a configurable glow so an audience never loses it on screen.
 Deep Glow
Generates a physically plausible, spill-friendly glow right on your timeline.
Deep Glow
Generates a physically plausible, spill-friendly glow right on your timeline.
 Default Folder
Adds a toolbar of favourite folders to every Open and Save dialog.
Default Folder
Adds a toolbar of favourite folders to every Open and Save dialog.
 Dehancer Pro
Rebuilds the colour and grain of sixty-two real film stocks on your digital images.
Dehancer Pro
Rebuilds the colour and grain of sixty-two real film stocks on your digital images.
 Depth Scanner
Generates a true depth map from a single photo so you can refocus after the shot.
Depth Scanner
Generates a true depth map from a single photo so you can refocus after the shot.
 CrossOver
Translates Windows software commands so a curated set of apps can run on a Mac.
CrossOver
Translates Windows software commands so a curated set of apps can run on a Mac.