 ASPNetWorld
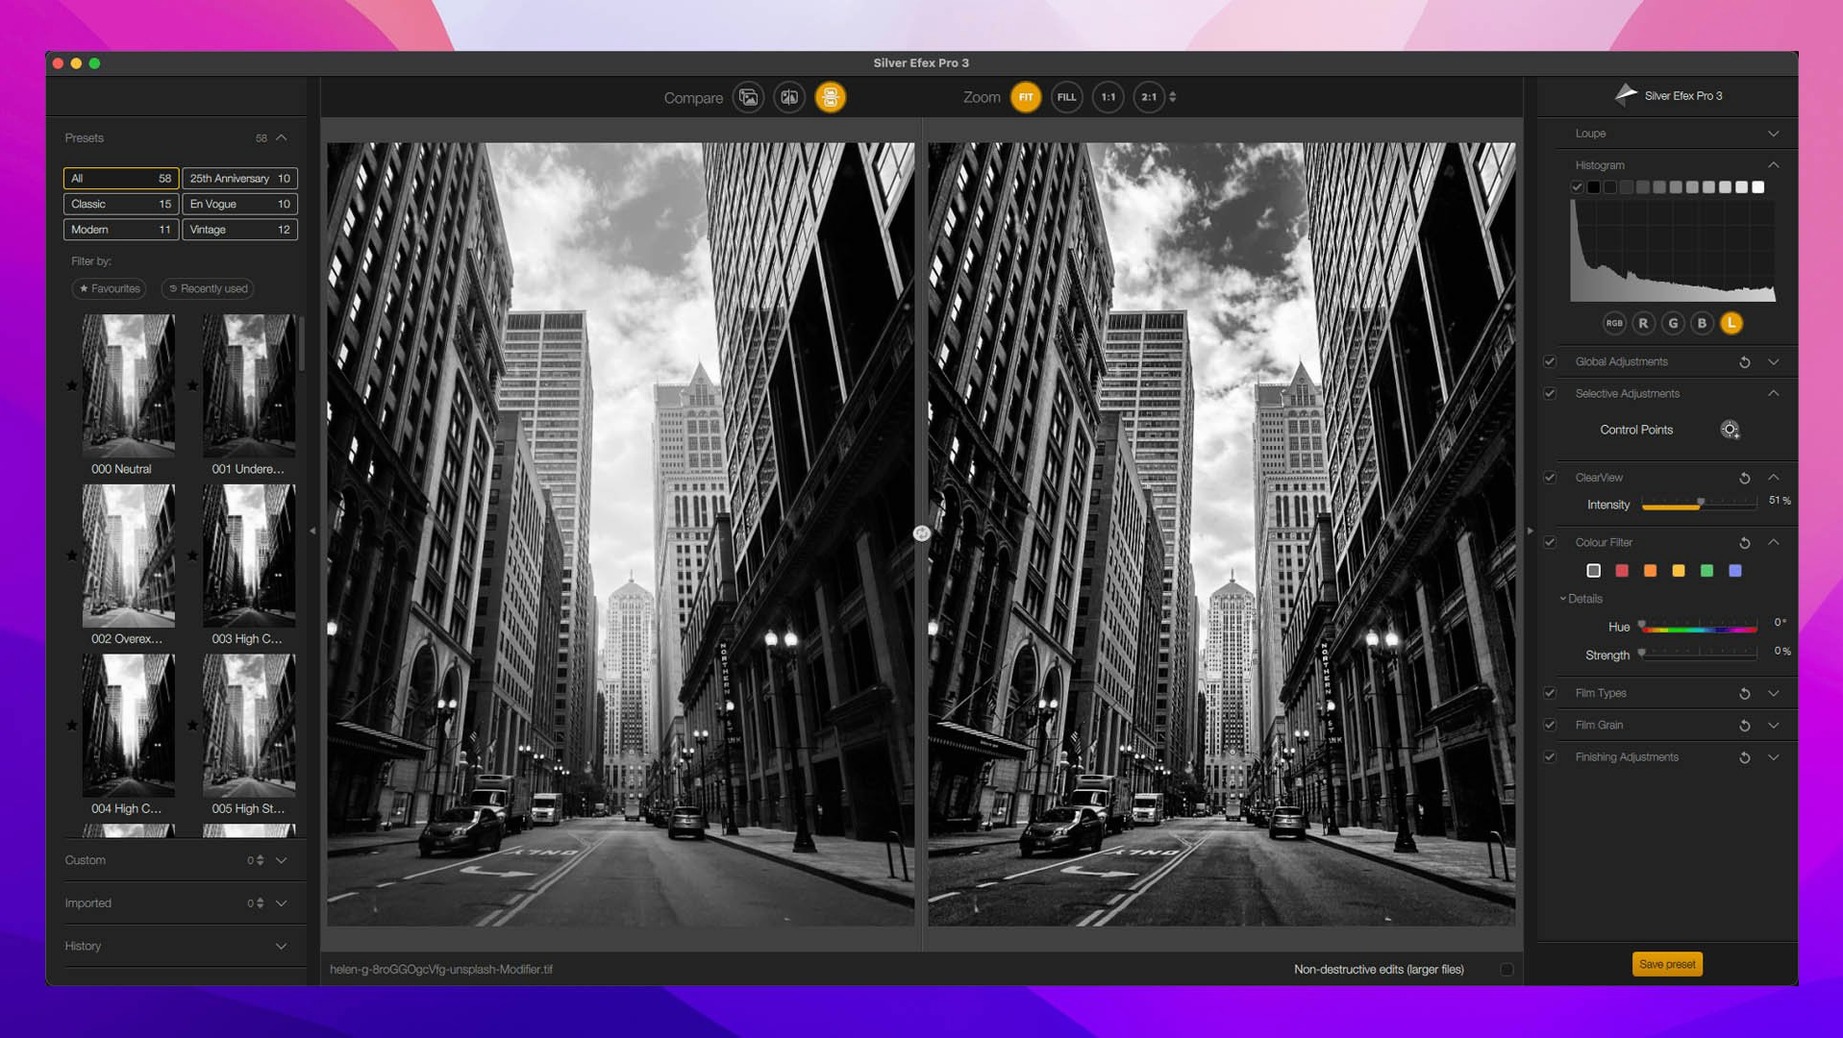
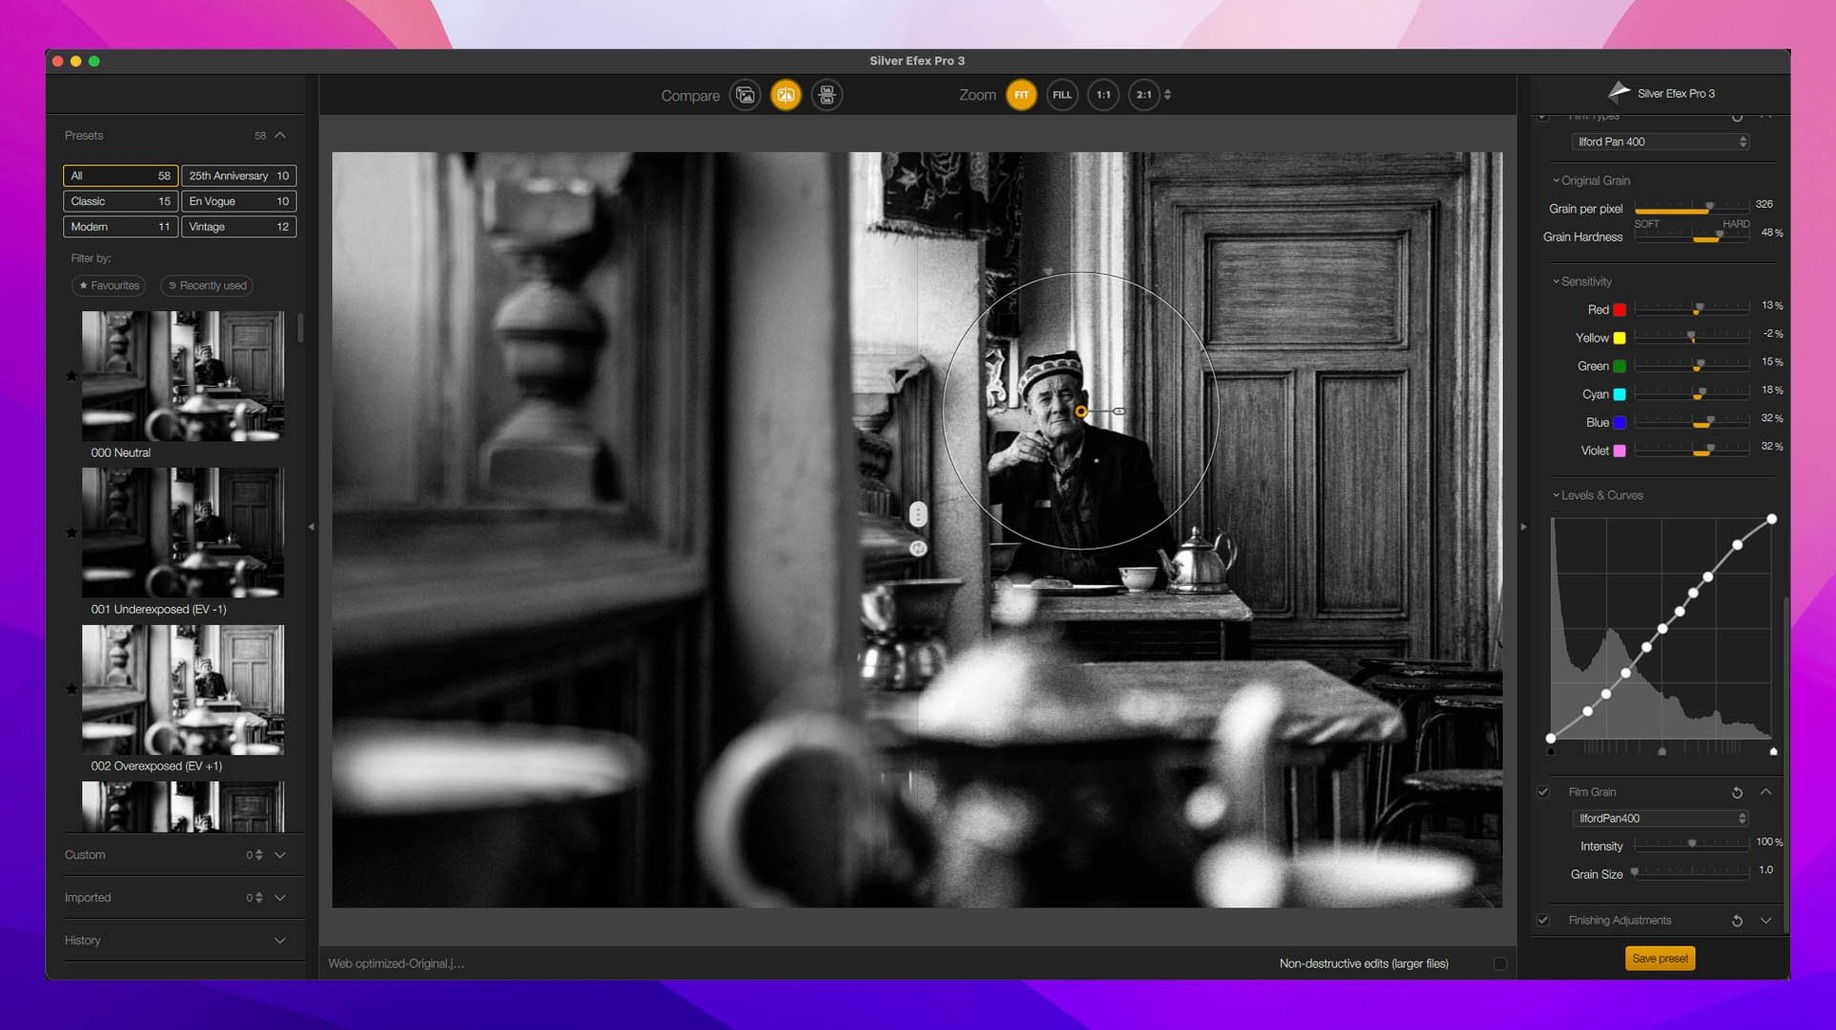
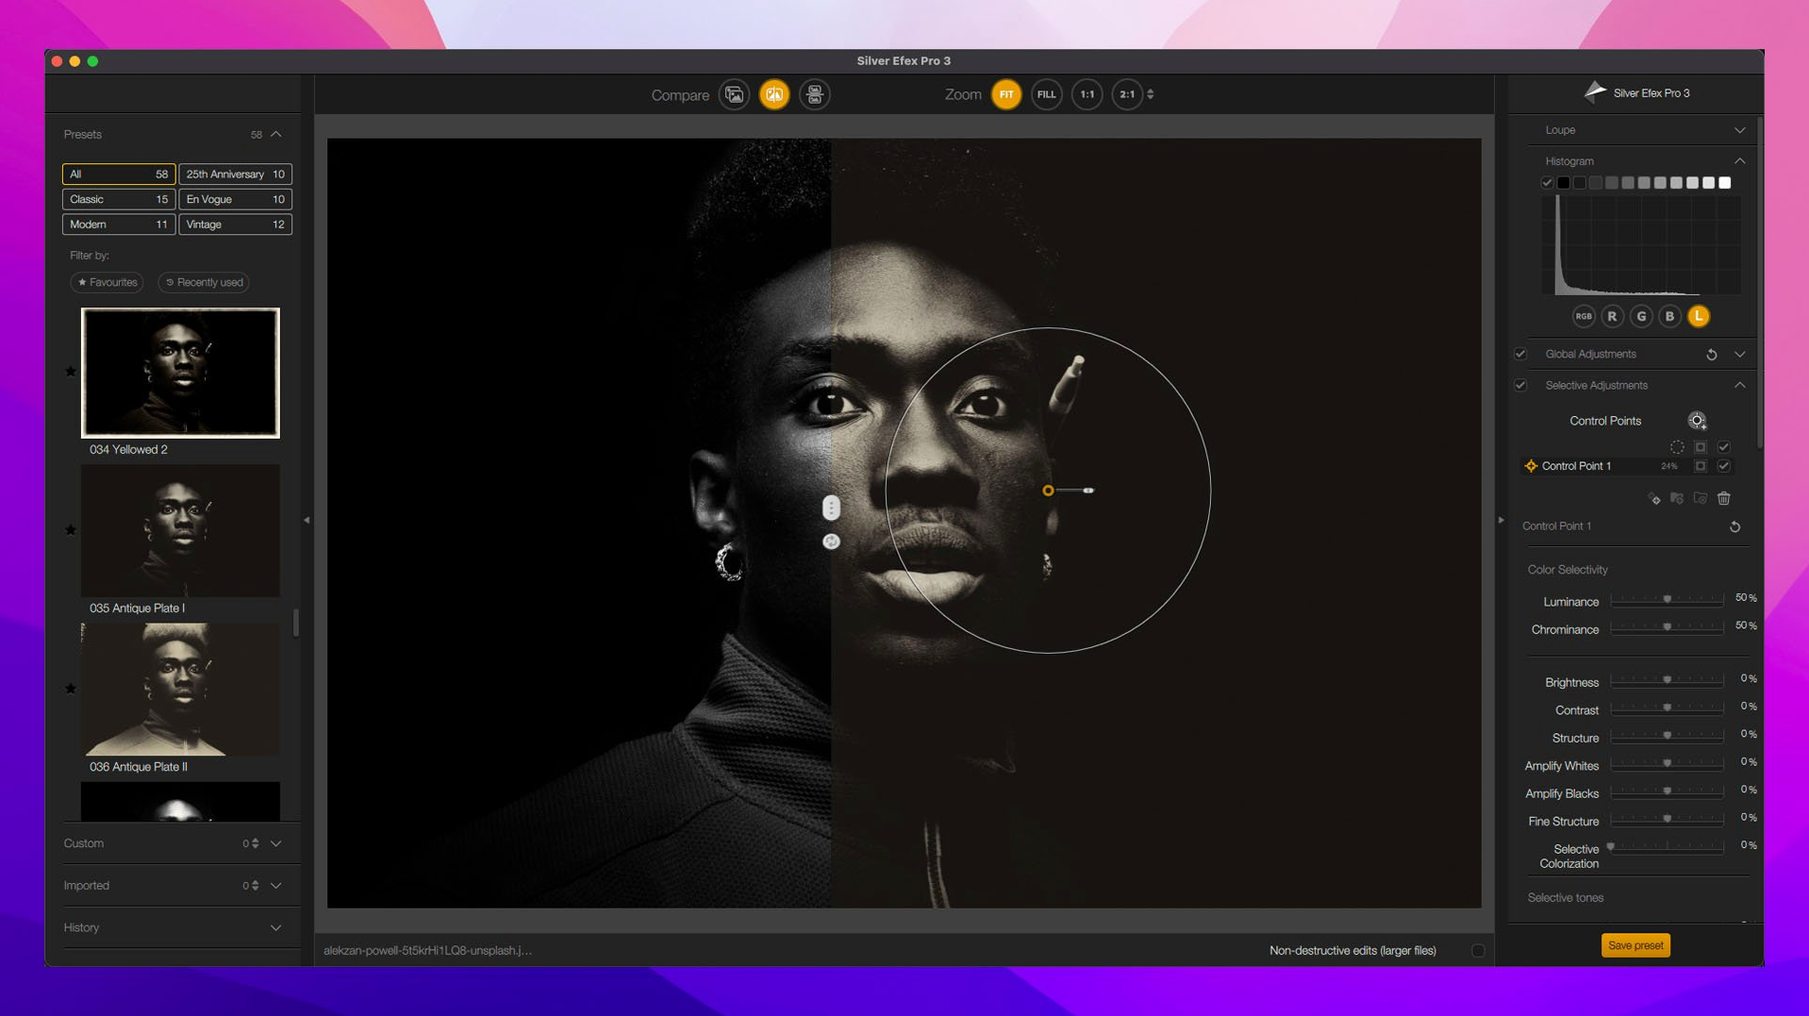
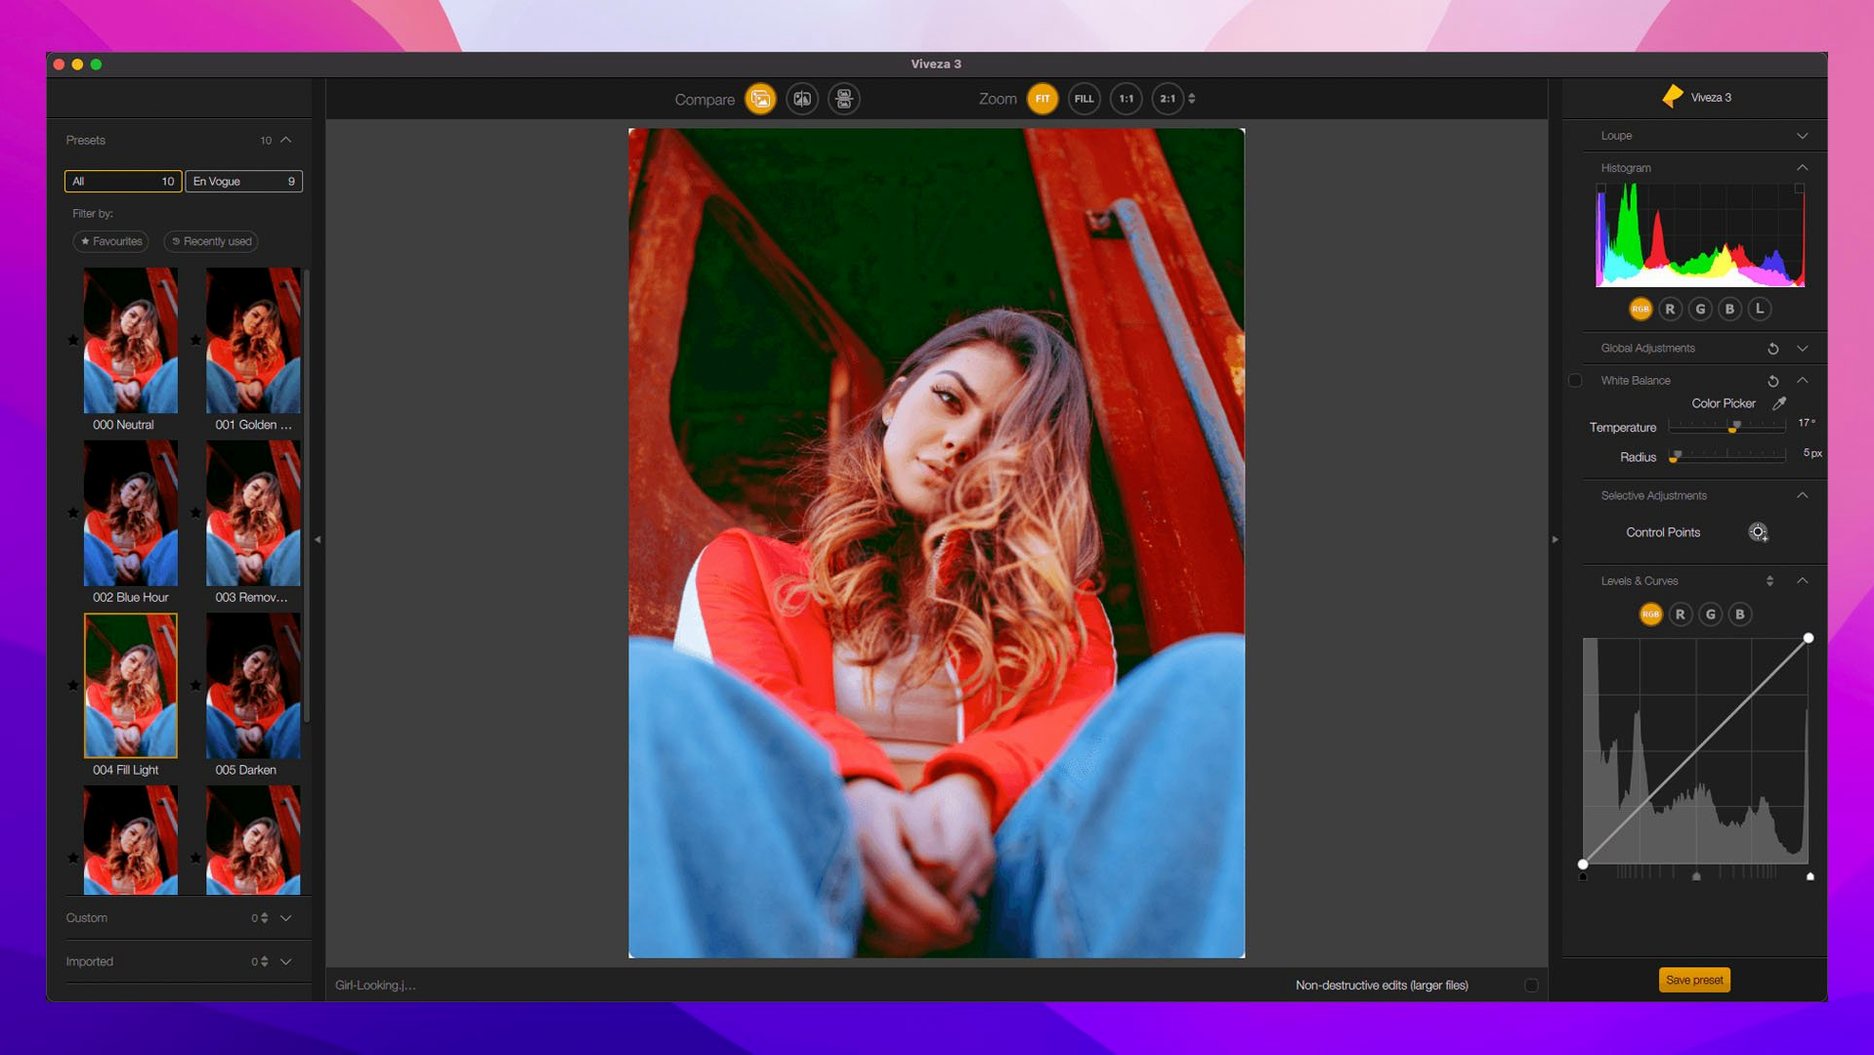
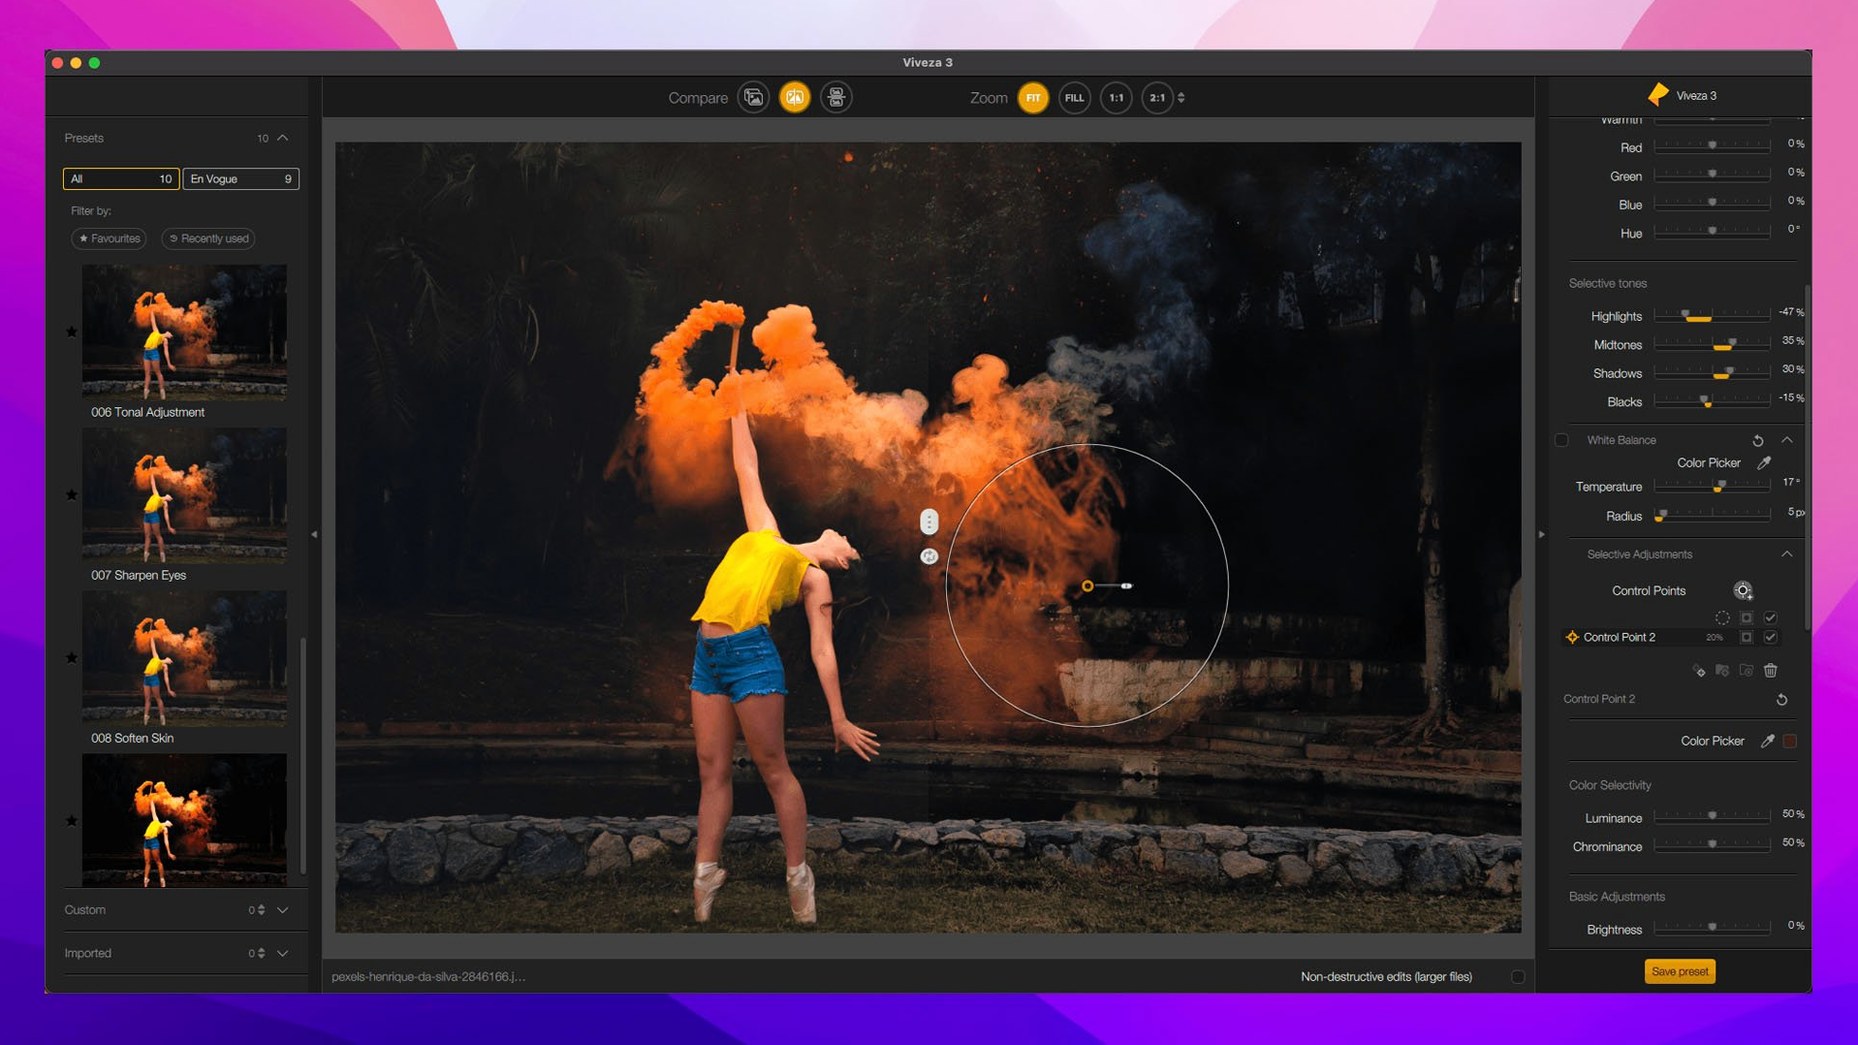
Nik Collection 9 arrives with a small but meaningful set of additions: Depth Masks, AI Masks, a new Color Grading tool in Nik Color Efex, and three fresh effects — Chromatic Shift, Glass Effect, and Halation. None of them shout for attention, which is rather the point. They give you finer control over where an adjustment lands and how it behaves.
- Depth Masks let you build selections based on how far objects sit from the lens, so a vignette or contrast lift can stay on the subject instead of bleeding across the whole frame.
- AI Masks read the image and suggest regions for local adjustments, which pairs neatly with the existing U Point technology when you want a more manual touch.
- The new Color Grading tool in Color Efex brings shadow, midtone and highlight control into one panel, with Preset Hover Preview so you can audition looks before committing.
- Chromatic Shift, Glass Effect and Halation add subtle optical character — useful when a scene feels too clean and you want a hint of analogue texture.
- Copy and paste of local adjustments between images speeds up working through a set shot in the same light.
- Sharpener Pro now handles 16-bit image sharpening, so fine detail work holds up in deeper bit depths.
Used together, the new masking tools and colour controls change how quickly you can isolate a mood or a subject. It is less about new looks than about deciding where a look should live.
Brush feathering hides behind a single key press
Some of the best features in Nik Collection sit just below the surface, hidden in keyboard shortcuts and interface behaviours that don’t announce themselves. A few worth committing to muscle memory early on:
- Brush feathering with a single key. When you paint a mask in Color Efex Pro or Silver Efex Pro, holding
Optionwhile dragging the brush edge lets you feather the stroke on the fly. It saves a trip to the brush settings panel when you are tidying a mask boundary around hair or foliage. - Control point stacking order matters. U Point control points work from the top of the list downward. If two points overlap and fight each other, drag the broader one higher in the stack. The bottom point’s influence gets clipped, which is useful when you want a colour tweak to sit inside a larger tonal adjustment without doubling up.
- Quick before-and-after anywhere. In most plugins, pressing the
Spacebar toggles the original image. It is faster than hunting for the split-view button, especially when you are checking whether a sharpening pass has started pulling texture from noise. - Silent sliders. Double-click any slider to reset it to its default. This works across all eight plugins and is remarkably easy to forget when you have nudged half a dozen controls and lost track of where you started.
- Mask Overlays toggle. Introduced in version 9, the Mask Overlay view appears with a shortcut that varies by host — usually
Minside the plugin window. It renders the active mask in a translucent red wash, which reveals gaps and spill that are invisible against a busy background.
A three-day rhythm to unlock the sprawling toolbox
After installation, the suite tends to feel like a sprawling toolbox. The best approach isn’t to learn every plugin at once — it is to let the host application guide your hand. Here is a practical three-day rhythm that helps the tools bed in without overwhelm.
Day one: anchor yourself in Color Efex Pro. Open a raw file that you have already balanced in Lightroom or DxO PhotoLab. Resist the urge to browse all 52 filters. Instead, pick three that match the image’s natural shortcomings — Pro Contrast for a flat scene, Detail Extractor for texture, and the new Color Grading tool for a gentle split-tone. Apply each to its own layer in Photoshop (or as a separate adjustment in PhotoLab) so you can blend them later. The goal is to see how filter stacking behaves, not to produce a finished image.
Day two: test the new masking tools. Take the same image and duplicate the edit, then replace the layer masks with Depth Masks and AI Masks where it makes sense. A Depth Mask on the Pro Contrast layer, for example, will keep contrast lift on the foreground while leaving the sky untouched. An AI Mask on the Detail Extractor can restrict sharpening to the subject’s face and clothing. Compare the two versions side by side. The difference is rarely dramatic, but it almost always feels more deliberate.
Day three: run a batch through Sharpener Pro. Pick five or six images from the same shoot — same lens, same focal length, similar light. Use Sharpener Pro’s 16-bit sharpening with a modest radius and the preview loupe to check haloing along high-contrast edges. The output sharpening stage includes an adaptive sharpening slider that varies strength across the frame; keep it low for portraits, push it higher for architecture. When you compare the batch, note how consistent the detail rendering stays from frame to frame. That consistency is what makes Sharpener Pro a better long-term choice than Lightroom’s built-in sharpening for print work.
A Real-World Session: The Portrait Photographer
Imagine a portrait photographer who shoots natural-light headshots outdoors, often against backlit foliage or uneven brick walls. Their workflow before Nik Collection involved delicate dodging and burning in Photoshop, a process that took twenty minutes per image and was hard to replicate across a set.
With Nik Collection 9, the session shifts. They open a raw file in Lightroom, apply a gentle global curve, then send a TIFF to Silver Efex Pro. A warm-toned preset with a soft selenium split gives the skin a luminous quality, but the background goes muddy. Instead of reaching for Photoshop, they drop a single U Point control point on the subject’s cheek, then a second on the forehead. Silver Efex Pro reads the skin tones and lifts the midtones only where the points sit. The background stays dark and unobtrusive.
Next, the image moves into Viveza. Two control points on the eyes lift local contrast and brightness by a fraction of a stop — enough to add catchlights without making the sclera look glassy. The new copy-and-paste local adjustments command copies both eye tweaks to the next three frames in the set. A job that once meant nudging the same sliders for each image now takes a single paste operation per frame.
Finally, Color Efex Pro applies the new Halation effect at a low opacity, just enough to soften the transition between the subject’s hair and the bright background. The result is a subtle rim glow that reads as lens character rather than a processing artefact. The whole sequence — from raw file to finished portrait — takes under eight minutes, and the adjustments stay editable if the host application supports smart objects. For a photographer delivering fifty headshots a week, that shift in speed is the difference between finishing at a reasonable hour and chasing sliders late into the evening.
What the Version 9 Updates Mean Day-to-Day
Version 9 did not redesign the interface or rethink the plugin architecture, but several small changes add up to a noticeably faster editing rhythm. The most practical is Preset Hover Preview. Before version 9, auditioning presets meant clicking each one, waiting for the render, then clicking the next. Now you hover, see the result in the preview window, and move on if it doesn’t fit. The time saved across a dozen presets in Silver Efex Pro or Color Efex Pro is modest — maybe thirty seconds — but the creative benefit is larger. You try looks you would have skipped before, simply because the cost of trying is near zero.
Depth Masks and AI Masks change how local adjustments are built, not just how precise they are. In earlier versions, masking a sky behind a tree meant either a careful brush job or accepting a sloppy transition. With an AI Mask, the software identifies the sky region in a second or two. You can then feather the edge by a pixel and apply the adjustment. It is not flawless — complex branches against a bright sky still need a manual check — but it cuts mask creation time by at least half for most landscape and architecture shots.
The three new effects — Chromatic Shift, Glass Effect, and Halation — sit in the “analogue character” drawer of Color Efex Pro. They are not tools you reach for on every image, but they solve specific problems that used to require a round trip to Photoshop. Chromatic Shift adds a subtle colour fringe along edges, mimicking vintage lens behaviour. Glass Effect diffuses highlights through a textured overlay, which can rescue a harsh flash reflection on skin. Halation spreads bright areas into adjacent shadows, a look that wedding photographers and film emulation fans will recognise immediately. Having them inside the plugin means you can stack them with other Nik filters and toggle the whole stack on and off as a single adjustment layer.
For anyone who has been using the suite since an earlier version — perhaps coming from a nik collection 8 mac torrent or an older nik collection torrent — the upgrade to version 9 feels less like a new toolbox and more like someone finally oiled the hinges. The masks land faster, the presets preview without friction, and the local adjustments carry between images without ceremony. It is the kind of update that fades into the background of your workflow, leaving you with more time to look at the photograph and less time spent managing the tools.
Nik Collection 9 focuses on selection and colour. The official release introduces Depth Masks and AI Masks for more precise local adjustments, and adds a new Color Grading tool in Nik Color Efex. Three new effects arrive too: Chromatic Shift, Glass Effect and Halation.
- Depth Masks and AI Masks for smarter local adjustments
- Color Grading tool in Nik Color Efex
- Chromatic Shift, Glass Effect and Halation effects
- macOS 13.3 or later
- Intel and Apple Silicon
Questions I keep hearing
Which host applications does Nik Collection 9 work with?
It works with Adobe Photoshop, Lightroom and Aperture on macOS.
Does Nik Collection 9 run on Apple Silicon Macs?
Yes, it supports both Intel and Apple Silicon Macs running macOS 13.3 or later.
Questions from the class 0
Sign in or join the class to ask a question.
Nobody has asked anything yet. If you have used it on a real job, say what the file did.
Also on the Mac Apps shelf
The whole Mac Apps shelf Nook X
Tucks a notepad, reminders, and a private AI chat assistant into your Mac’s menu bar.
Nook X
Tucks a notepad, reminders, and a private AI chat assistant into your Mac’s menu bar.
 NotchBox
Turns the empty space around your MacBook notch into a strip of quick-action buttons and live widgets.
NotchBox
Turns the empty space around your MacBook notch into a strip of quick-action buttons and live widgets.
 NotchNook
Turns the MacBook notch into a pop-out panel for shortcuts, a mini music player, and file drops.
NotchNook
Turns the MacBook notch into a pop-out panel for shortcuts, a mini music player, and file drops.
 Navicat Premium
Connects to multiple databases so you can manage MySQL, Postgres, and others side by side.
Navicat Premium
Connects to multiple databases so you can manage MySQL, Postgres, and others side by side.
 OmniGraffle Pro
Builds precise diagrams, wireframes, and site maps from a deep library of draggable stencils.
OmniGraffle Pro
Builds precise diagrams, wireframes, and site maps from a deep library of draggable stencils.
 OmniPlayer: MKV Video Player Pro
Plays almost any video file you throw at it, fetches subtitles online, and streams web clips.
OmniPlayer: MKV Video Player Pro
Plays almost any video file you throw at it, fetches subtitles online, and streams web clips.
 MuMu Player Pro
Runs Android apps and mobile games on your Mac as if they were tiles in your dock.
MuMu Player Pro
Runs Android apps and mobile games on your Mac as if they were tiles in your dock.
 Multitouch
Lets you assign custom finger swipes and taps to control apps without touching the keyboard.
Multitouch
Lets you assign custom finger swipes and taps to control apps without touching the keyboard.