 ASPNetWorld
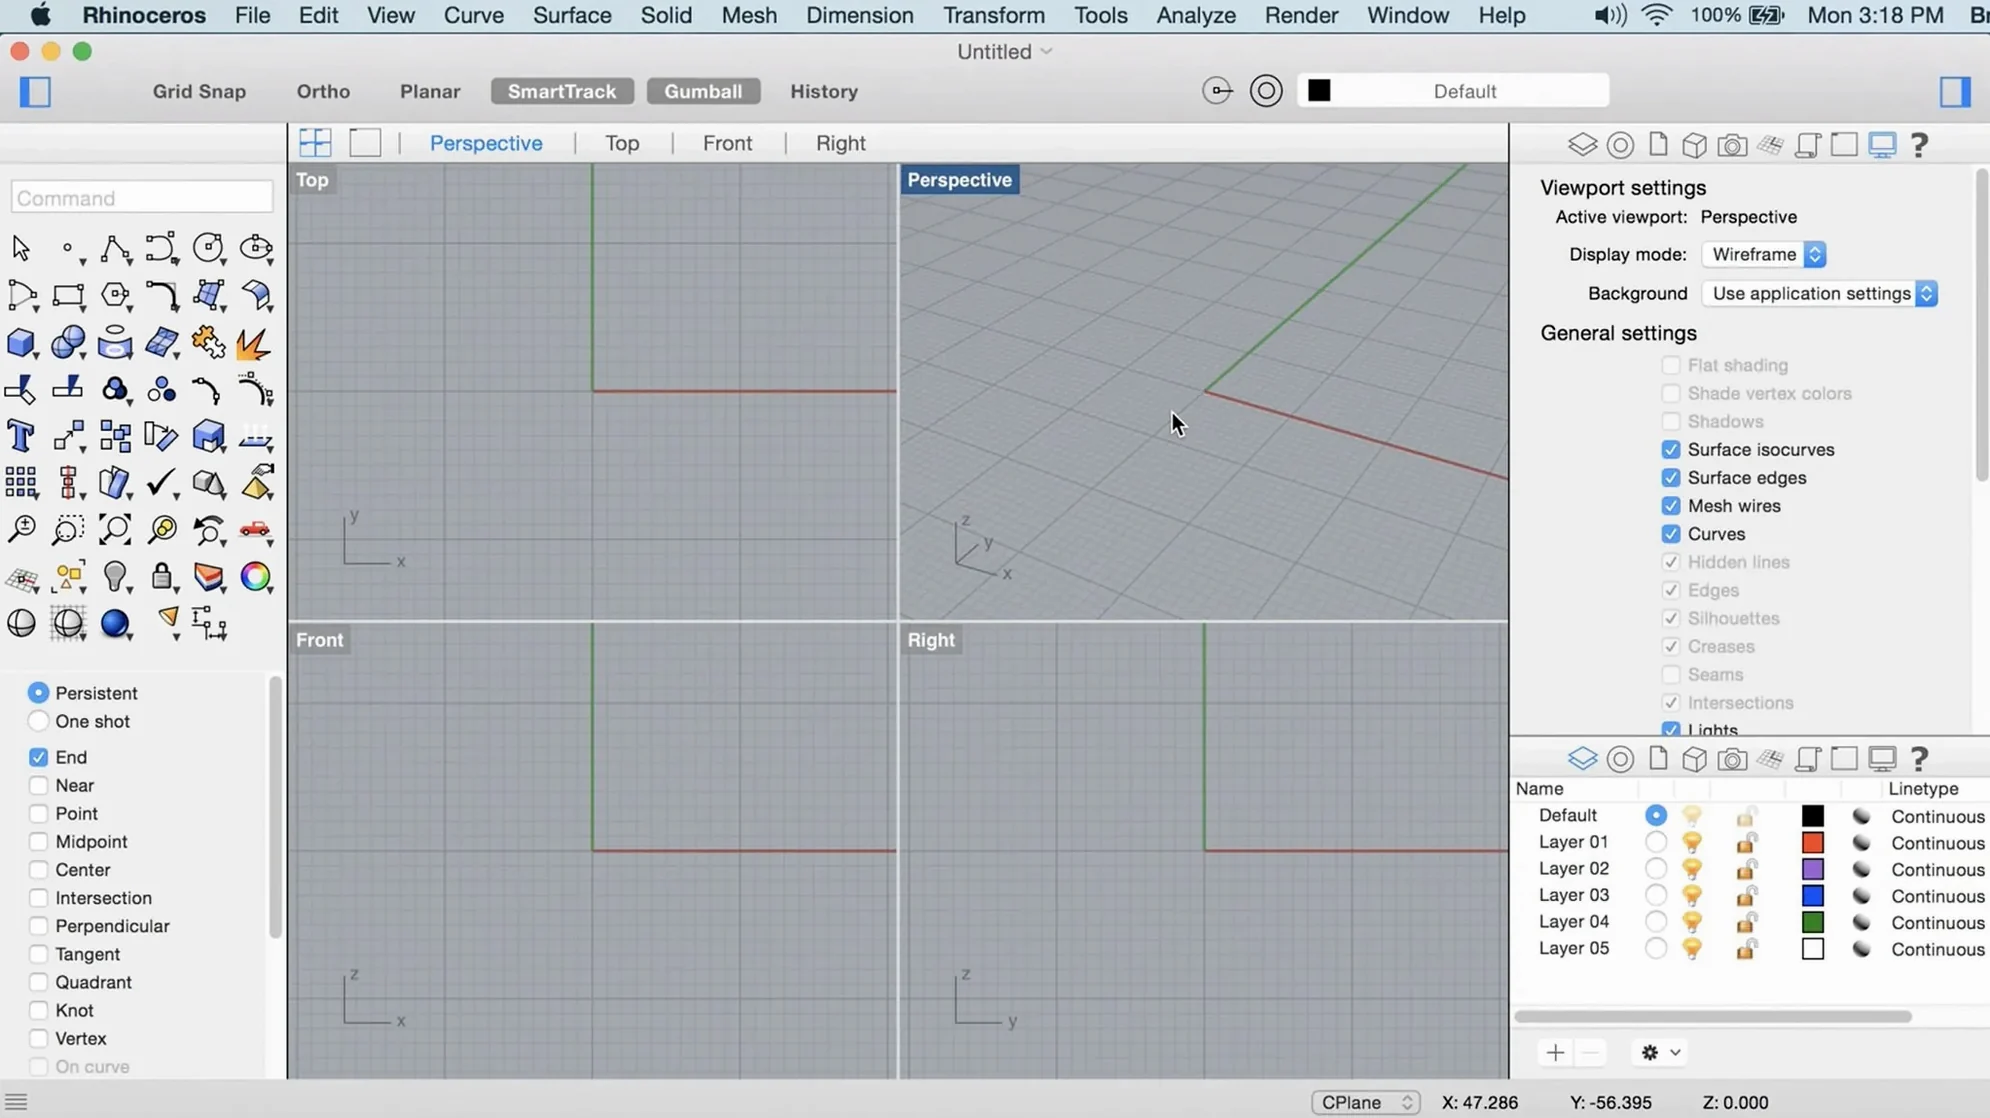
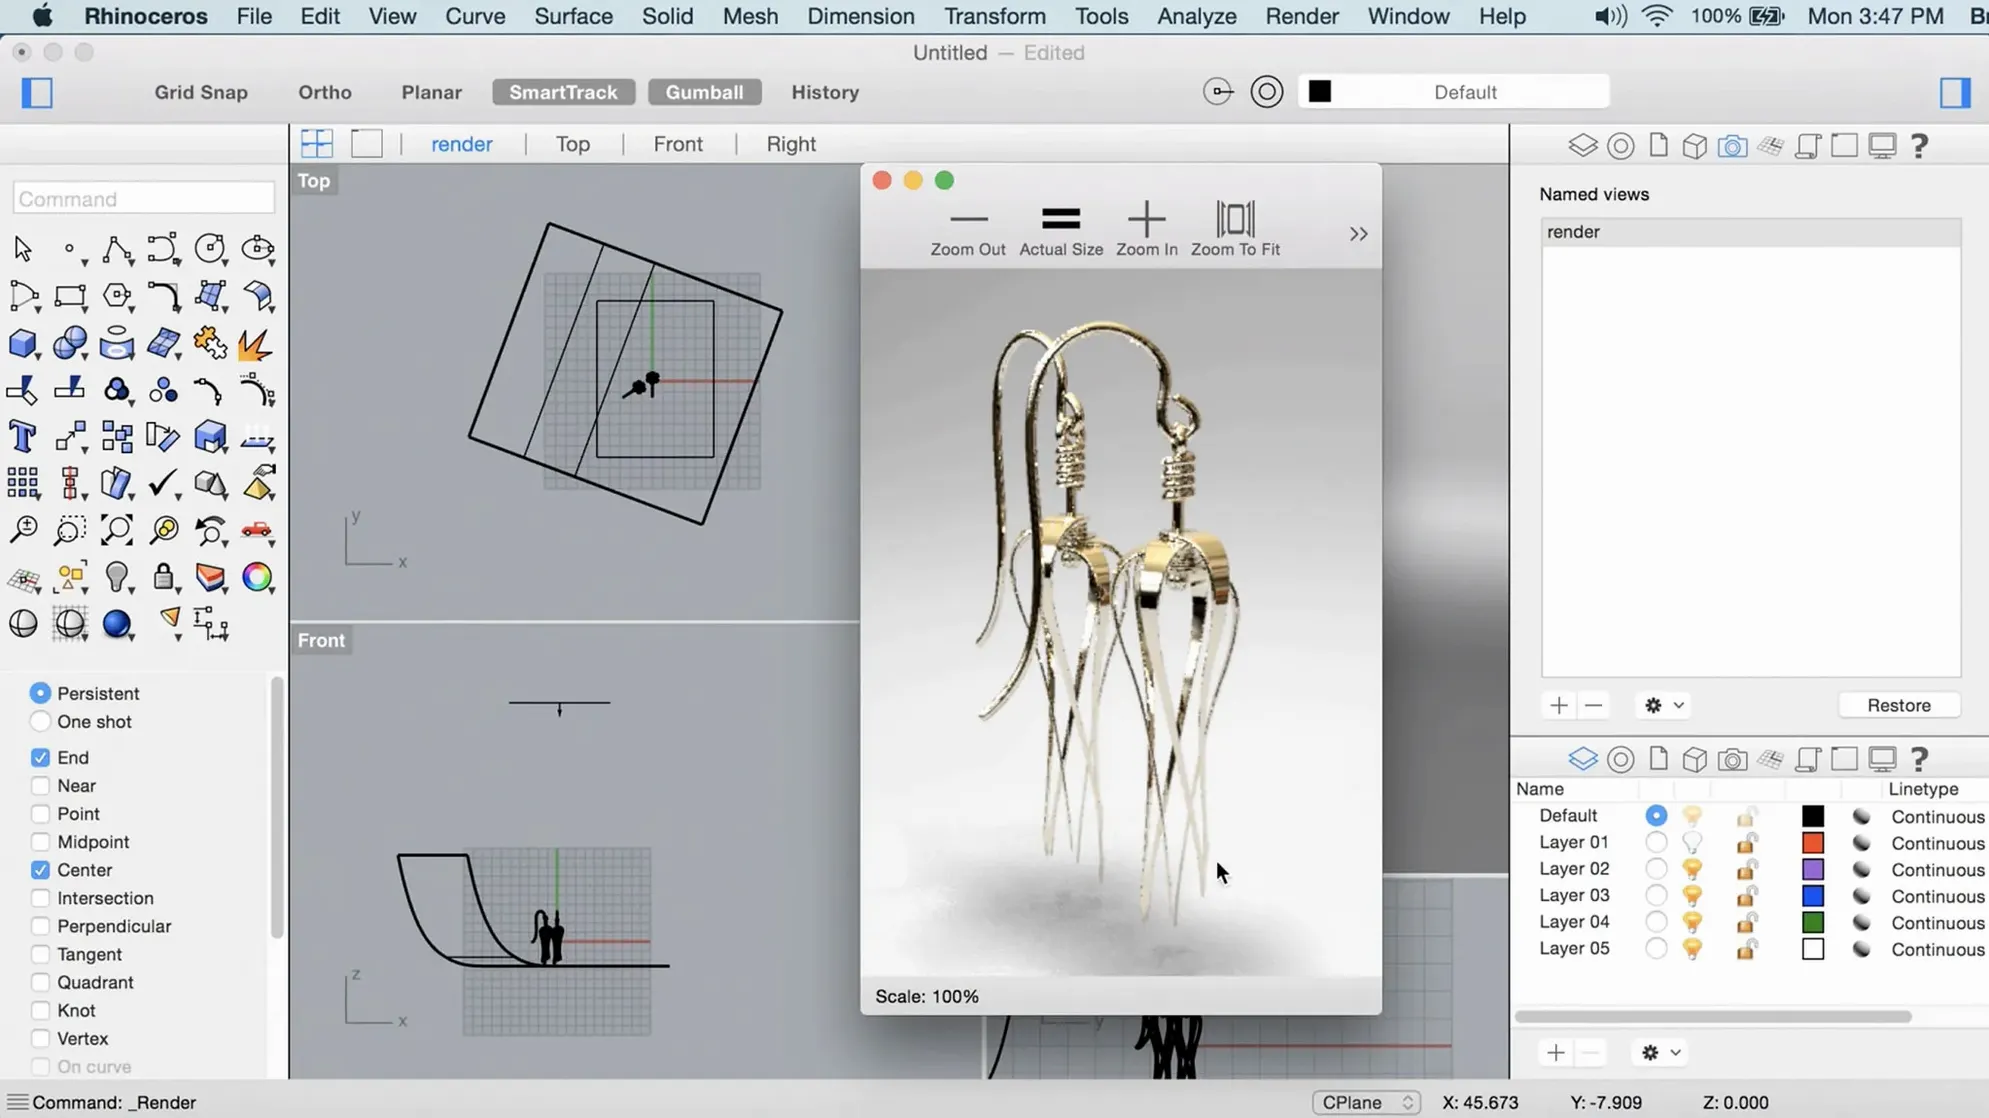
A product designer sits down with a fresh coffee, a multi-button mouse, and a loose sketch on a napkin. The aim is to turn that scribble into a solid, inspectable 3D form without the software getting in the way. Rhino 8 on a Mac laptop is a genuinely good place to start that journey, especially now the display is driven by Apple's Metal technology. Here are the first things I'd point a newcomer towards.
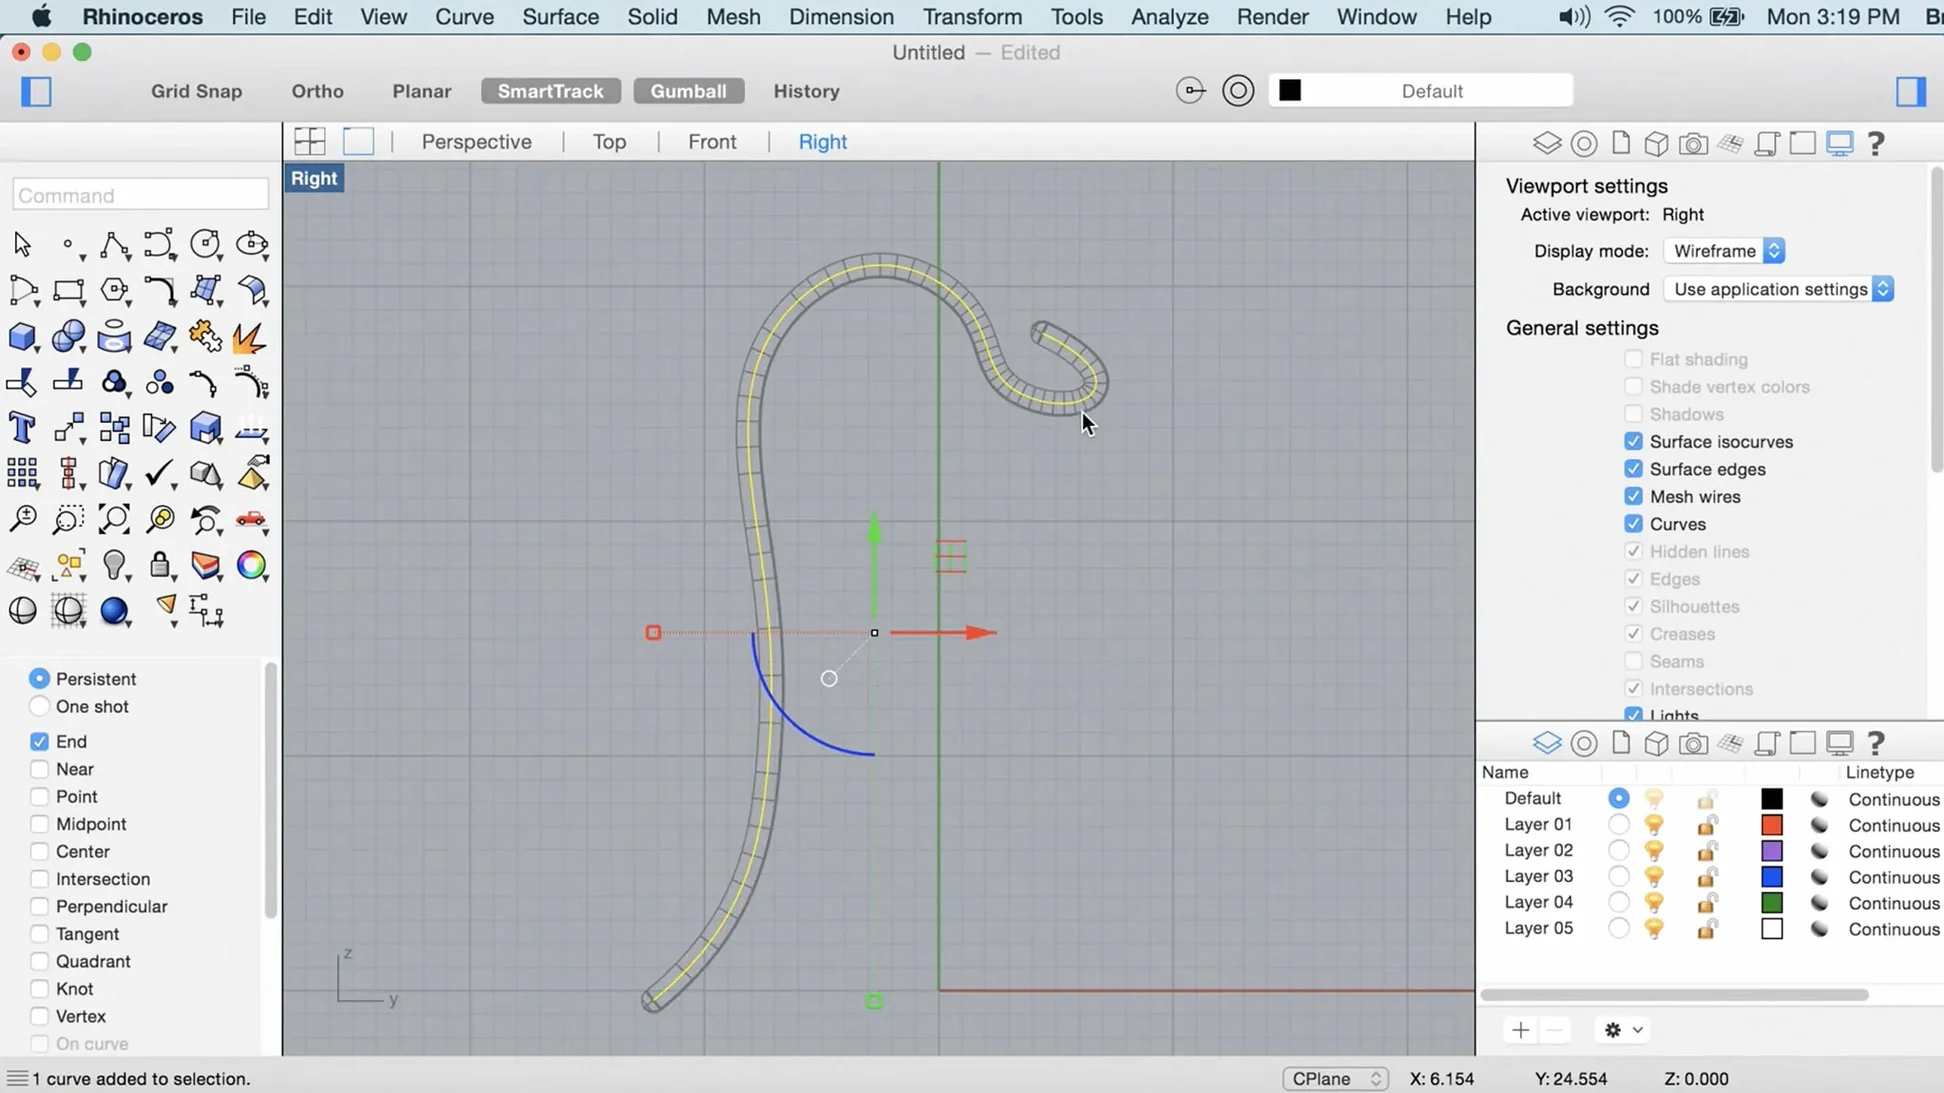
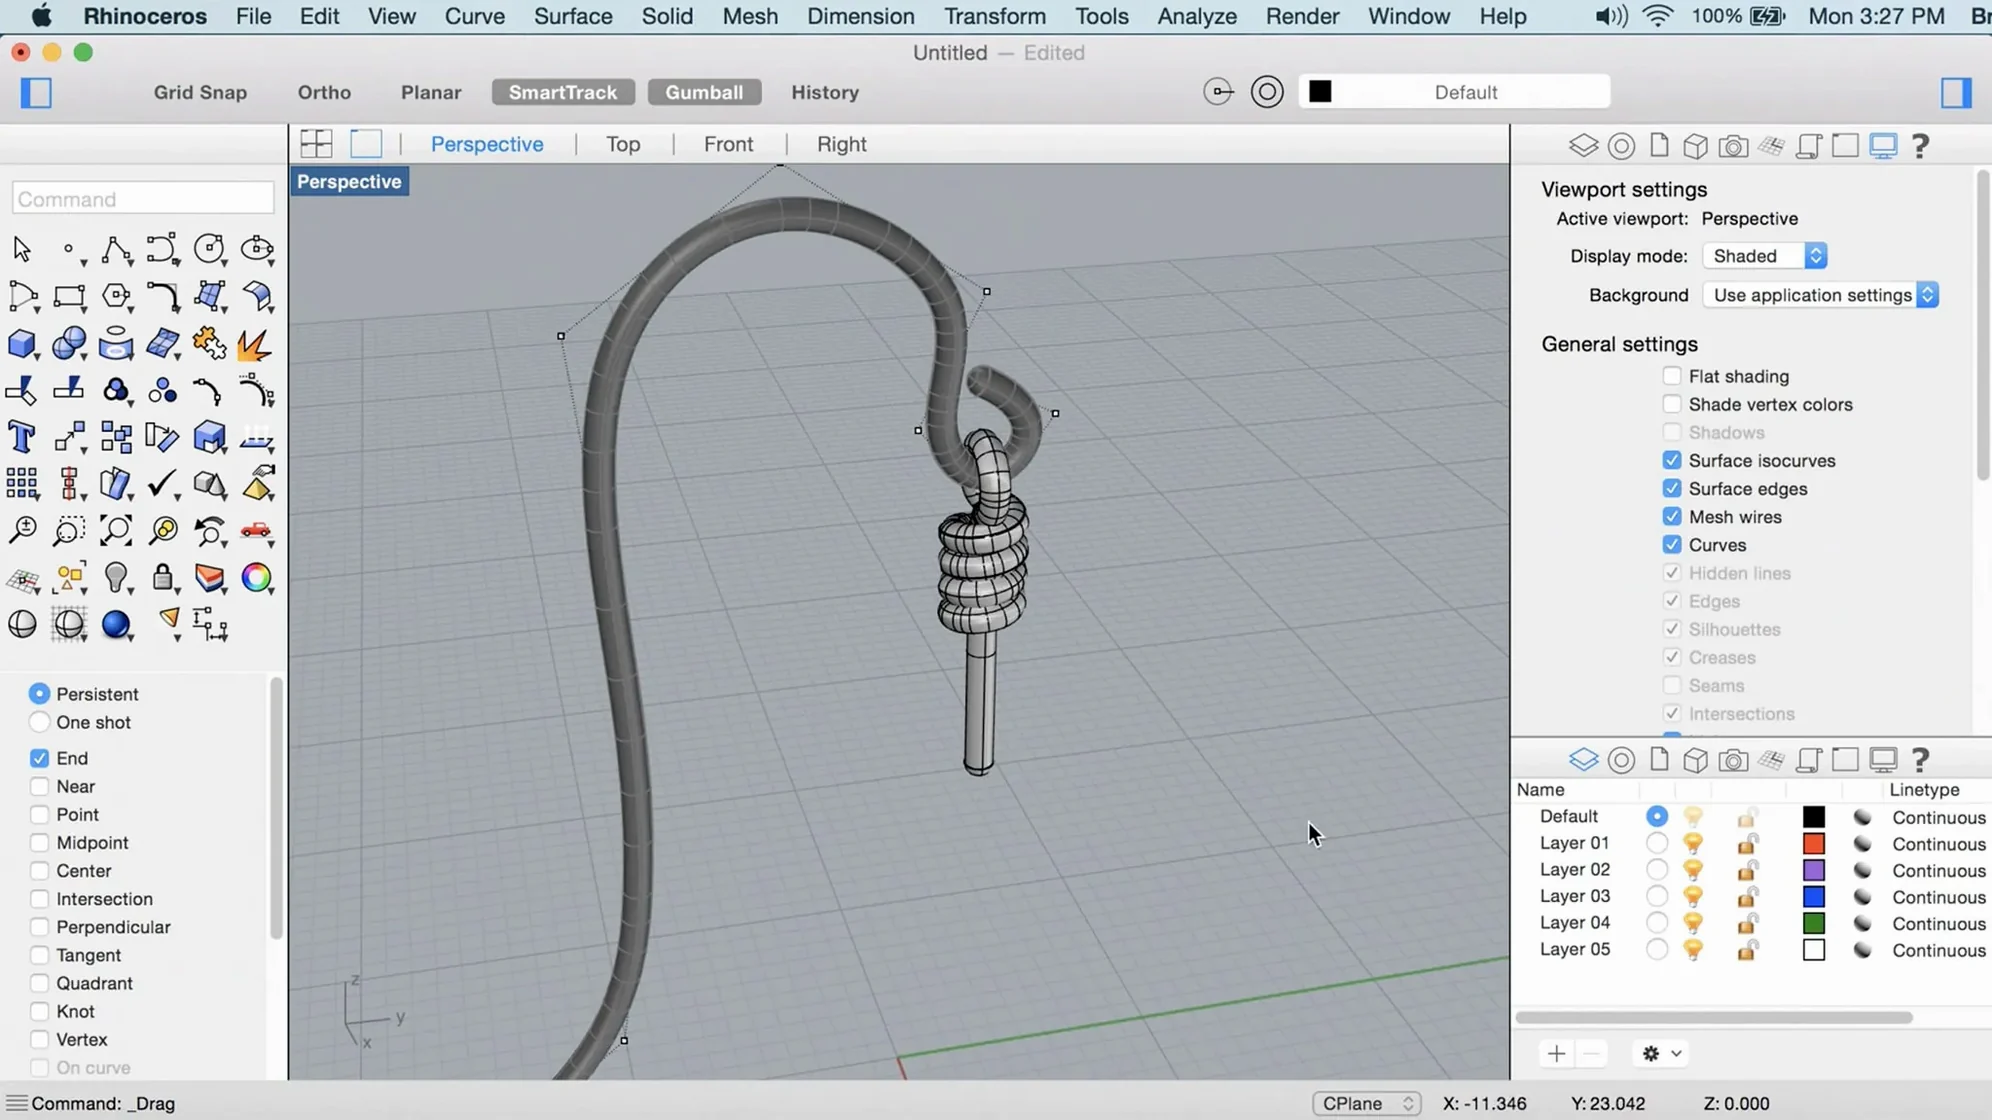
- Make a simple NURBS curve and extrude it. Draw a freeform curve, then use the extrude command to pull it into a surface. It gives you an immediate feel for how Rhino thinks — everything is mathematically precise, not a collection of flat triangles.
- Run the ShrinkWrap command on a mess. Grab a few overlapping solids or an imported polygon mesh and let ShrinkWrap create a tidy, watertight envelope around them. It's oddly satisfying and a practical way to prep a model for 3D printing.
- Right-click everything. The interface in version 8 is much more customisable, but the real speed secret is the right mouse button. It repeats the last command, which sounds trivial until you realise half your work is repeating what you just did.
- Drop a point cloud into the viewport. Even on a modest MacBook, you can import a hefty point cloud and orbit around it. It's a good way to appreciate that the only real limit is your hardware, not an arbitrary ceiling inside the application.
- Open Grasshopper and type a slider. Grasshopper is Rhino's visual programming environment. Pull a number slider onto the canvas, connect it to a simple component, and you are doing parametric design. The new data types in version 8 make this side of the software friendlier for a first visit.
These five starting points skip the aimless clicking and get you straight to the parts of Rhino that feel rewarding. Once you have a feel for NURBS and a little Grasshopper logic, the rest of the toolset starts to open up quite naturally.
A typical modelling session, step by step
Let me walk you through how a morning might unfold with Rhino 8 open on a Mac. The user in this story is designing a small desktop speaker enclosure — nothing wildly complex, but enough to touch several corners of the toolset. The Mac is a two-year-old Apple Silicon laptop connected to an external display, and the multi-button mouse is within reach. Coffee is involved.
First twenty minutes: laying down the base curves. The session starts in the Top viewport, maximised to fill the screen. A few reference images have been placed on a background layer using the PictureFrame command — a side elevation and a top view of a rough hand sketch scanned earlier. With the InterpCrv command, a smooth NURBS curve is drawn along the speaker's side profile. The curve receives a few control-point tweaks until it matches the sketch's intention. A second curve follows for the top edge. Neither needs to be perfect yet; Rhino rewards an iterative, build-and-refine approach. The viewport is then split into four panes with a quick double-click on the viewport tab, giving simultaneous top, front, right and perspective views. Metal makes the split feel fluid on this machine — no redraw lag when switching focus between panes.
Next half-hour: surfacing and giving the form thickness. The side profile curve is duplicated and moved across to the enclosure's full width. A Loft command creates a surface between the original and the copy, producing the main body shell. The top curve is extruded downward with a slight draft angle, then trimmed against the body with Trim. At this stage the model is still an open shell — beautiful, but a zero-thickness surface. The OffsetSrf command is applied with a value of 3 mm, and the speaker enclosure suddenly has wall thickness. Rhino handles this solid operation cleanly because the original surfaces were built with good continuity; messy input geometry would have thrown a failure here, but the careful curve work earlier pays off.
Third act: details and ShrinkWrap for the grille. A recess for the driver is cut with a boolean subtraction, and the screw bosses are simple extruded circles arrayed around the opening. The front grille is a separate challenge — it needs to be a single watertight mesh for a 3D print quote later. Rather than modelling it from scratch, a loose collection of intersecting pipes and a curved faceplate is built quickly, overlapping deliberately. The ShrinkWrap command wraps the whole cluster in a clean, closed mesh envelope with a target edge length set fine enough to capture the grille pattern. Within thirty seconds, what was a messy assembly becomes a single printable mesh. The original NURBS geometry is kept on a hidden layer in case the grille shape needs adjusting later.
Winding down: quick render and Grasshopper check. With the enclosure modelled, the Raytraced viewport mode is activated. The faster render engine in Rhino 8 calculates soft shadows and material previews directly in the viewport, not in a separate window — it is enough to judge proportions and surface continuity without sending anything to a dedicated renderer. Meanwhile a tiny Grasshopper definition reads the enclosure's overall bounding box and writes the dimensions to a panel. It is a simple parametric sanity check, confirming the enclosure will fit the amplifier board that was measured yesterday.
By late morning the file is saved, the ShrinkWrap mesh is exported as an STL, and the coffee is cold. The session took about two and a half hours and moved from curve to solid to mesh without leaving the same application or converting file formats.
Watching Rhino run on ageing Intel iMacs and current Macs
I hear a handful of concerns repeated by students in the evening classes whenever a new version of Rhino arrives. The answers below come from watching people run the software on everything from an ageing Intel iMac to a current MacBook Pro.
Will it run properly on my Apple Silicon Mac, or is it a translation-layer compromise? Rhino 8 for Mac runs natively on Apple Silicon. There is no Rosetta emulation involved unless you are loading a plugin that has not yet been updated. The viewport uses Apple's Metal API directly, which means the display pipeline is talking to the GPU in a way the hardware understands natively. On an M-series chip you get responsive orbiting even with reasonably large models, and the render viewport mode uses the GPU cores properly. You are not getting a watered-down Windows port.
Is the Mac version missing features compared to the Windows release? The gap has narrowed significantly with version 8. The Mac build now includes SubD Creases, ShrinkWrap, PushPull workflows, and the revamped Grasshopper data types — all features that were once Windows-only or arrived late on the Mac side. There are still a few third-party plugins that remain Windows-exclusive, and some very specialised manufacturing tools are absent from the Mac version, but for the core modelling, rendering and parametric workflows the two platforms are genuinely comparable. If your work centres on NURBS modelling, SubD, mesh repair and Grasshopper, the Mac version is feature-complete for your needs.
Does Rhino force a subscription model these days? Rhino's licensing approach has not shifted to subscription. The software is sold as a permanent licence with an optional upgrade path when a new major version arrives. You install it and it works indefinitely on your current operating system. There is no monthly fee and no cloud-based feature gating. That independence is a significant reason people choose Rhino over competing tools, especially in education and small studios where predictable costs matter.
Will a trackpad be enough, or do I really need a mouse? The official recommendation of a multi-button mouse with a scroll wheel is not marketing padding. Rhino's command flow leans heavily on the right mouse button for repeating the last command, and the scroll wheel zooms in and out of the viewport in a way that a trackpad pinch struggles to match for precision. You can use a trackpad — the software functions — but after an hour of modelling you will feel the friction. A basic three-button mouse costs very little and changes how fast you work.
Drag it into Applications, then steer the first week
Installing Rhino 8 on a Mac is straightforward — mount the disk image, follow the Gatekeeper-friendly step in Terminal, and drag the application into your Applications folder. What you do in the first week after that determines whether you feel at home or slightly overwhelmed. These are the things I tell my evening class to try before any structured learning.
- Customise the middle mouse button immediately. Open Rhino's preferences, go to the mouse section, and set the middle mouse button to pop up a small, personally curated toolbar. Put frequently used commands there —
ExtrudeCrv,BooleanDifference,Join,Trim. A toolbar that appears under your cursor saves more time than any keyboard shortcut you will learn this month. - Spend an hour with the Properties panel open. Select an object and watch what the panel shows. Switch between the object's layer, material, and display mode tabs. Understanding that a single object carries all this data — and that you can override it per-viewport — unlocks the mental model for how Rhino organises a scene.
- Learn the Osnap dialogue properly. Object snaps are not an afterthought in Rhino; they are the core of precise modelling. Disable the ones you do not use often and leave about four active.
End,Near,MidandIntcover most situations. Toggling them on the fly with the Osnap panel prevents the cursor from snapping to a dozen candidates at once, which is a common new-user frustration. - Resist the urge to explode everything. New users coming from polygon modellers often explode solids into surfaces to tweak individual faces. Rhino works better when you keep solids intact and use the solid-editing commands like
MoveFace,PushPullandSolidPtOn. Exploding a solid for a small adjustment is like dismantling a chair to adjust one leg — it works, but you create more work reassembling it. - Set up a template file on day one. Open a blank file, set your preferred grid spacing, units, layer structure, and viewport arrangement, then save it as a template. Every new project starts clean and familiar. Five minutes of setup now saves repeating the same housekeeping for every project for the next year.
An architect's morning with PushPull and SubD Creases
An architect I know switched her conceptual massing workflow to Rhino 8 after years in a BIM-first tool. Her scenario is typical for someone who needs to explore form rapidly before committing to a building information model later in the project.
She starts with a rough site plan imported as a PDF underlay. A few boundary curves are traced and extruded into simple massing blocks representing the allowable building envelope. This is where PushPull changes her pace. She selects a face of a block — representing the eastern wing of a proposed building — and pulls it outward by two metres. Rhino treats the solid as a direct-manipulation object, extending the adjacent faces and keeping the geometry closed. No explode, no rebuild, no history tree. She pulls the western facade face back, tapers a courtyard opening, and within ten minutes has a massing model with several articulated volumes, all watertight solids.
Once the massing is broadly settled, she converts one block to a SubD object and begins sculpting a softer roof profile. The SubD Creases feature added in Rhino 8 lets her mark specific edges as sharp while leaving the surrounding surface smooth — a hybrid of box-modelling control and organic subdivision. The roof ridge stays crisp while the curved overhang blends smoothly into the walls. This kind of edge-weight control used to require workarounds; now it is a right-click on an edge and a slider.
By lunchtime she has a concept model that reads well in a client presentation, is dimensionally accurate enough to check against planning constraints, and can be exported to her BIM tool as a reference solid. The whole session happened in one file without format translation or rebuilding geometry.
How Rhino 8 compares with similar Mac apps
People evaluating a 3D modeller for a Mac often look at three names alongside Rhino: Blender, SketchUp, and Autodesk Fusion. They serve overlapping audiences but think differently about geometry, and that difference matters more than any feature checklist.
Rhino versus Blender. Blender is a polygon-based 3D creation suite with an extraordinary feature set — sculpting, animation, video editing, full rendering, simulation. It is free and open-source, and it runs beautifully on macOS. Where Rhino diverges is the geometry engine. Rhino is a NURBS modeller at its core; a curve is a precise mathematical object, not a series of line segments. For product design, marine hulls, jewellery and anything that needs to be manufactured from smooth, exact surfaces, Rhino's precision is the reason people choose it. Blender can produce beautiful renders and organic forms, but it does not natively output engineering drawings with tolerances or drive a CNC machine with the same confidence. The two tools complement each other well — many designers model the precision parts in Rhino and the organic surroundings in Blender.
Rhino versus SketchUp. SketchUp's appeal is immediacy. The push-pull interface is genuinely intuitive, and someone can produce a recognisable architectural model within their first hour. Rhino's learning curve is steeper, but the ceiling is dramatically higher. SketchUp models are mesh-based and tend to become unwieldy when complex curved geometry enters the scene. Rhino's NURBS surfaces stay smooth and editable at any scale. The PushPull command added in Rhino 8 narrows the immediacy gap — you can now grab a solid face and pull it directly, much like SketchUp — but Rhino gives you that workflow alongside lofting, sweeping, boolean operations and Grasshopper's parametric logic. For a quick massing study, SketchUp still wins on speed. For a model that will be refined over weeks and eventually sent to a manufacturer, Rhino is the more capable environment.
Rhino versus Autodesk Fusion. Fusion is a parametric solid modeller with integrated CAM, simulation and cloud-based collaboration tools. It is a different philosophy: Fusion wants you to build a timeline-based feature history where every sketch and extrusion is a node you can revisit. Rhino is a direct
Rhino 8 for Mac brings the display firmly into the present with Metal-based graphics, making viewport navigation noticeably smoother. You will also find a more customisable interface so you can arrange palettes to suit your own workflow, and a new ShrinkWrap command that wraps messy geometry in a clean, watertight mesh.
- macOS 12.4 Monterey or later
- Apple Silicon or Intel processor
- At least 8 GB of RAM recommended
- 10 GB of free disk space
- A multi-button mouse with a scroll wheel is strongly recommended
Questions I keep hearing
What is NURBS modelling?
NURBS stands for Non-Uniform Rational B-Splines — it is a way of describing curves and surfaces with absolute mathematical accuracy, rather than as a mesh of flat polygons.
What is ShrinkWrap in Rhino 8?
ShrinkWrap creates a single, closed mesh that tightly wraps around any selection of geometry, which is perfect for cleaning up messy models or preparing complex assemblies for 3D printing.
Questions from the class 0
Sign in or join the class to ask a question.
Nobody has asked anything yet. If you have used it on a real job, say what the file did.
Also on the Mac Apps shelf
The whole Mac Apps shelf Rider
Builds .NET and Unity projects in a cross-platform IDE.
Rider
Builds .NET and Unity projects in a cross-platform IDE.
 RightFont
Manages and previews fonts directly from the menu bar.
RightFont
Manages and previews fonts directly from the menu bar.
 Remove-It
Uninstalls apps and removes their leftover files.
Remove-It
Uninstalls apps and removes their leftover files.
 Raycast Pro
Launches apps and commands from a keyboard palette.
Raycast Pro
Launches apps and commands from a keyboard palette.
 RAR Extractor
Previews and extracts compressed archive contents.
RAR Extractor
Previews and extracts compressed archive contents.
 RAR Extractor - unzip
Extracts files from compressed archives like RAR and ZIP.
RAR Extractor - unzip
Extracts files from compressed archives like RAR and ZIP.
 Screen Studio
Records your screen while automatically smoothing cursor movement and trimming silence.
Screen Studio
Records your screen while automatically smoothing cursor movement and trimming silence.
 ScreenFlow
Captures and edits screen recordings, then turns your clicks and taps into animated callouts.
ScreenFlow
Captures and edits screen recordings, then turns your clicks and taps into animated callouts.