 ASPNetWorld

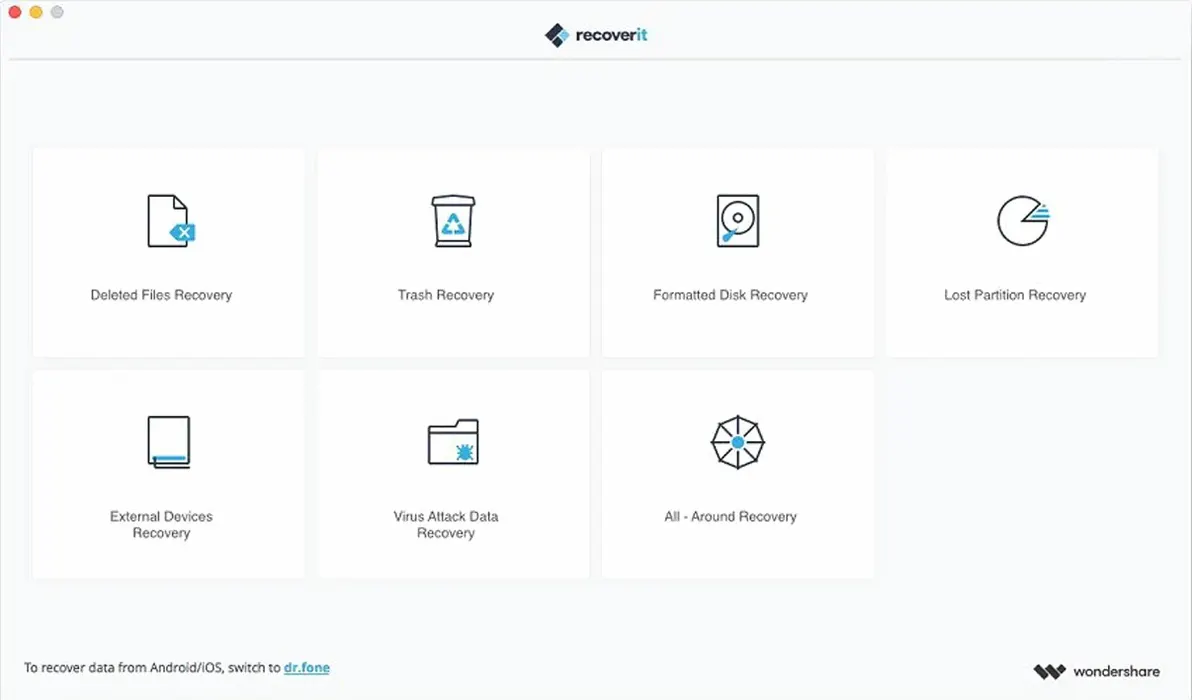
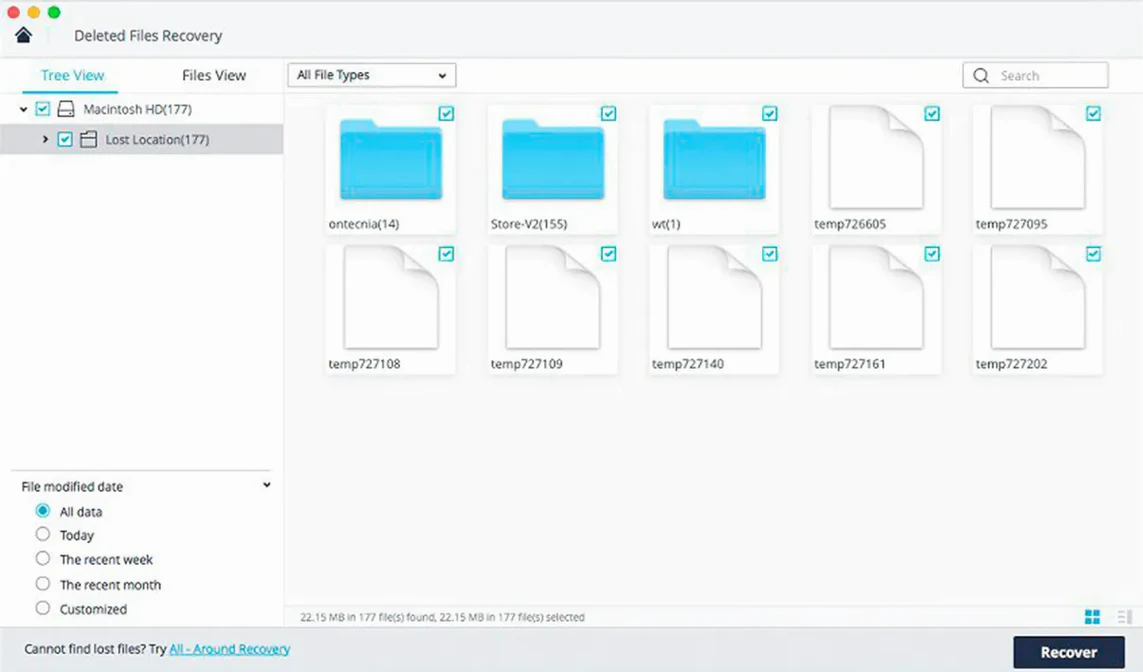
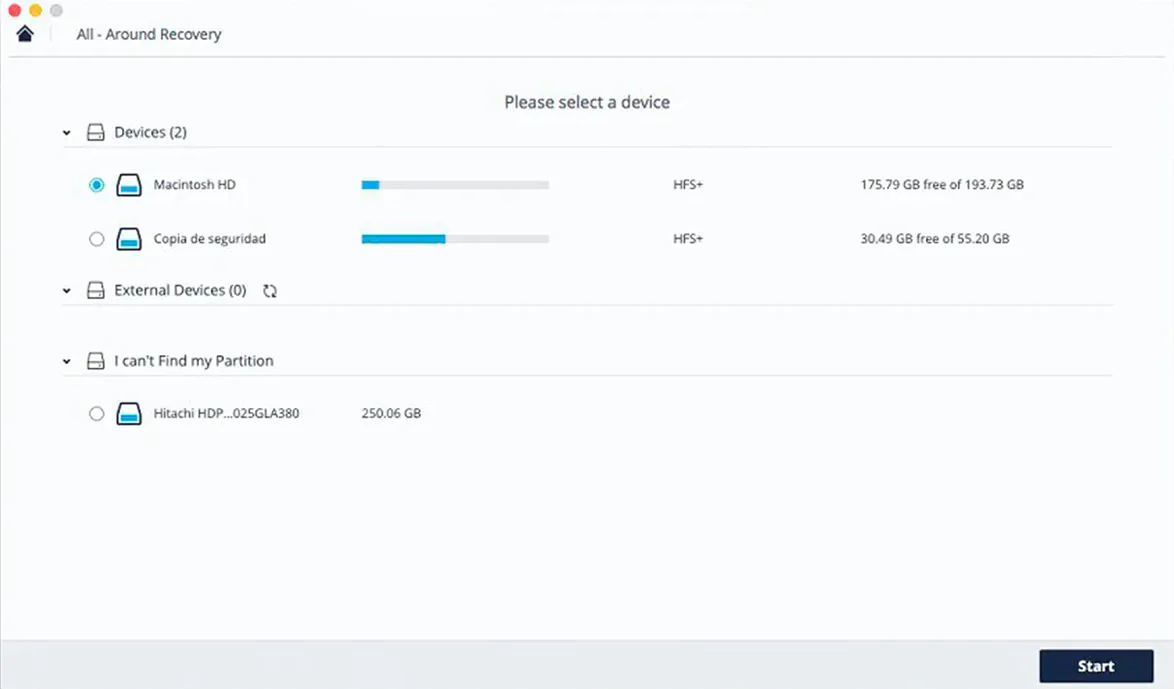
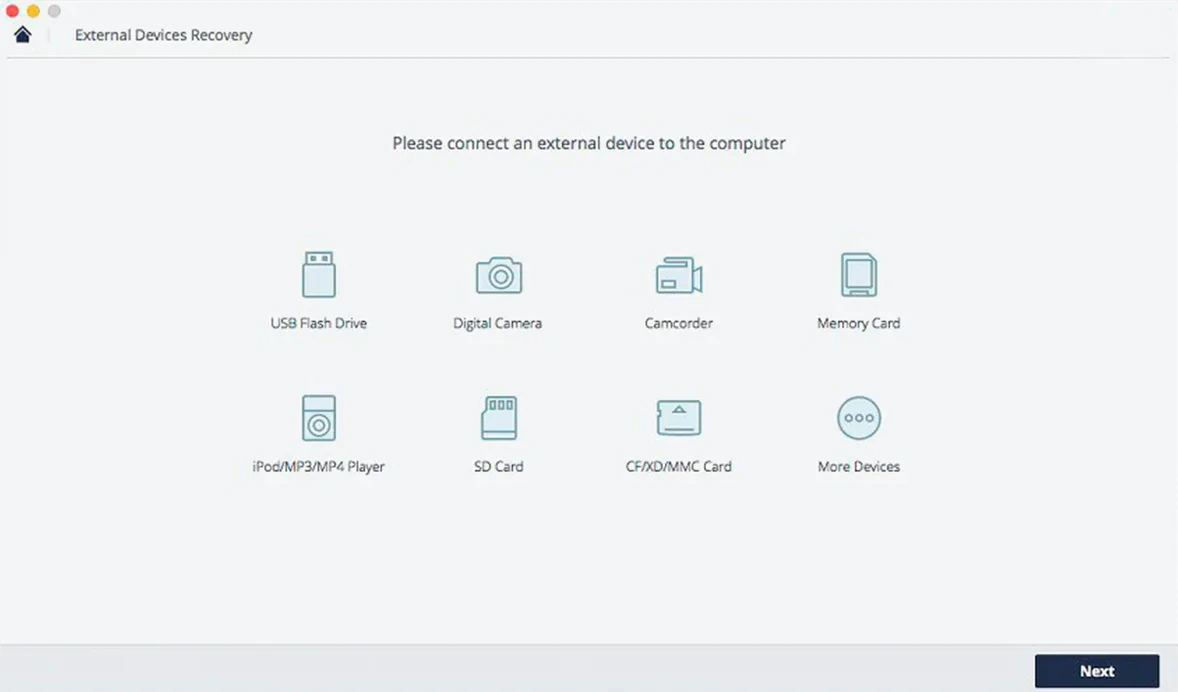
The Enhanced Recovery method kicks in when a quick scan doesn't find what you need. It's a deeper, more thorough search — useful for drives that have been reformatted or files lost long ago.
Preview a lost file
Before committing to a full recovery, you can preview photos, documents, and videos to check they're intact. This is a proper sanity saver; you know exactly what you're getting back before the export begins.
Recover from an external drive
Recoverit works across internal Mac disks, external hard drives, SSDs, USB flash drives, and SD cards. The process stays the same regardless of the device — scan, preview, then restore to a safe location.
Rescuing a photographer’s dead SD card, step by step
Let me walk you through what a morning with Recoverit actually feels like. I’ll use a real scenario: a photographer friend rang me in a mild panic because an SD card from a weekend shoot had decided to play dead. The Mac’s Finder showed nothing — no folders, no images, just a prompt to initialise the disk. We didn’t initialise it, obviously. That’s rule one: never write anything new to a drive you want to recover data from.
We mounted the card through a USB reader, launched Recoverit, and the drive appeared in the main window inside a tidy grid of available devices. A single click selected it, and the Start button began the quick scan. While the progress bar crept along, the app started populating a tree of found files in real time — you don’t have to wait until the scan finishes to see what’s coming back. That’s a thoughtful touch; it cuts the anxiety down considerably.
Within about four minutes, thumbnails began filling the preview pane. We could see the weekend’s RAW files sitting there, complete with filenames and original folder structure. I switched to the File Type view, filtered for images only, and checked a handful of previews at full size. All intact. The quick scan had caught about ninety percent of the card’s contents, but a few video clips from the evening were missing. That’s when we let the Enhanced Recovery module run — it added another twenty minutes to the process, but it pulled the .MOV files out of what must have been a corrupted directory table. By lunchtime, every shot was back on a safe internal drive, and my friend had stopped pacing.
Faster quick scans and other refinements that speed up your day
Version 14 brought refinements rather than a ground-up rewrite, but a few of them genuinely affect how the app fits into a working day. The scanning engine received a quiet but meaningful speed bump — quick scans on healthy media now complete noticeably faster than they did in the 13.x branch, especially on APFS-formatted volumes. That’s the kind of change you don’t measure in seconds; you measure it in how many fewer cups of tea you drink while waiting.
The preview system was extended to cover more RAW photo formats, which matters if you’re pulling files from modern mirrorless cameras. Previously, some proprietary RAW variants would show a generic icon rather than a thumbnail; now the renderer handles them properly, so you can confirm a file’s content before restoring it. Video previews also gained support for longer clips — earlier builds would truncate playback at around two minutes, but the current release streams the whole file.
Under the hood, the developers improved the way Recoverit handles interrupted scans. If the app quits unexpectedly — say, a power cut or a macOS forced restart — the session state is saved, and you can resume from where you left off rather than starting the scan again. That’s a small thing until you’ve just spent an hour deep-scanning a 4 TB external drive and the cat steps on the power strip.
The interface received a light polish too. The device-selection screen now groups internal and external drives more clearly, and the scan-results panel uses a collapsible sidebar that makes navigating a deep folder tree less fiddly than in earlier versions. None of this rewrites the rulebook; it just removes friction from a process that’s already stressful enough.
Two preference tweaks to make before your first serious scan
Out of the box, Recoverit works with sensible defaults, but a couple of adjustments will make it fit your habits better. Open the preferences pane before your first serious scan — it lives under the app menu, labelled simply Preferences.
The first thing I tick is Resume interrupted scan. It’s not on by default, and I can’t think of a good reason to leave it off. Recovery sessions on large drives can run for hours; losing progress because macOS decided to install an update overnight is infuriating.
Next, look at the File type filter list. By default, the scan casts a wide net — documents, images, video, audio, archives, emails, the lot. If you know you’re only hunting for a missing Logic Pro session or a folder of spreadsheets, uncheck the categories you don’t need. It trims the scan time and keeps the results list from ballooning with irrelevant files. You can always re-enable them later if the first pass doesn’t turn up what you expected.
The Preview quality slider is worth a glance too. On older Macs — say, a 2017 MacBook Air — dropping it to medium keeps the thumbnail rendering snappy when the results list runs into the thousands. The previews are still clear enough to identify a file; you just save a little RAM and GPU bandwidth for the operating system.
Finally, set a dedicated output folder that lives on a different physical drive from the one you’re scanning. Recovery tools should never write restored files back to the same disk they’re reading from — it risks overwriting the very data you’re trying to save. Recoverit prompts you with a warning if you try, but pre-configuring a safe destination in preferences means you won’t even see the warning.
Recovering a filmmaker’s portable SSD that travels between Macs
Picture an independent filmmaker who shoots on a Blackmagic Pocket Cinema Camera, edits in DaVinci Resolve, and keeps project files on a portable 2 TB SSD that travels between a Mac Studio at home and a MacBook Pro on location. One Tuesday, after a long day of B-roll, the SSD connects but refuses to mount. Disk Utility sees the physical device but lists the volume as uninitialised. There’s about 600 GB of footage on there — rushes from three separate shoots, plus a nearly finished edit of a short documentary.
This is where Recoverit’s deep-scan behaviour earns its place. The filmmaker launches the app, sees the unmounted SSD in the device list under External Drives, and starts a scan on the raw device rather than a mounted volume. The quick scan finds a handful of orphaned .MOV files, but the directory structure is gone. That’s expected — the partition table is what’s damaged, not the files themselves.
Switching to the deep-scan mode, Recoverit starts reading the storage block by block, looking for file signatures. An hour later, the results pane fills with familiar clip names, sorted into folders by file type. The filmmaker previews a few clips directly in the app — the colour, the framing, the audio track, all present. A full recovery to the Mac Studio’s internal drive takes another forty minutes, and by evening the project is back in Resolve, relinked and playing without a single missing frame. The torrent recoverit chatter you sometimes see online misses the point entirely; this is about a tool doing one specific, difficult job when you need it most.
A workflow for recovering formatted-camera-card video
Let’s build a specific, repeatable workflow for a common disaster: you’ve accidentally formatted an SD card in-camera before transferring the day’s footage. The card now shows as empty in the Finder, but the camera hasn’t overwritten the data with new recordings. Here’s the recovery path I teach in my evening classes.
Step 1: Lock the card. Physically slide the write-protect tab on the SD card to the locked position before it goes anywhere near a computer. This guarantees macOS won’t write Spotlight indexes or .DS_Store files to it when you connect the reader.
Step 2: Launch Recoverit and select the card. In the device grid, it’ll appear under External Drives with its capacity listed. Click once to highlight it, then hit Start. The quick scan begins immediately.
Step 3: Watch the live results. As the scan progresses, the file tree populates. Switch to File Type view and expand the Video category. You’ll likely see your clips appearing while the progress bar is still moving. Thumbnails render as the scan finds them, so you can start identifying the important shots early.
Step 4: Preview the critical clips. Before recovering anything, double-click a few files to open the preview window. Check the duration, the audio waveform, and scrub through to confirm there’s no corruption. A formatted card rarely damages the video data itself — formatting just clears the allocation table — so previews usually play cleanly.
Step 5: If the quick scan misses files, run Enhanced Recovery. This is sometimes necessary if the camera’s formatting routine wrote a new, empty file system over the old one. Click the Deep Scan button that appears after the quick scan finishes. It’ll take longer — roughly one minute per gigabyte, depending on the card’s read speed — but it locates files by their internal structure rather than directory entries.
Step 6: Recover to a safe location. Tick the checkbox next to the files or folders you want, click Recover, and choose a folder on your Mac’s internal drive. Never restore directly back to the SD card. Once the transfer completes, open the destination folder and confirm everything plays. Only then should you unlock the card and consider it safe for reuse.
This workflow works identically whether you’re pulling footage from a Canon, Sony, Panasonic, or Blackmagic body — the file signatures Recoverit hunts for are standard across manufacturers. For anyone searching wondershare recoverit full mac or similar phrases, the important thing to know is that the full-fat version includes both scan modes and the file-format breadth that makes this workflow possible on a single card without switching tools. The recovery itself is methodical; the magic is simply that the data was never really gone in the first place.
- macOS 10.14 or later
- Intel-based Mac
Questions I keep hearing
What types of storage can Recoverit scan for lost files?
It can scan internal Mac disks as well as external HDDs, SSDs, USB flash drives, and memory cards.
Questions from the class 0
Sign in or join the class to ask a question.
Nobody has asked anything yet. If you have used it on a real job, say what the file did.
Also on the Mac Apps shelf
The whole Mac Apps shelf Wondershare Filmora
Helps vloggers and teachers assemble polished videos without a professional timeline.
Wondershare Filmora
Helps vloggers and teachers assemble polished videos without a professional timeline.
 Wondershare UniConverter
Converts, compresses, and merges video files into a single format your editor and players understand.
Wondershare UniConverter
Converts, compresses, and merges video files into a single format your editor and players understand.
 Workspaces
Restores a complete project setup—files, folders, and web pages—in a single click.
Workspaces
Restores a complete project setup—files, folders, and web pages—in a single click.
 Wirecast Pro
Streams live video with built-in scoreboard overlays, replays, and multi-camera switching.
Wirecast Pro
Streams live video with built-in scoreboard overlays, replays, and multi-camera switching.
 Wipr
Makes cookie banners and popups vanish without a single settings toggle.
Wipr
Makes cookie banners and popups vanish without a single settings toggle.
 WinZip Mac Pro
Lets you right-click a messy folder and find every duplicate, archive, and file to tidy up.
WinZip Mac Pro
Lets you right-click a messy folder and find every duplicate, archive, and file to tidy up.
 Winclone Pro
Packages a Boot Camp Windows installation into an image and restores it onto a new Mac.
Winclone Pro
Packages a Boot Camp Windows installation into an image and restores it onto a new Mac.
 WidgetWall
Places over twenty mini-apps, from a Pomodoro timer to a TikTok viewer, directly on your desktop.
WidgetWall
Places over twenty mini-apps, from a Pomodoro timer to a TikTok viewer, directly on your desktop.