 ASPNetWorld
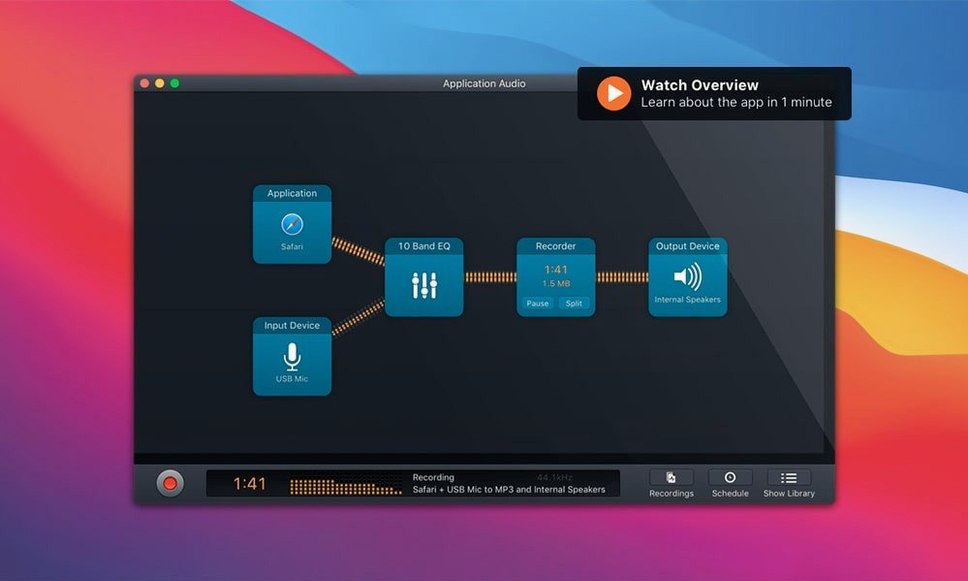
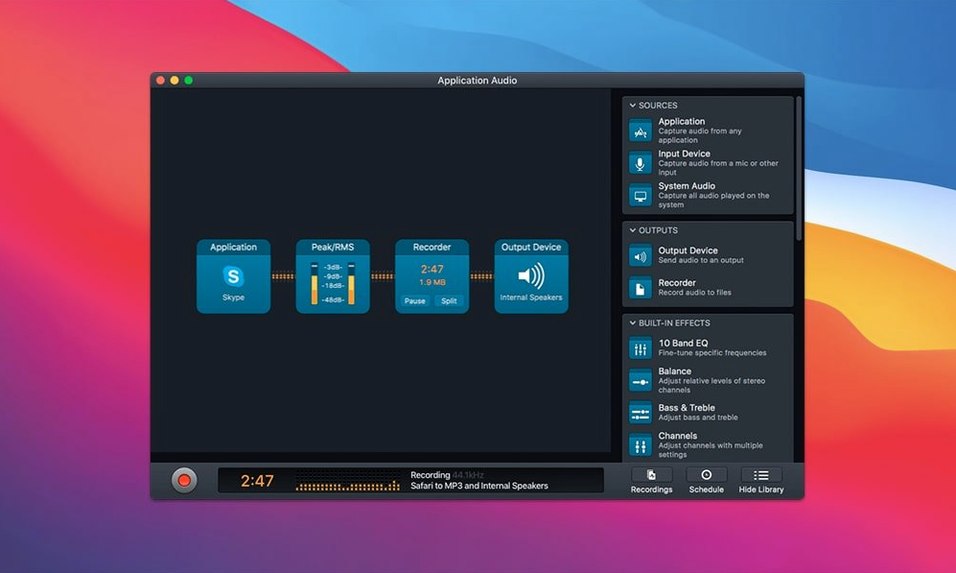
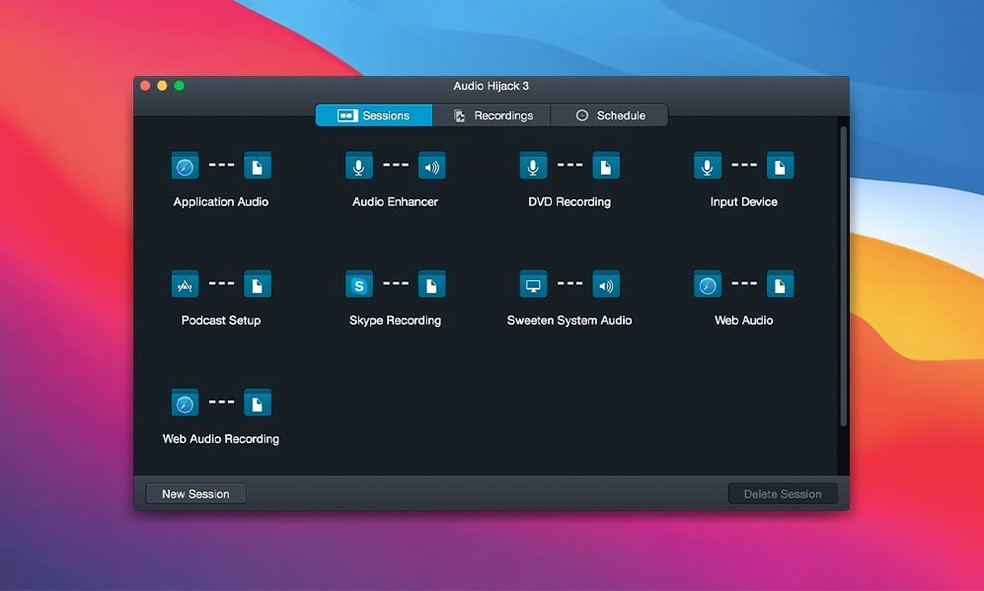
The Transcribe block, powered by a quietly updated Whisper backend, turns a recorded interview into a searchable text document without sending a single syllable to the cloud. It is one of those features that makes you rethink what an audio routing tool can be, but it also raises the most common question people have before they install Audio Hijack: what exactly can it capture? The honest answer is almost anything that produces sound on a Mac. You can pull audio from Safari, Music, or a DVD player, grab a VoIP call from Skype or FaceTime, pipe in a USB microphone, or digitise a collection of old cassettes and vinyl through an analogue input.
The second question is usually about what happens to the audio after it is captured. Recording is only half the story. The app lets you chain processing blocks directly in the signal path, so you can apply the Denoise, Declick, and Dehum filters to clean up a crackly record or a hissy tape while it records, rather than fixing it later in a separate editor. Once you are happy with the sound, you can export the file as a high-resolution FLAC.
There is often a quiet question about system compatibility that users hesitate to ask. The current version, 4.6.0, introduces official support for macOS 27 Golden Gate while maintaining compatibility back to macOS 14.4, which means you are not forced into upgrading your operating system just to keep the tool working. The update also refines the transcription block by moving to a recommended model system, making it simpler to get an accurate result without tweaking obscure settings.
The first time you launch Audio Hijack, the block layout looks inviting, but a handful of defaults are worth adjusting before you record anything important. Open the app's preferences and switch to the Recording tab. The default output format is MP3 at 128 kbps, which is perfectly fine for voice memos but undersells what the app can do. If you are archiving vinyl, capturing a high-quality stream, or recording a podcast interview you plan to edit, bump the format to FLAC or at least a 256 kbps AAC. You will hear the difference on any half-decent speakers.
Next, check the File Naming section. Out of the box, recordings land in your Music folder with a timestamp-based name. That is tidy but useless when you are hunting for last Tuesday's call with a client. I tell my evening class students to create a dedicated folder per project and set Audio Hijack to save there automatically. While you are in preferences, look at the Silence Monitor setting. It is switched off by default, and turning it on with a sensible threshold of around 30 seconds means you will not come back to a three-hour recording of a Zoom call where everyone wandered off for lunch and left their mics open.
The Advanced tab holds one more gem: the option to increase the recording buffer. The default works for most setups, but if you are running an older Intel machine with a spinning hard drive, bumping the buffer to 500 milliseconds prevents the occasional dropout glitch that otherwise makes a perfectly good take unusable.
Thursday evening VoIP recording starts with three blocks
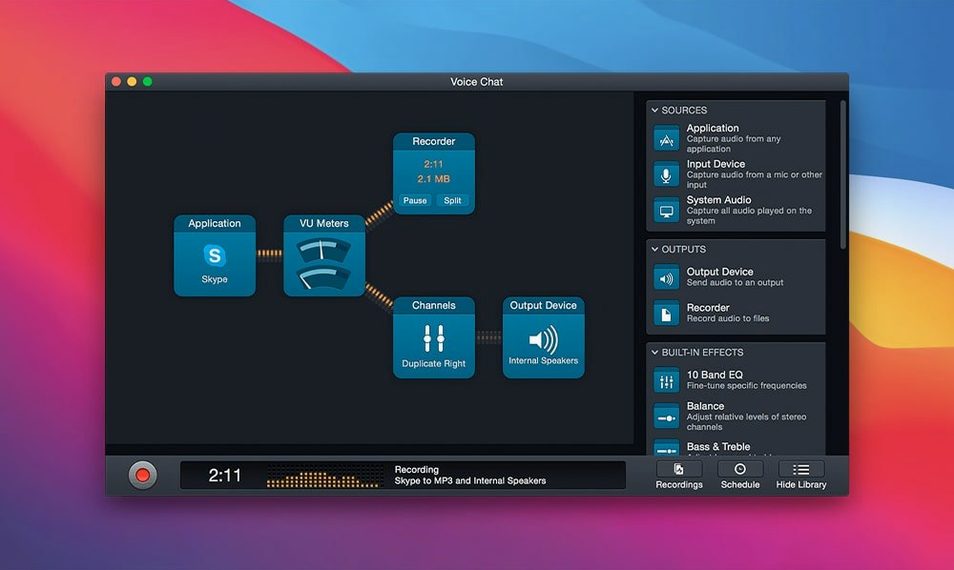
Imagine it is Thursday evening and you have scheduled a remote interview for a podcast episode. You open Audio Hijack and choose the Record VoIP Call template, which drops three blocks onto the canvas: an input from your voice-call application, a recorder, and an output block patched to your headphones so you can monitor the conversation without feedback. You double-click the input block and confirm it is pulling audio from FaceTime rather than something else running in the background. The block briefly flashes its level meter and you see both your own mic and the remote caller's voice registering on separate channels.
You drag a Denoise block from the palette and slot it between the input and the recorder. A gentle reduction of about 6 dB cleans up the slight hum from your guest's old USB headset without making their voice sound processed. You also add a Volume block and apply a small boost to the guest's channel, because their levels were a touch low during the pre-call check. The chain now reads: Application Input → Denoise → Volume → Recorder → Output. You name the session after your guest, set the recording destination to the episode's working folder, and hit the large red button in the toolbar. The timer starts counting and you concentrate on the conversation, not on the software.
After the call ends, you stop the recording and switch to the Recordings tab. The file appears immediately, timestamped and ready to play. You right-click it and choose Transcribe, which queues the Whisper-based processing. A couple of minutes later, because you selected the recommended model in version 4.6.0, you have a timestamped transcription that makes editing decisions obvious. You can skim the text, find the segment where your guest described their studio setup, and jump straight to that point in the audio. The whole session, from template to transcript, took under an hour and involved no third-party services.
Activity Monitor shows a barely visible CPU hit during capture
Will this slow down my Mac while it records? On any Mac that meets the minimum requirement of macOS 14.4, the CPU hit during a straightforward recording is barely visible in Activity Monitor. The signal processing happens efficiently, and the app has been written specifically for Apple's audio subsystem rather than being a cross-platform port. Where you notice a load is when you stack multiple heavy processing blocks, particularly the transcription engine, which uses the GPU if one is available. Even then, a modern Apple Silicon machine handles it without the fans spinning up.
Can I capture a streaming radio show while I work on something else? Absolutely, and it is one of the classic use cases. You set the input to Safari or Music, add a recorder block, and minimise the app. It sits in the menu bar with a small waveform indicator to reassure you it is still running. You can browse, edit documents, or even play other audio through a different output device without polluting the recording. The capture is per-application, not a blunt system-wide loopback.
Is the transcription block truly offline, and how accurate is it? The block runs entirely on your machine using the Whisper.cpp engine. Nothing leaves your Mac. Accuracy depends heavily on the recording quality and the clarity of the speakers, but with a clean signal from a decent microphone, the recommended model in version 4.6.0 produces transcripts that need only light proofreading. Heavy accents, overlapping speech, and poor room acoustics still trip it up, which is true of any speech-to-text system.
The Recommended transcription model replaced the old default
Version 4.6.0, released in late August 2026, focused on macOS 27 compatibility, which in practice means the app survived Apple's annual architectural shuffle without breaking. More interesting for daily users was the switch to a Recommended transcription model. Before this update, the Transcribe block presented a list of model sizes and left you guessing which one to pick. Too large a model, and transcription took forever; too small, and the text was riddled with errors. The recommended option picks a sensible default based on your Mac's hardware, which removes one of those friction points that used to send beginners down a rabbit hole of forum threads.
The backend update from Whisper.cpp 1.7.4 to 1.9.2 brought noticeable speed improvements on Apple Silicon machines, shaving roughly 20-30% off the transcription time for the same model size. If you record regular meetings or lectures and rely on the transcript for searchability, that time adds up over a week. The update also improved handling of non-English words within predominantly English speech, so a guest who drops a French phrase into the conversation no longer produces a garbled mess of phonetics.
A block defaults to the built-in mic instead of your USB interface
The most common mistake is forgetting to check which input device a block is actually listening to. A template might default to your Mac's built-in microphone when you meant to capture a USB interface, and you do not notice until you play back an hour of silence or, worse, room tone with distant keyboard clatter. Always click each input block and verify the source before you press record, especially after plugging in new hardware.
Another classic blunder is piling on processing blocks without listening to the combined effect. Three noise-reduction blocks in a row, each set to modest levels, can turn a warm voice recording into something that sounds like a bad telephone connection. The signal path is linear and cumulative, so add one block, test it, and only then add another. Your ears are a better judge than the meters.
Beginners also tend to ignore the Schedule feature, which is tucked into the bottom of each session's inspector panel. If you always want to capture a particular internet radio show that airs at the same time each week, you can set a recurring schedule and forget about it. The app wakes up, records, and stops automatically. People who discover this after months of setting phone reminders tend to be quietly furious at themselves.
Finally, a surprising number of new users do not realise that Audio Hijack can record in split-channel mode, where each source lands on a separate track within the same file. This makes editing a multi-person podcast dramatically easier, because you can adjust levels and remove coughs from individual speakers after the fact. The setting lives in the recorder block's advanced options, and it is easy to miss if you never open that panel. Once you know it is there, it changes how you plan every group recording.
Version 4.6.0 brings compatibility with macOS 27 Golden Gate and a smarter transcription experience. The built-in Transcribe block now suggests a recommended model, taking the guesswork out of choosing, while the underlying Whisper.cpp engine has been updated from 1.7.4 to 1.9.2 for improved accuracy.
- macOS 14.4 or later (including macOS 27 Golden Gate)
- Apple Silicon or Intel Mac
Questions I keep hearing
Can Audio Hijack record both sides of a Skype or FaceTime call?
Yes. The app can capture audio from individual applications, so you can set it to record the full conversation including your own voice from the microphone.
Does it include tools for cleaning up old recordings?
It has built-in processing blocks like Denoise, Declick, and Dehum, which you can apply in real time to remove hiss, pops, and electrical hum from digitised tapes or records.
What file formats can I save my recordings in?
Alongside common compressed formats, Audio Hijack supports lossless FLAC output for archiving audio at full quality.
Questions from the class 0
Sign in or join the class to ask a question.
Nobody has asked anything yet. If you have used it on a real job, say what the file did.
Also on the Audio shelf
The whole Audio shelf Audiobook Builder
Joins dozens of audio files into a single, properly chaptered audiobook with cover artwork.
Audiobook Builder
Joins dozens of audio files into a single, properly chaptered audiobook with cover artwork.
 Bitwig Studio
Gives producers a sandbox for recording, sound design, and live performance with modular freedom.
Bitwig Studio
Gives producers a sandbox for recording, sound design, and live performance with modular freedom.
 Boom 3D
Reshapes your Mac's entire output with an equaliser, a volume boost, and spatial widening.
Boom 3D
Reshapes your Mac's entire output with an equaliser, a volume boost, and spatial widening.
 Amadeus Pro
Edits and analyses audio files with a customisable favourite actions palette.
Amadeus Pro
Edits and analyses audio files with a customisable favourite actions palette.
 Airfoil
Sends any Mac audio to AirPlay and Bluetooth speakers around your home.
Airfoil
Sends any Mac audio to AirPlay and Bluetooth speakers around your home.
 AIMP
Plays a vast range of audio file formats from a familiar desktop interface.
AIMP
Plays a vast range of audio file formats from a familiar desktop interface.
 Cockos REAPER
Turns a Mac into a full multitrack studio for recording, arranging and mixing audio.
Cockos REAPER
Turns a Mac into a full multitrack studio for recording, arranging and mixing audio.
 Cubase
Provides a musical workspace that keeps up with an arrangement as fast as you can imagine it.
Cubase
Provides a musical workspace that keeps up with an arrangement as fast as you can imagine it.