 ASPNetWorld

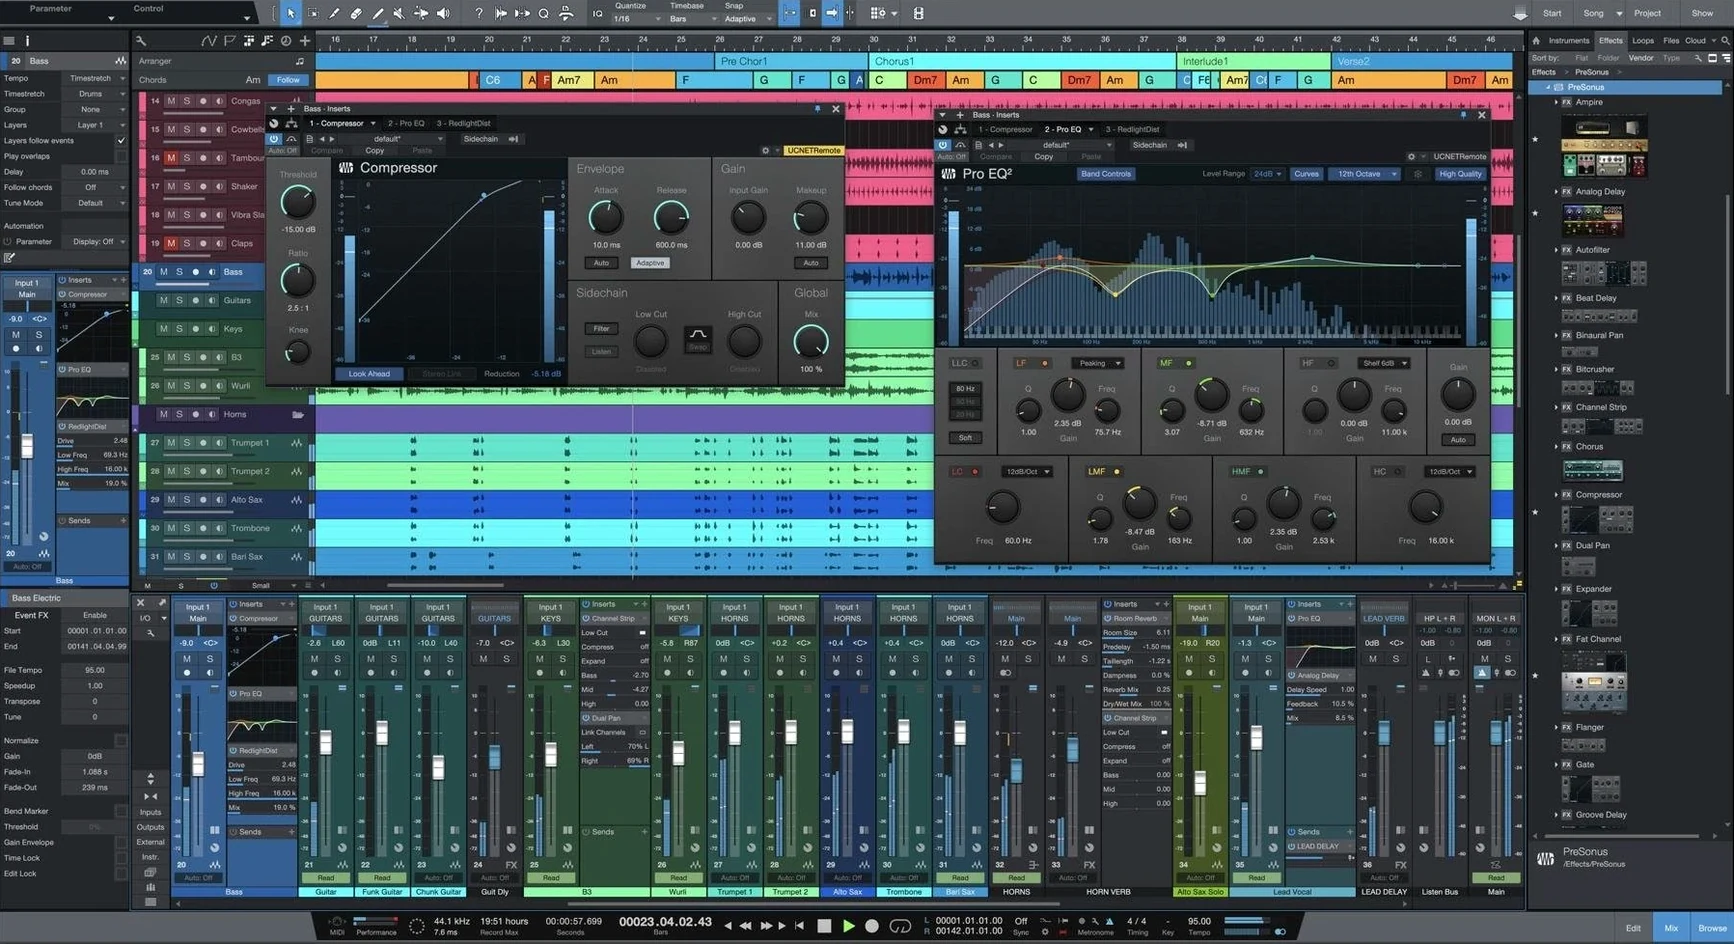
Studio One is built around drag and drop: instruments, effects and audio move into place with a single gesture, from a rough idea to a finished arrangement. If you are checking compatibility before anything else, the figure that matters is macOS 12.4. That’s the minimum operating system for version 7.0.0, and it applies whether your machine has an Apple Silicon chip or an older Intel 64-bit processor; both architectures are supported natively.
A typical workflow in the Song page follows a relaxed sequence, though nothing is locked in place. You can drop a virtual instrument onto the timeline to handle synthesis, sample playback, rhythms, or performance parts, then layer audio recordings on top. Native Effects plug-ins live inside the same window, so compression, EQ, and reverb are patched in without launching extra software. Once the arrangement feels solid, the drag-and-drop philosophy extends to mixing — pulling a fader level into a scene or playlist slot takes one movement, and version 7 lifts the old ceiling by adding Unlimited Launcher Scenes and Playlists.
Three additions steer this release. Advanced tempo detection maps the pulse of a freely recorded performance automatically, so you can quantise or rearrange without tapping out a tempo map by hand. AI-powered offline Stem Separation pulls vocals, drums, bass, and other elements apart from a mixed stereo file, which is handy when you’re reworking old demos. And because Studio One Pro 7 opens songs, projects, and shows created in earlier versions, a back catalogue doesn’t get stranded. One detail worth knowing: neither Studio One 6 nor version 7 supports ReWire, so if your old setup relied on that protocol you’ll need to route audio a different way.
Make the click track route only to your headphones
The first hour with any DAW throws up little friction points, and Studio One is no exception. One that catches newcomers is the metronome routing. Out of the box the click track defaults to the main output, but if you’ve set up a headphone cue mix for a vocalist you’ll wonder why it’s vanished from their ears. The fix lives in the Click section of the Song Setup window, where you can point the metronome to any available output — choose your cue bus there and it’ll appear in the headphone feed without touching your master channel.
Audio popping up on the wrong input is another classic. Studio One inherits whatever your Mac’s audio device reports as input one, and an interface with eight channels will often land the first take on a line input rather than the mic pre you’re actually patched into. Open the Audio I/O Setup from the Studio One menu, give each input a clear name — “Vocal Booth,” “Guitar DI,” “Synth L-R” — and the track input selector becomes readable instead of a guessing game. While you’re there, hide any inputs you never use so the dropdown stays clean.
A more subtle headache involves third-party plug-in scanning. After installing something fresh, Studio One sometimes skips it on launch, especially if the plug-in is a VST3 that shares a name with an older AU version you’d long forgotten about. Clicking Reset Blocklist in the Locations preferences forces a full rescan, and the plug-in manager will show you exactly which formats registered. If you’re coming from a setup that relied on ReWire — which version 7 and version 6 both dropped — this is also the moment to replace any stranded Reason or Ableton Link routing with the built-in Pipeline XT plug-in or a loopback audio path.
Hold Option-Shift on a fader for finer level adjustments
Studio One has a quiet fondness for modifier keys. Hold Option while dragging a clip and you’ll duplicate it rather than move it, which is standard across most editors. What’s less obvious is that Option-Shift while dragging a fader lets you adjust a parameter in finer increments — useful when a quarter-dB nudge is all the vocal ride needs. The same fine-control trick works on send levels and pan knobs, and it’s the kind of thing you either discover by accident in week three or never find at all.
The browser deserves more attention than it usually gets. Typing “kick” into the search field filters instruments, loops, and effects simultaneously, but adding a file-type tag like kick preset narrows the results to Impact XT kits and saved channel strips. Drag a preset straight onto a track header and Studio One builds the instrument chain in one move. A related timesaver: if you right-click any plug-in slot and choose Save Preset, that custom setting appears in the browser alongside the factory ones, searchable and ready to drag into future projects without browsing through Finder.
Macros sound intimidating until you realise they’re just a record button for repetitive chores. Open the Macro Organiser from the View menu, hit record, and perform a sequence like “freeze track, hide track, colour track grey.” Stop recording, name it, and assign a keystroke. From then on, archiving a finished guitar layer takes one key press. The organiser ships empty, which is why most people never trip over it, but it’s been sitting there quietly since long before version 7.0.0 arrived.
Max out the dropout protection while you are tracking
Before you record a single note, open Preferences > Audio Setup and bump the Dropout Protection slider to its maximum value while tracking, then pull it back to medium when you start mixing. The setting governs how aggressively the audio engine buffers, and a high buffer during playback cuts CPU load without harming latency — the trade-off only bites when you’re monitoring through plug-ins, so switching it per session stage is free performance.
Next, head to Advanced > Console and tick Show Pan Controls on All Channels. By default, stereo channels hide the pan knob, which makes sense until you want to narrow a wide synth pad without loading a utility plug-in. Enabling this exposes a simple width control that’s already wired in, and it saves dropping an effect just to turn something down the middle.
One more change that pays off early: in Preferences > Locations, add a dedicated folder for user presets and samples before you start saving your own work. If you leave it blank, custom content scatters into the application support directories, and six months later you’ll be hunting for a drum kit you tweaked and forgot. Point it to a folder inside your Documents or an external drive, and the browser will treat it as a first-class library alongside the factory content.
The version 7 installer leaves your old Studio One 6 untouched
A recurring question is whether version 7 will sit alongside an existing Studio One 6 installation without conflict. It does — the installer places version 7 as a separate application, so your older version stays untouched. Songs, projects, and shows created in earlier releases open directly in the new version, and the only caution is that once you save in version 7 format, older releases can’t read the file. Making a backup before converting anything you care about is a sensible five-second habit.
People also ask if the AI stem separation requires an internet connection. It doesn’t. The processing runs offline on your own machine, which means a complex five-minute track might take a minute or two to separate on a base M1 Mac and noticeably less on something newer, but no audio leaves your computer. The feature lives under Audio > Detect Stems and pops the results onto new tracks automatically.
The Mac compatibility question usually comes phrased as “does it run on Apple Silicon or do I need Rosetta?” Version 7 is a universal binary, so Apple Silicon Macs run it natively with no translation layer. Intel 64-bit machines are still fully supported, and projects swap between architectures without any export step — the session file format is the same on both.
Occasionally someone asks about Studio One Pro 7 free download, or searches variations on Studio One Mac crack, and the answer is always the same: the installer and activation instructions in the download package handle everything, and there’s no need to hunt for a separate Studio One 6 Mac crack or a Studio One 7 Pro torrent to get the application running. The included guide steps through activation cleanly, and once it’s set up, the application behaves exactly as expected.
Strip a Smart Template down to the parts you actually use
Spend your first session building a template rather than a song. Open a Smart Template — the “Record and Mix” one is a good starting point — and strip it back to the bits you actually use: delete the extra reverb sends, swap the stock EQ for one you prefer, set up a headphone cue mix if you record vocals, and colour-code the track headers. Save it as your own template, and every new project inherits those decisions. Five minutes of tidying now removes a dozen small frictions from every session that follows.
When you first drag audio into the timeline, pay attention to the tempo map. If the file has a known BPM, Studio One reads it. If it doesn’t — say, a live band recording without a click track — the advanced tempo detection in version 7.0.0 analyses the performance and builds a variable tempo map automatically. Right-click the event and choose Detect Tempo, then check the tempo track. Correcting a few bar lines manually is far quicker than tapping out an entire song by hand, and once the map is accurate, quantising and adding MIDI parts becomes straightforward.
Another early habit worth forming: use the Project page for mastering, but only after you’ve lived with a mix for a day. The temptation is to bounce a track and master it immediately, yet the Project page is designed for sequencing an album or EP as much as for finalising one file. Drop in a reference track first — literally drag a commercial WAV onto the waveform area — and use the level-matched comparison to guide EQ and limiting choices. The stem separation tool can also pull apart a reference track so you can study its balance in isolation, which is a fast way to train your ears on a new monitoring setup.
Finally, explore the Launcher before you commit to a linear arrangement. Unlimited Scenes and Playlists in version 7 mean you can sketch out several song sections as looped cells, trigger them in different orders to test structure, and only then drag the best sequence onto the timeline. It’s a playful way to find an arrangement, and because the cells reference the same instrument and effect chains, any mixing you do carries straight through to the finished Song page.
Studio One 7.0.0 lifts a few long-standing limits and brings smarter analysis tools into the arrange window.
- Unlimited Launcher Scenes and Playlists let you build as many arrangement snapshots as a project needs.
- AI-powered offline Stem Separation pulls apart a mixed stereo file into vocal, drum, bass, and other stems without any online processing.
- Advanced tempo detection maps the timing of a freely recorded performance so you can quantise or rearrange without manually tapping a tempo map.
- macOS 12.4 or later
- Apple Silicon or Intel 64-bit processor
Questions I keep hearing
Will Studio One 7 open my old projects?
Yes, Studio One Pro 7 opens songs, projects, and shows created in earlier versions of the software.
Does Studio One 7 still support ReWire?
No, ReWire support is absent from both Studio One 6 and version 7, so you’ll need an alternative routing method for older sessions that depended on it.
Questions from the class 0
Sign in or join the class to ask a question.
Nobody has asked anything yet. If you have used it on a real job, say what the file did.
Also on the Audio shelf
The whole Audio shelf Steinberg Nuendo
Edits dialogue and sound for film and games.
Steinberg Nuendo
Edits dialogue and sound for film and games.
 Swinsian
Plays and organises local music files.
Swinsian
Plays and organises local music files.
 SoundSource
Gives you a menu-bar panel to adjust the volume and output of every app on your Mac individually.
SoundSource
Gives you a menu-bar panel to adjust the volume and output of every app on your Mac individually.
 Serato Studio
Builds beats and full arrangements around your existing DJ library and its stem-separated parts.
Serato Studio
Builds beats and full arrangements around your existing DJ library and its stem-separated parts.
 Serato DJ Pro
Plays two or more audio tracks in sync and lets you blend them with hardware decks.
Serato DJ Pro
Plays two or more audio tracks in sync and lets you blend them with hardware decks.
 Traktor Pro
Mixes on four decks and isolates drums, bass or vocals from a track in real time.
Traktor Pro
Mixes on four decks and isolates drums, bass or vocals from a track in real time.
 QLab
Controls audio, video and lighting cues for live performances.
QLab
Controls audio, video and lighting cues for live performances.
 Plugin Alliance Brainworx bx_mastering studio
Polishes a finished stereo mix with a few focused mastering controls.
Plugin Alliance Brainworx bx_mastering studio
Polishes a finished stereo mix with a few focused mastering controls.