 ASPNetWorld

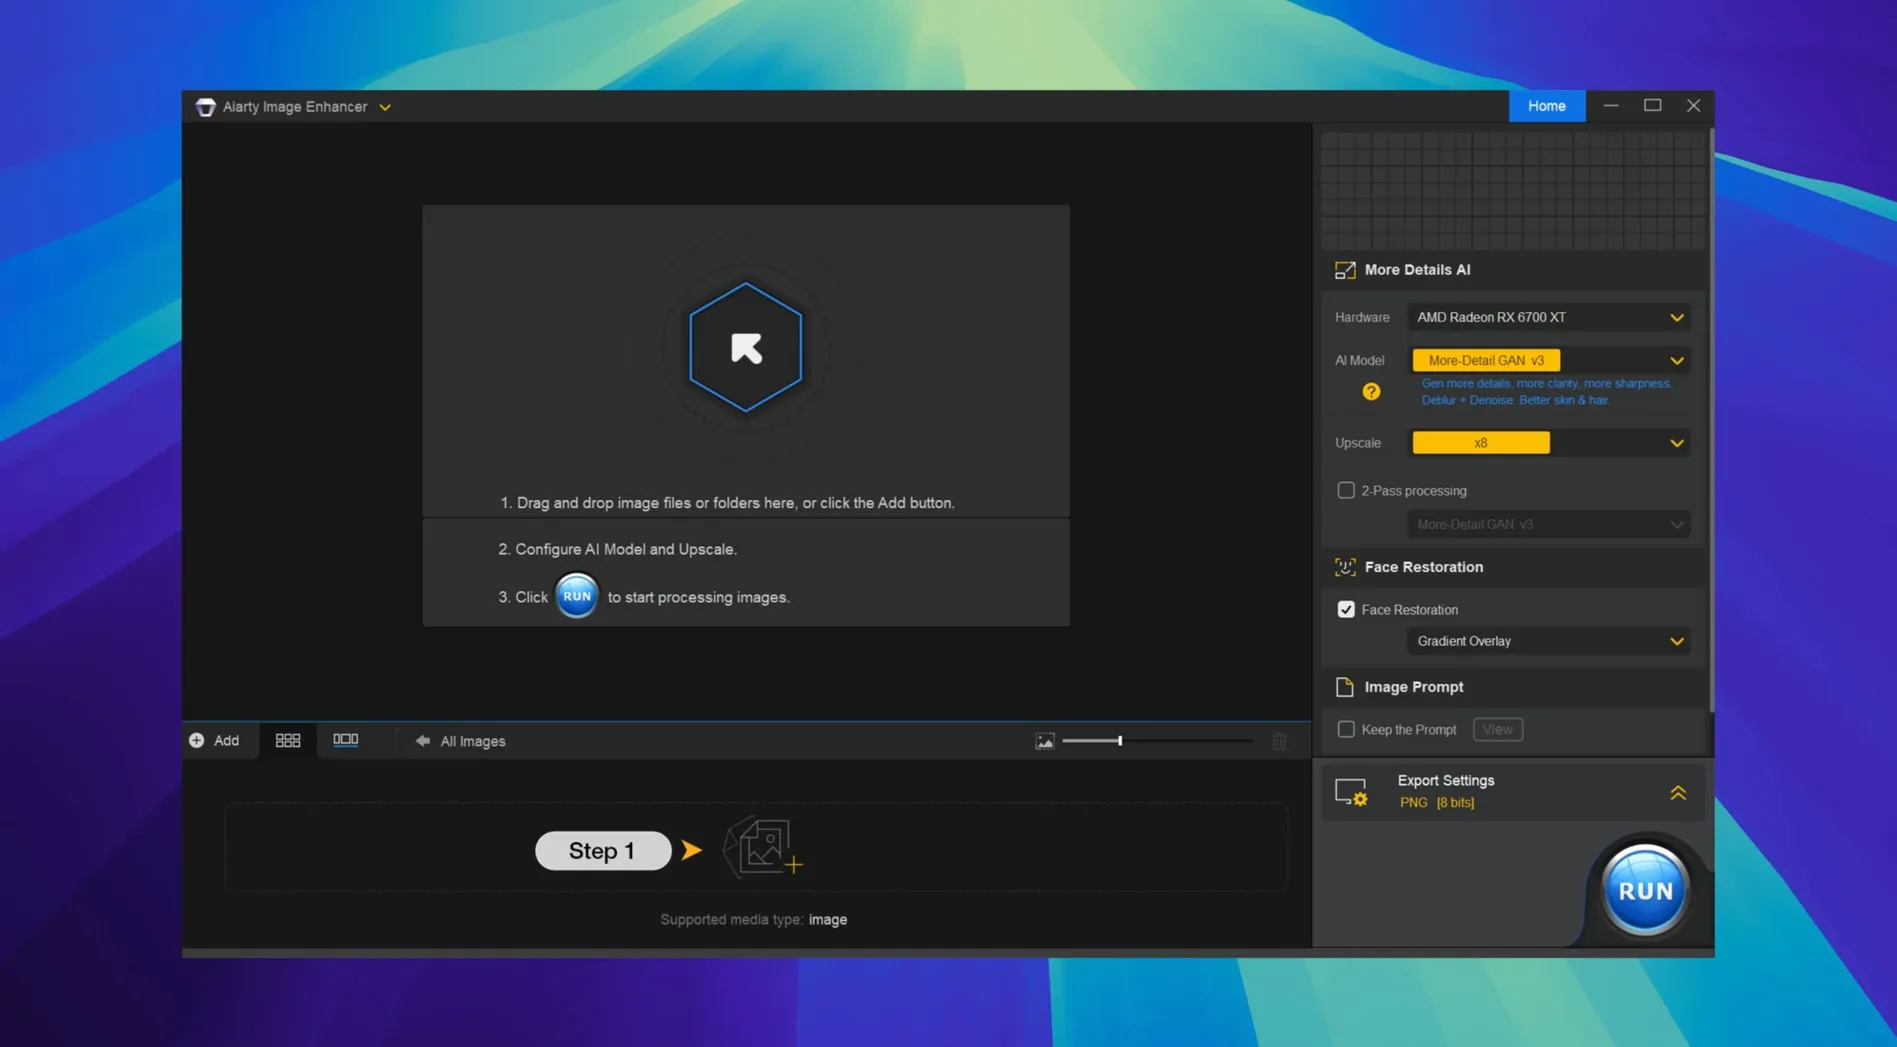
You have just pulled a batch of photos off an older DSLR, and a few of them are noisier than you remember. The shots are worth keeping, but they need more than the quick sharpening pass you would normally reach for in your editor. That is where Aiarty Image Enhancer settles in — not as a replacement for your existing photo tools, but as a specialist that handles the heavy lifting on detail and texture before you carry the results elsewhere.
- Works on both Apple Silicon and Intel 64-bit Macs running macOS 11 or later, so it fits into most current setups.
- Handles JPEG, PNG, TIFF, WebP, BMP, and AVIF files, covering the formats most people actually encounter.
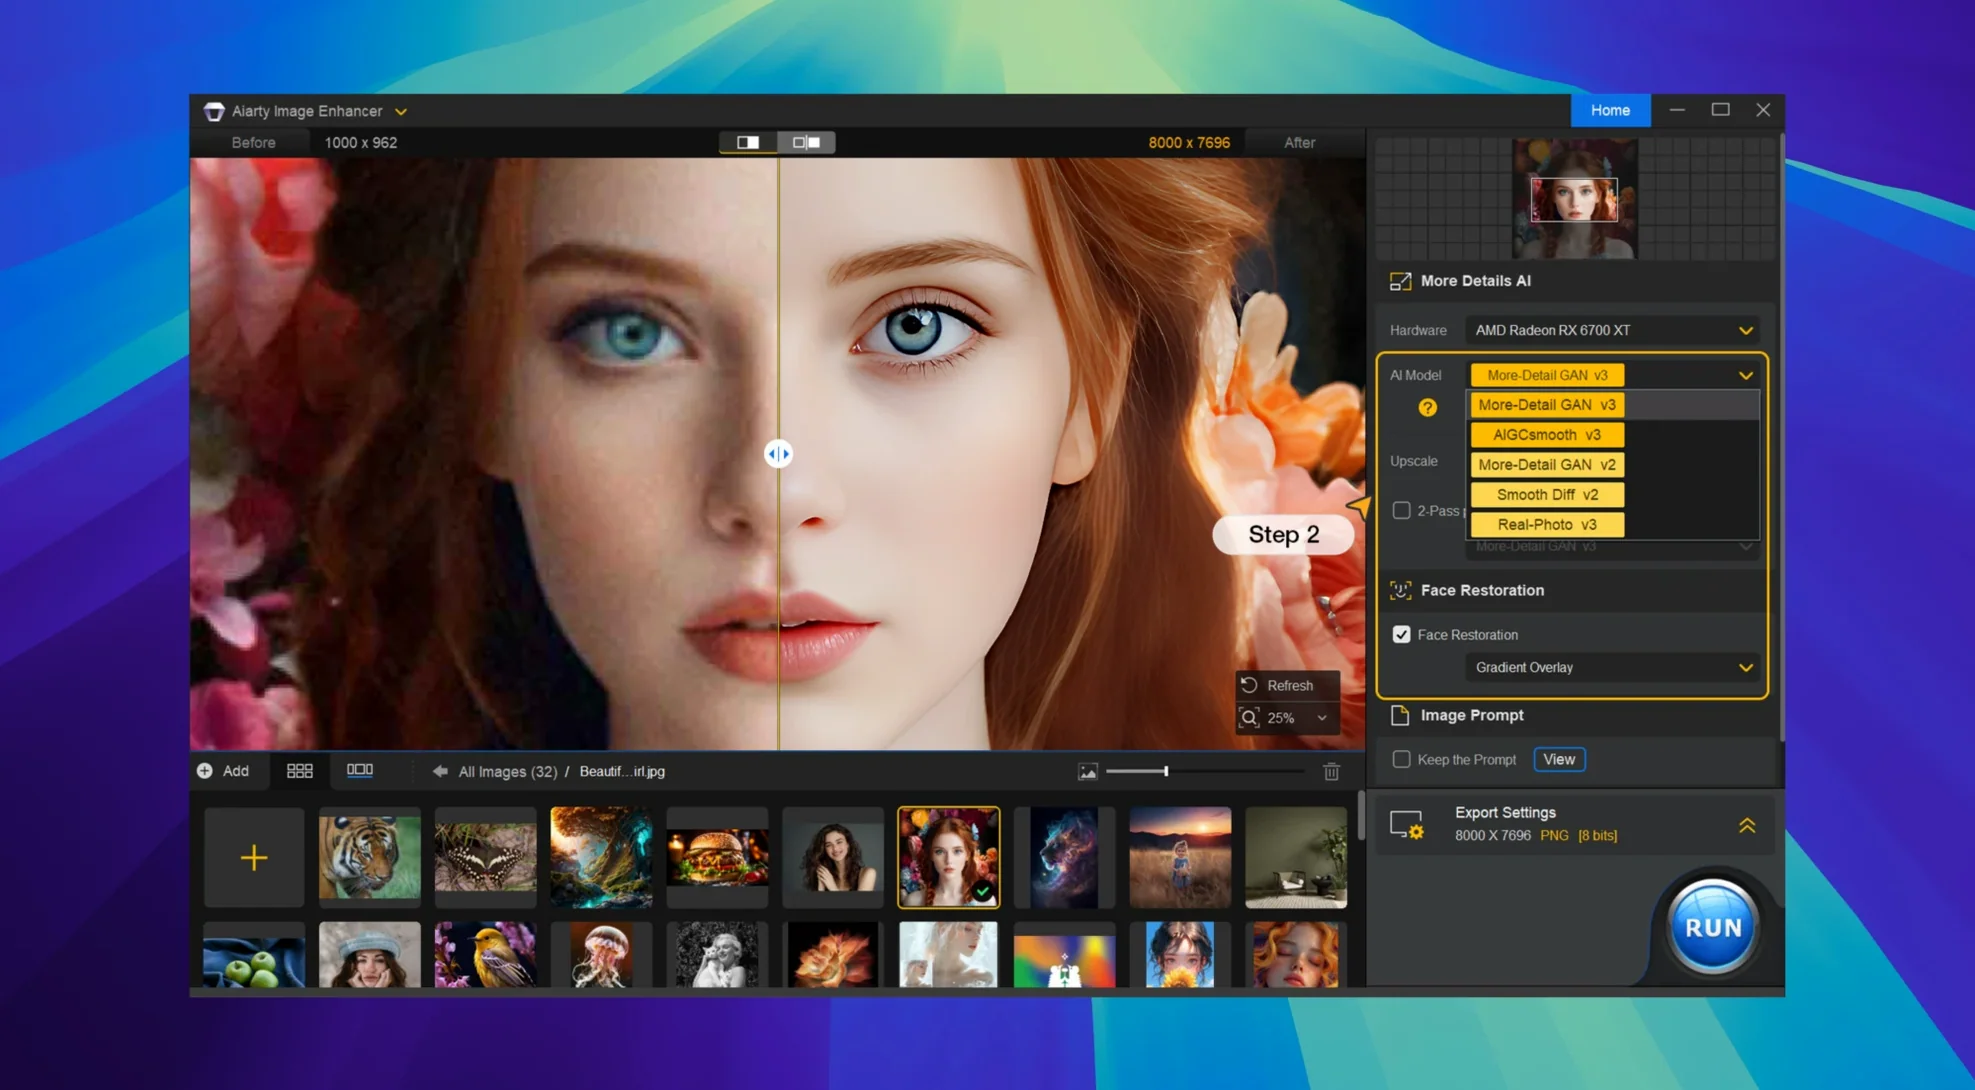
- Uses deep learning to denoise and deblur, while generating plausible skin, hair, and fabric detail rather than just smoothing everything over.
- Version 3.14 adds EXIF metadata access, which is handy when you want to check settings before judging how much a photo needs.
- Includes Lightroom Classic workflow improvements in 3.14, so it can sit near the end of a Lightroom session without feeling bolted on.
- The interface is available in English, German, Traditional Chinese, Simplified Chinese, and Japanese.
Think of it as a specialist you call in for the frames your regular tools struggle with. The rest of your workflow stays exactly where it is.
The app works best when you think of it as a dedicated processing station, not an island. A common pattern is to run Aiarty on a handful of selects from a shoot, then bring those enhanced TIFFs back into your main library. If you use Lightroom Classic, the 3.14 improvements make this smoother: export your raw files as 16-bit TIFFs, run them through the enhancer, and re-import into the same folder. Lightroom will spot the new files and ask if you want to synchronise, which keeps the enhanced version stacked with the original. This avoids the headache of a scattered folder structure where nobody knows which version is the final one.
For those who prefer Apple Photos, the logic is similar — export unmodified originals, enhance in Aiarty, then drag the results back into the library. The EXIF metadata access added in this version helps you decide which images even need the trip. If the shutter speed was low and the ISO high, you can see it at a glance before committing to an export.
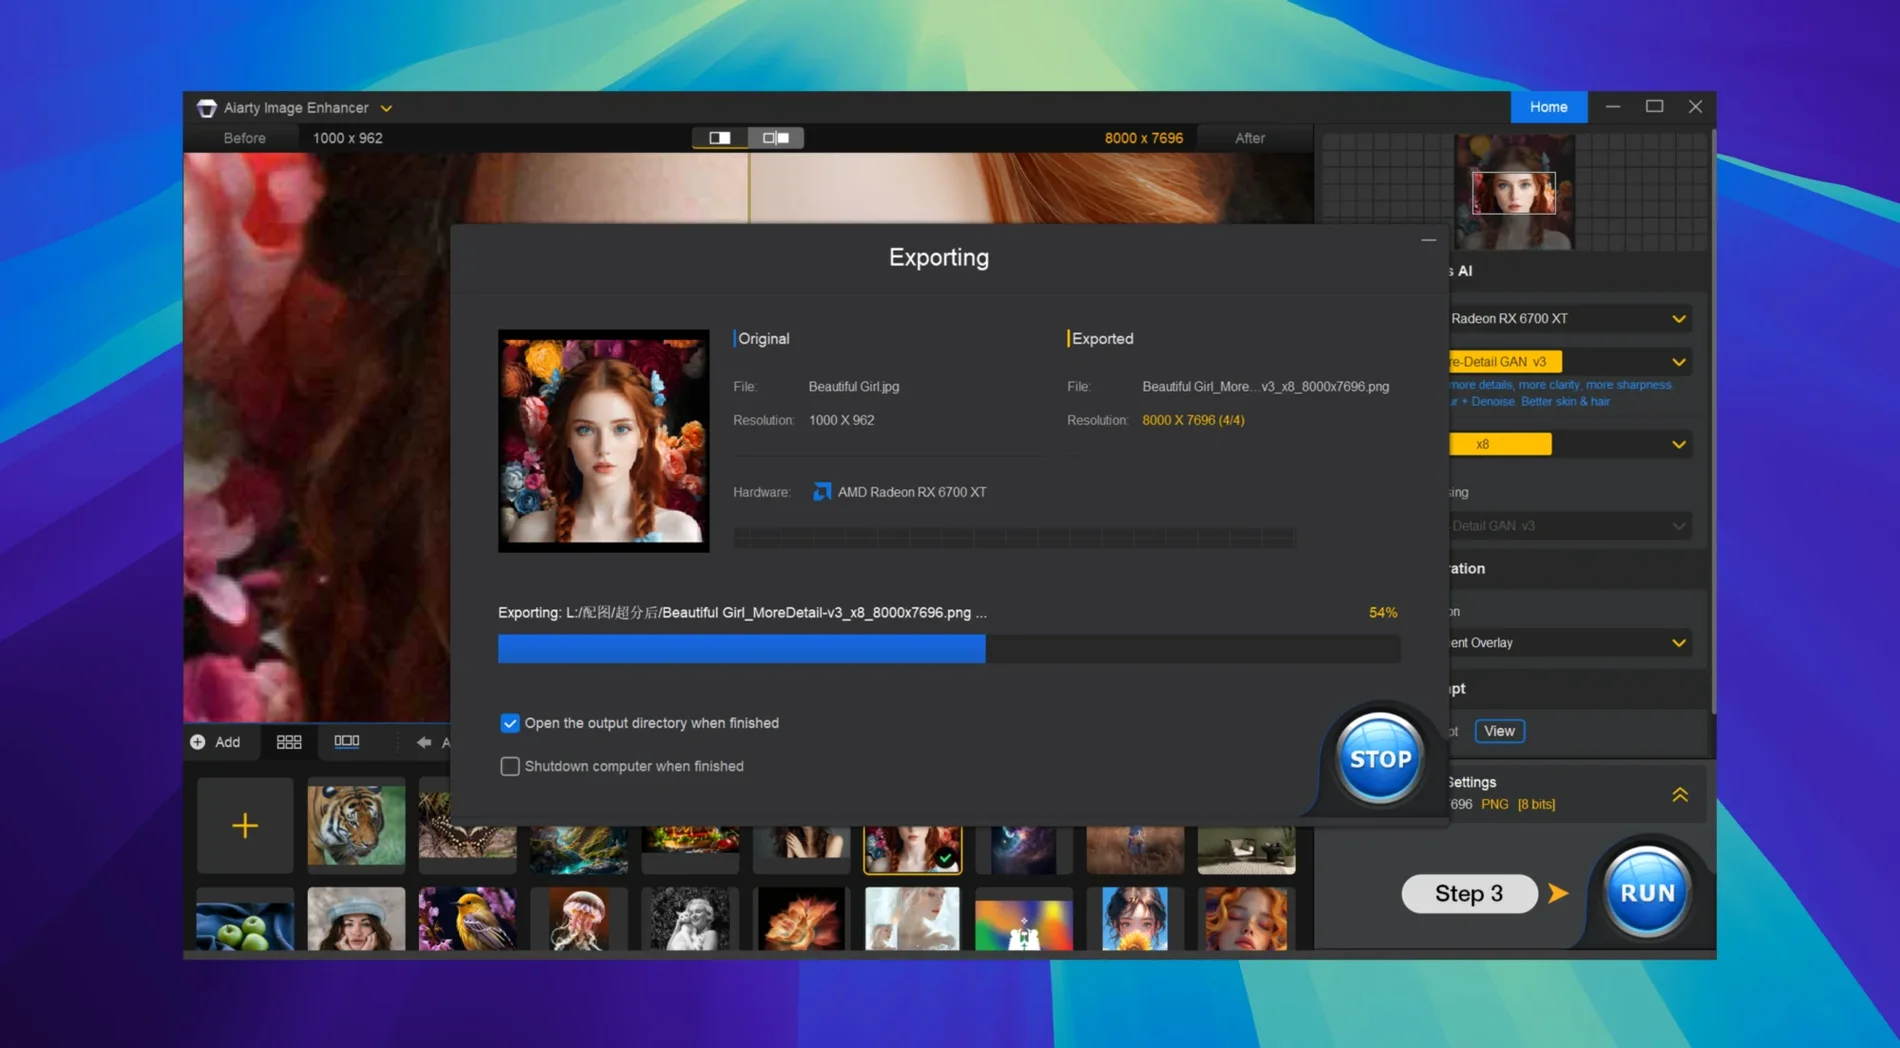
The app also plays nicely with Finder’s Quick Actions and the Mac share sheet, though it does not register itself as an official extension. The practical move is to keep Aiarty in your Dock for drag-and-drop. Batch processing a folder of JPEGs is as simple as selecting all, dragging them onto the app icon, and walking away while the deep-learning models do their work. If you are the sort of person who has asked about a 4k enhancer video equivalent for stills, this is the closest feeling — the upscaling model can push images to 32K dimensions, which is overkill for most screen use but genuinely useful when you need to crop aggressively and still have enough resolution for print.
A draggable split-screen preview hides below the surface
Aiarty is not loud about its interface, and a few thoughtful touches sit just below the surface. The preview window supports split-screen comparison with a draggable divider, so you can check what the AI is adding to skin texture or fabric detail without toggling back and forth. This matters when you are trying to decide between the denoise and deblur models — the difference is not always obvious on a first glance, and a side-by-side view makes the call quicker.
The output format selector remembers your last choice per session, but the resolution scale does something subtler: it shows the effective pixel dimensions in real time as you adjust the slider. If you are preparing files for a specific print size or a web gallery with pixel constraints, this feedback loop saves mental arithmetic. You can also type a raw number into the dimension fields rather than relying on the slider alone.
Another easily missed detail is the right-click menu on any loaded image. It gives you direct access to the source folder, a quick copy of the file path, and a shortcut to reveal the original in Finder. If you are working through a large folder and want to archive the unprocessed original before replacing it, that shortcut saves a trip through the file dialog.
Switch the default model to Restore for scanned prints and film
Out of the box, the app uses a balanced processing profile that leans towards denoising. If your typical workload involves older scanned prints or film frames, switching the default model to Restore under the AI Model preferences will save you from changing it manually every time. The restore model is trained on compression artefacts and generational loss, so it handles scanned JPEGs with a different approach than the denoise model, which assumes sensor noise patterns.
Also worth tweaking is the output colour space. The default is sRGB, which is fine for web and screen use, but if you are round-tripping through Lightroom for print you will want Adobe RGB or ProPhoto RGB selected in the export settings. The setting sticks once changed, and it prevents a subtle colour shift from appearing between your editor and the enhanced file.
On Apple Silicon Macs, the app automatically uses the Neural Engine for most operations. If you notice the machine getting warm during long batch runs — less common on M1 Max and later, but possible — you can limit processing threads under the Performance pane. Dropping from the default maximum to half the available cores still delivers brisk results while keeping fan noise civil.
Compressed Fujifilm X-Trans RAWs can trip the parser
The most frequent hiccup is a file that refuses to load. Aiarty supports a broad range of formats, including RAW files from most major camera brands, but compressed Fujifilm X-Trans RAWs can sometimes trip the parser. The workaround is to run those through Lightroom or Capture One as a 16-bit TIFF export first, then feed the TIFF into Aiarty. The enhancement result is identical to what you would get from a supported RAW, because the AI works on the raster data rather than the original sensor mosaic.
Another snag crops up when people install the app on an external monitor with a nonstandard colour profile. The preview can look slightly desaturated because Aiarty reads the system profile on launch. Quitting, switching your display to a standard profile such as Display P3 or Generic RGB, and relaunching clears it up. The exported files themselves are unaffected — it is purely a preview rendering quirk.
Users moving from a 4k ai video enhancer workflow sometimes expect the same frame-by-frame logic applied to stills and wonder why batch processing a folder of 300 images takes longer than they estimated. The short answer is that still enhancement runs a deeper inference pass per image because there is no temporal data to lean on. If time is tight, process a test batch of five images first, note the per-image speed, and multiply up. You can pause a batch at any point without losing completed work, which makes it practical to run overnight.
On the software side, Gatekeeper can occasionally block the app after a macOS point update. The fix is the standard Terminal bypass — xattr -cr /Applications/Aiarty\ Image\ Enhancer.app followed by a relaunch — and it is worth bookmarking that command if you update macOS frequently. The app runs natively on both architectures, but if you are on an M1 Mac and a particular model fails to initialise, toggling the Open with Rosetta checkbox in Finder’s Get Info panel can stabilise things while the developer patches the issue.
- macOS 11 or later
- Apple Silicon or Intel 64-bit Mac
Questions I keep hearing
Does Aiarty Image Enhancer replace Lightroom or Photoshop?
No. It complements them by focusing on denoising, deblurring, and detail generation, with Lightroom Classic workflow improvements in version 3.14.
Which file types can I open?
It supports JPEG, PNG, TIFF, WebP, BMP, and AVIF files.
Questions from the class 0
Sign in or join the class to ask a question.
Nobody has asked anything yet. If you have used it on a real job, say what the file did.
Also on the Mac Apps shelf
The whole Mac Apps shelf Aiarty Video Enhancer
Lifts old, grainy video into clearer, watchable footage.
Aiarty Video Enhancer
Lifts old, grainy video into clearer, watchable footage.
 AI Transcription
Converts batches of spoken recordings into searchable written text.
AI Transcription
Converts batches of spoken recordings into searchable written text.
 AirBuddy
Shows your AirPods battery status instantly in the menu bar.
AirBuddy
Shows your AirPods battery status instantly in the menu bar.
 Airflow
Queues up local video files for uninterrupted, hands-off playback.
Airflow
Queues up local video files for uninterrupted, hands-off playback.
 Affinity Publisher
Lays out multi-page documents combining text and high-res images for print.
Affinity Publisher
Lays out multi-page documents combining text and high-res images for print.
 Affinity Photo
Edits photos nondestructively with selective adjustments and raw processing.
Affinity Photo
Edits photos nondestructively with selective adjustments and raw processing.
 Alcove
Turns the MacBook notch into a handy capsule for alerts and controls.
Alcove
Turns the MacBook notch into a handy capsule for alerts and controls.
 Affinity Designer
Turns rough sketches into crisp, scalable vector artwork and layouts.
Affinity Designer
Turns rough sketches into crisp, scalable vector artwork and layouts.