 ASPNetWorld

You've just mounted a client's external drive alongside your own media library in a Finder window, knowing that months of cross-dragging have left the same project files scattered in three places. A simple byte-for-byte scan would find the obvious copies, but you need to understand the shape of the mess before you hit delete.
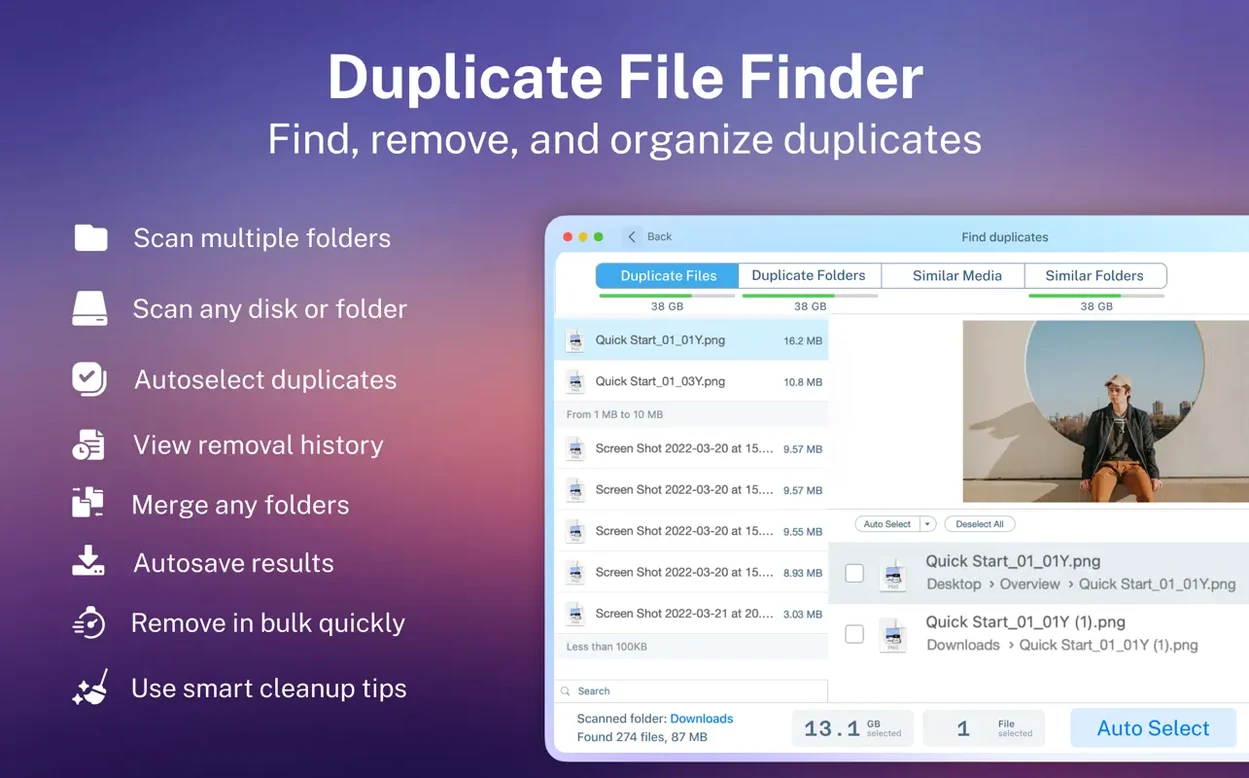
- Scan results by category. Duplicates are broken out into images, video, music, archives and documents, so you can tackle the 40GB of forgotten MP3s without touching the photo library.
- Folder merging. Beyond trashing duplicates, the app can merge folders that contain overlapping sets of files — useful when you've ended up with two incomplete 'Project Assets' folders on different drives.
- Hidden folder scanning. It reaches into the ~/Library and other hidden corners where backup artefacts and cache duplicates tend to accumulate unnoticed.
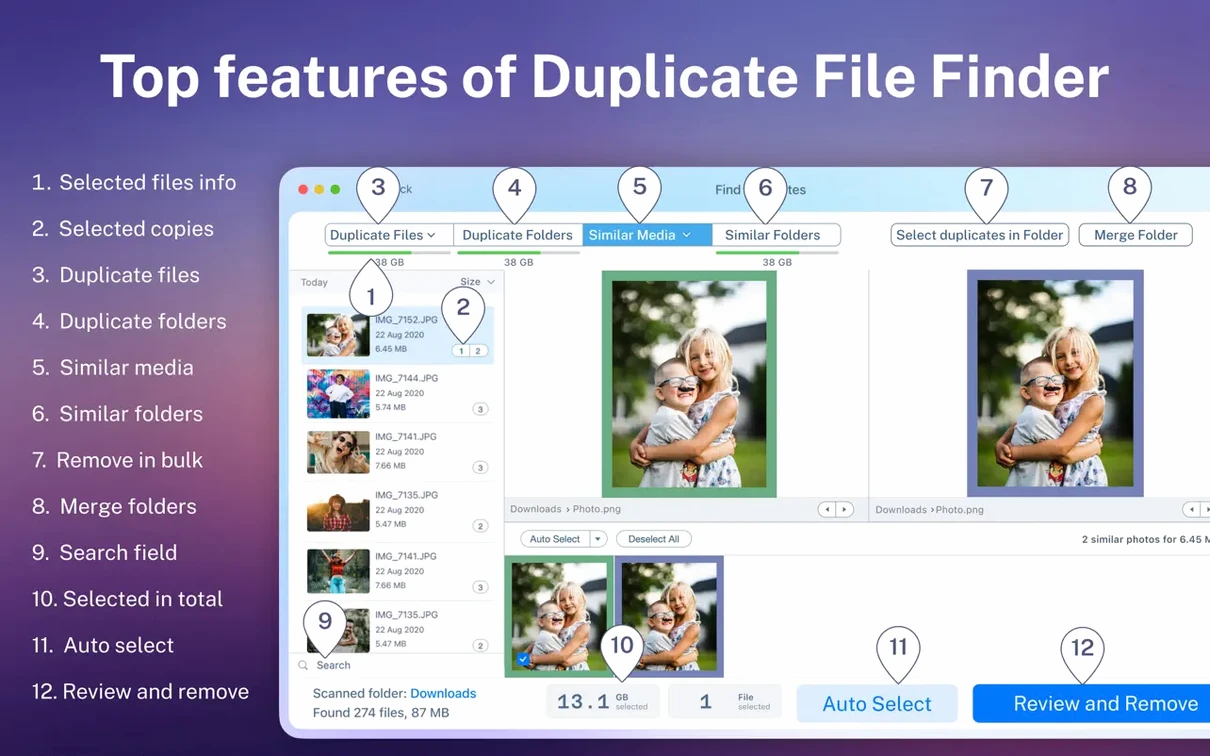
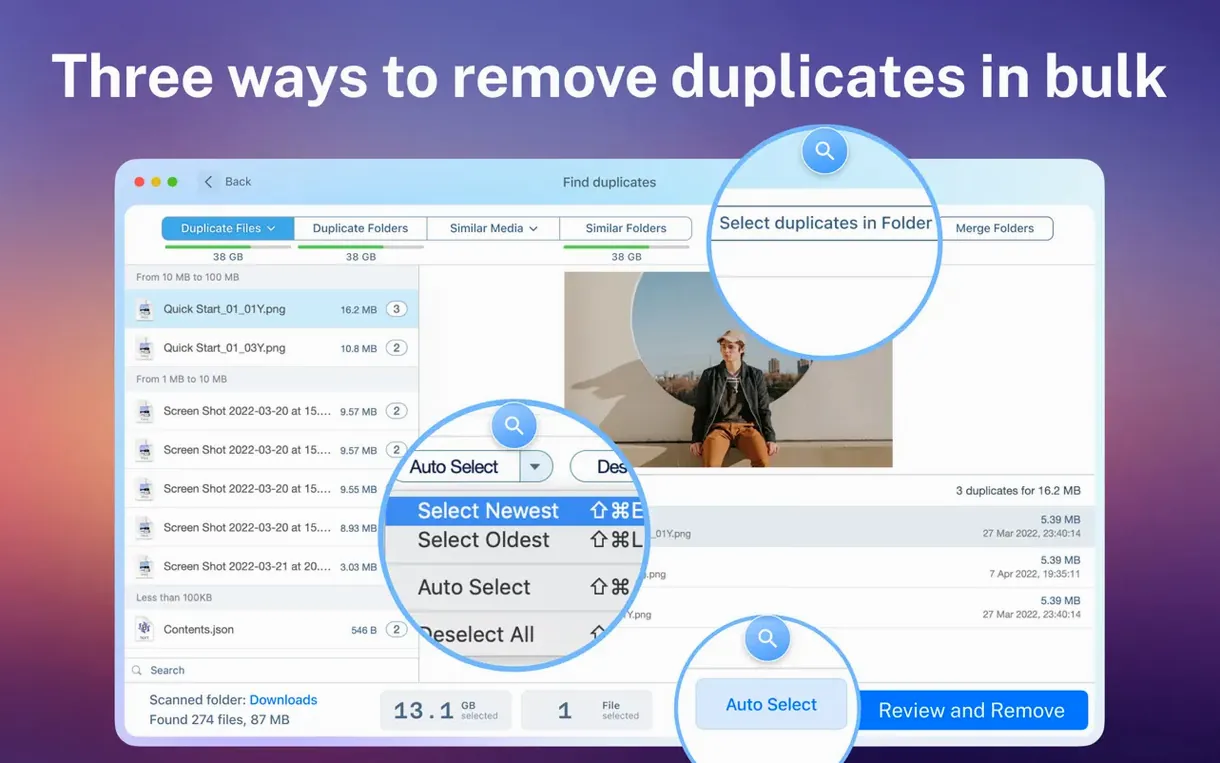
- Smart selection. The automatic selection rules save you from manually ticking hundreds of files, while still letting you adjust the logic before committing to a bulk move or permanent delete.
- Visual scan report. A colour-coded treemap shows what's eating your space at a glance, making it easier to spot a single bloated duplicate set among thousands of tiny files.
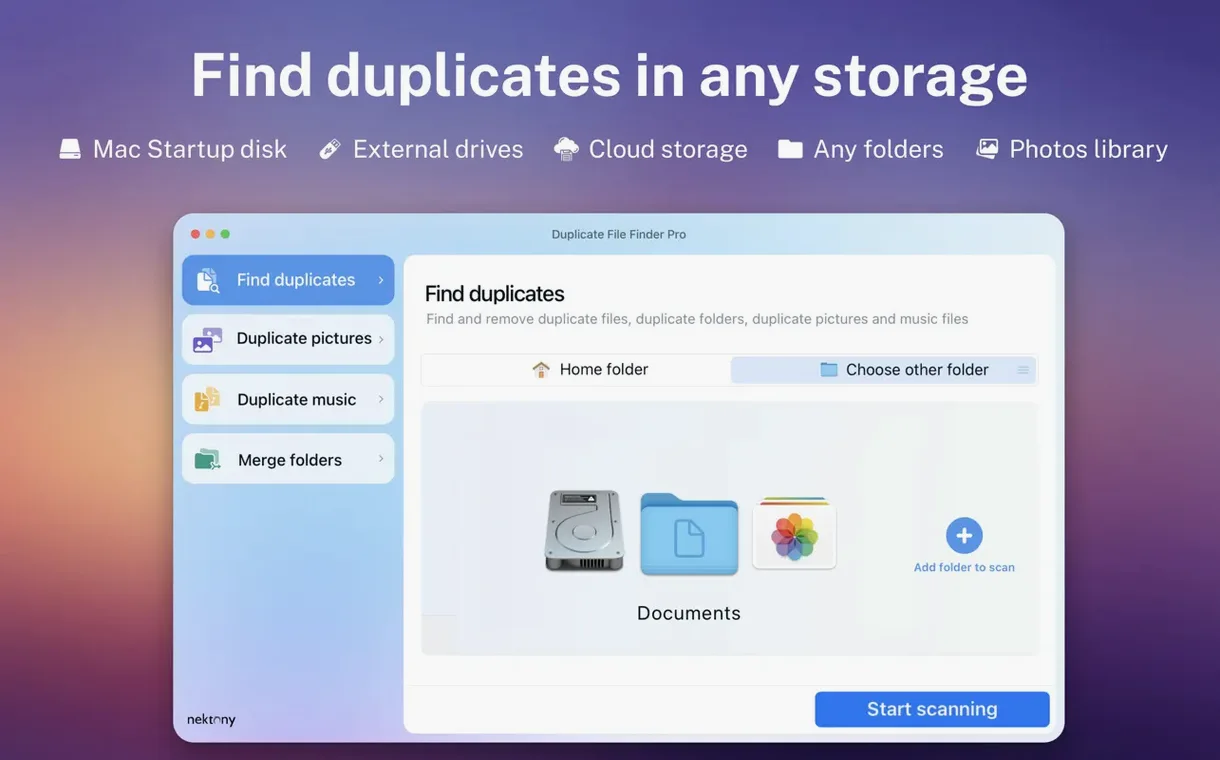
- Multi-disk scanning. Select several folders across internal and external disks in one scan, and the app treats them as a single search space rather than making you run separate passes.
Sorting the duplicate list by total size tends to surface the most rewarding targets first, and the move-to-Trash option gives you a safety net that a permanent-delete button doesn't. For anyone adding OneDrive or Dropbox to Finder on a Mac, it's worth pointing the scanner at those cloud-synced folders too — local duplicates have a habit of multiplying when selective sync keeps pulling down files you already had elsewhere.
Check the hidden-folder setting before a serious scan
The defaults are sensible, but there are a few preferences I'd adjust before running a serious scan. Open the app's preferences and look for the scan behaviour options. The first thing to check is whether hidden folders are included. If your duplicates tend to come from backup artefacts, Time Machine snapshots, or cache files tucked inside ~/Library, enabling this from the start saves you a second pass later. If you're only tidying user documents, leave it off and keep the scan focused.
Next, look at the comparison method. Depending on how the app is set up, you may be able to choose between byte-for-byte comparison and a faster filename-and-size check. The quicker method is fine for a first sweep, but when you're about to delete the only copy of a client's final mix, exact content matching matters. I tend to run the fast scan first, then switch to full comparison for any folders where the results look ambiguous.
Also worth setting is the minimum file size filter. Scanning every 2KB preference file on a full system pass adds noise and time. Setting a sensible floor — say 1MB — keeps the duplicate list readable. Finally, check the selection rules for smart selection. By default the app may favour keeping files in their original location, but you can usually tell it to prefer a specific drive or folder path. If you've just added Dropbox to Finder on your Mac and want to keep the cloud copy as the canonical one, set that folder as the preferred location before letting the app auto-tick anything.
I always verify the external drive is mounted before launching
Here's how a cleanup usually goes for me. I connect the external drive, open a Finder window to check what's actually mounted, and then launch the app. I add the Mac's home folder and the external drive as scan locations in one pass — there's no need to run them separately. The app spends a few minutes building its index, longer if the drive is a spinning disk, and then presents the visual report.
I start with the video category because that's where the gigabytes live. Sorting by total size puts the most bloated duplicate sets at the top. I select the first few sets, use the preview pane to confirm the files really are identical, and then click smart selection to handle the rest of the category. The app marks the copies it thinks are redundant; I skim the list to make sure it hasn't picked the wrong version of anything important. A quick check of the selection logic — usually it's keeping the file in the most recently modified folder — and I move the rest to Trash.
From there I work through music and archives, trusting the smart selection more as I go. The archive category often surprises me with zip files I'd forgotten about, still sitting next to the folders they were compressed from. Those go too. Finally I run the folder comparison, which spots two half-finished Project Assets folders on different disks and offers to merge them. I let it. The whole session takes under an hour, and I've reclaimed space without touching a single file I might regret.
Double-click any duplicate file for a Quick Look preview
A few things I only discovered after weeks of use, and they've since become part of my routine:
- Double-click to preview. The preview pane is obvious, but double-clicking a file in the duplicate list opens a larger Quick Look-style view. Handy when thumbnails are too small to judge two near-identical photos.
- Sort by duplicate count. Sorting by total size is the obvious move, but sorting by count shows which files have the most copies. A single file duplicated eight times across a drive is often a sign of a syncing mishap worth investigating before you simply delete the extras.
- Selecting multiple duplicates at once. Beyond smart selection, holding
Shiftand clicking a set header selects every copy in that group. It's faster than ticking boxes one by one when you only want to act on three or four sets. - Restore from Trash. Because the app moves files to Trash by default, restoring a mistaken selection is just a right-click away in the Dock. You don't need the app open to undo a bad bulk move.
- Hidden folder scan toggle. It's not just in preferences — the scan setup screen usually has a checkbox for hidden folders. Toggle it per-scan rather than changing your global settings every time.
- Keyboard navigation. The arrow keys move through the duplicate list, and the space bar opens the preview for the selected file. Once you get used to it, you can work through a long list without touching the mouse.
For anyone running a duplicate file finder alongside cloud-synced storage, remember that adding OneDrive to Mac Finder means the scanner sees those files as local content too. That's a good thing — it means duplicates inside your OneDrive folder get caught in the same pass — but it also means you should be careful about permanently deleting anything that exists only in the cloud folder. Trash first, verify later.
- macOS 10.13 or later
- Apple Silicon and Intel Macs
Questions I keep hearing
Can Duplicate File Finder Pro scan a NAS or network drive?
It can scan any volume that appears in the Finder, including mounted network shares, though performance will depend on your connection speed.
Does the smart selection ever delete originals by mistake?
The smart selection keeps one copy from each duplicate set; you can review and override its choices before anything is moved to Trash or deleted.
Questions from the class 0
Sign in or join the class to ask a question.
Nobody has asked anything yet. If you have used it on a real job, say what the file did.
Also on the Mac Apps shelf
The whole Mac Apps shelf Dropover
Holds dragged files on a floating shelf so you can gather items before dropping them elsewhere.
Dropover
Holds dragged files on a floating shelf so you can gather items before dropping them elsewhere.
 DVDFab
Copies a DVD-9 film onto two standard DVD-5 discs while keeping the original menus.
DVDFab
Copies a DVD-9 film onto two standard DVD-5 discs while keeping the original menus.
 DriveDx
Warns you while a drive is still in the failing stage, before it dies completely.
DriveDx
Warns you while a drive is still in the failing stage, before it dies completely.
 DxO PhotoLab
Processes raw photos with lens-specific corrections and local adjustment masks.
DxO PhotoLab
Processes raw photos with lens-specific corrections and local adjustment masks.
 DxO ViewPoint
Corrects distorted perspective and volume deformation in wide-angle architectural shots.
DxO ViewPoint
Corrects distorted perspective and volume deformation in wide-angle architectural shots.
 DynamicLake Pro
Puts a slim pill-shaped panel near your Mac’s notch for music, calendar, and system toggles.
DynamicLake Pro
Puts a slim pill-shaped panel near your Mac’s notch for music, calendar, and system toggles.
 Element 3D
Imports true 3D models into After Effects so you can light and animate them on the timeline.
Element 3D
Imports true 3D models into After Effects so you can light and animate them on the timeline.
 DockView
Shows a live preview of any app’s open windows when you hover over its Dock icon.
DockView
Shows a live preview of any app’s open windows when you hover over its Dock icon.