 ASPNetWorld

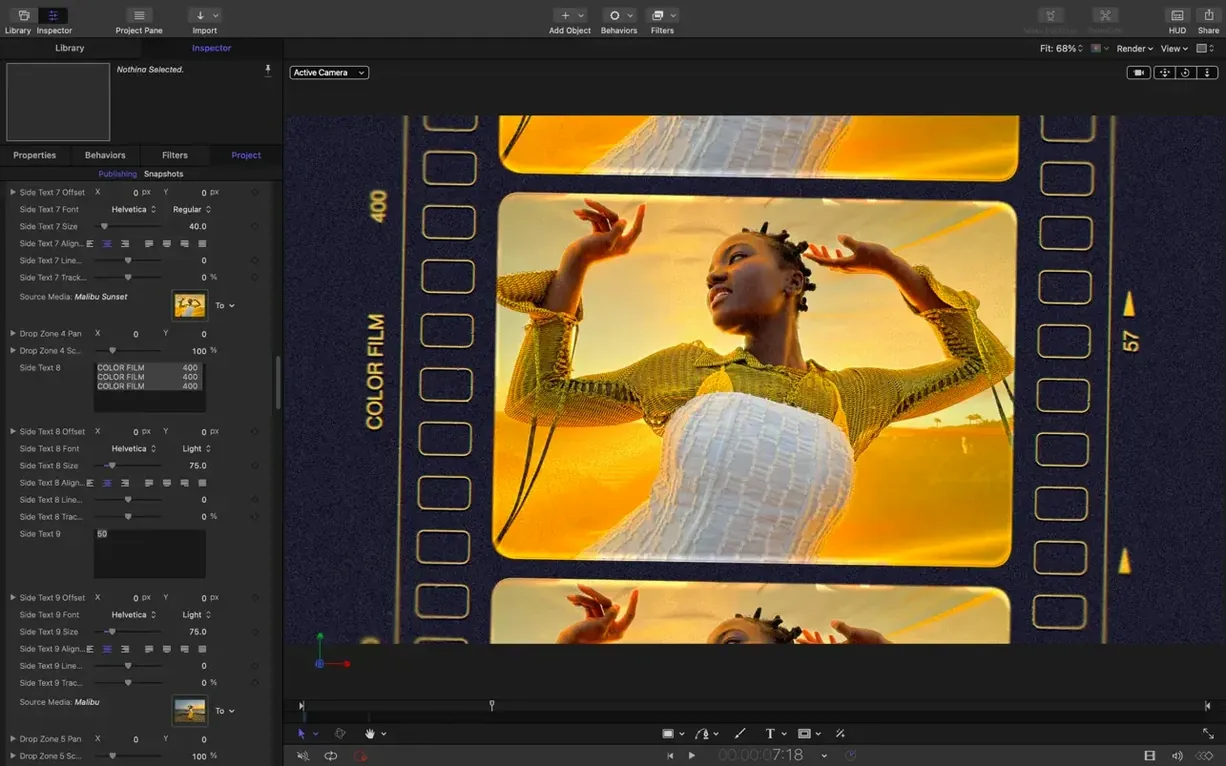
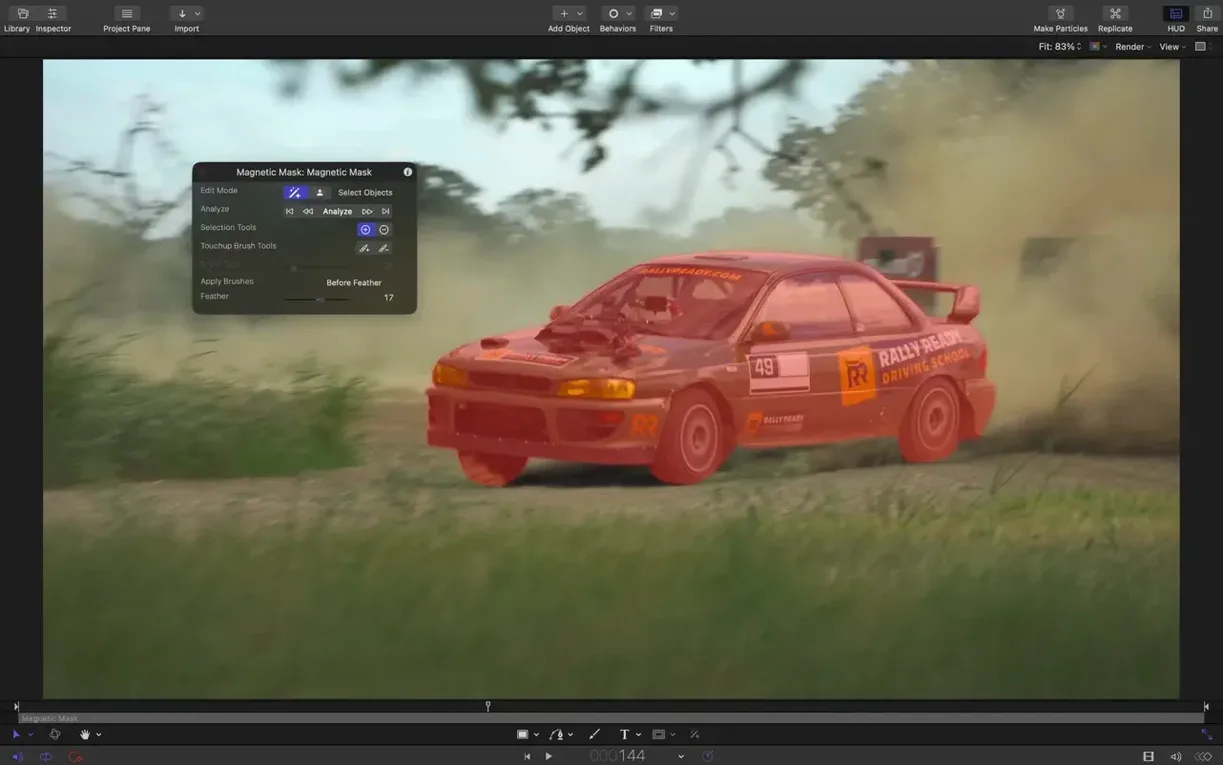
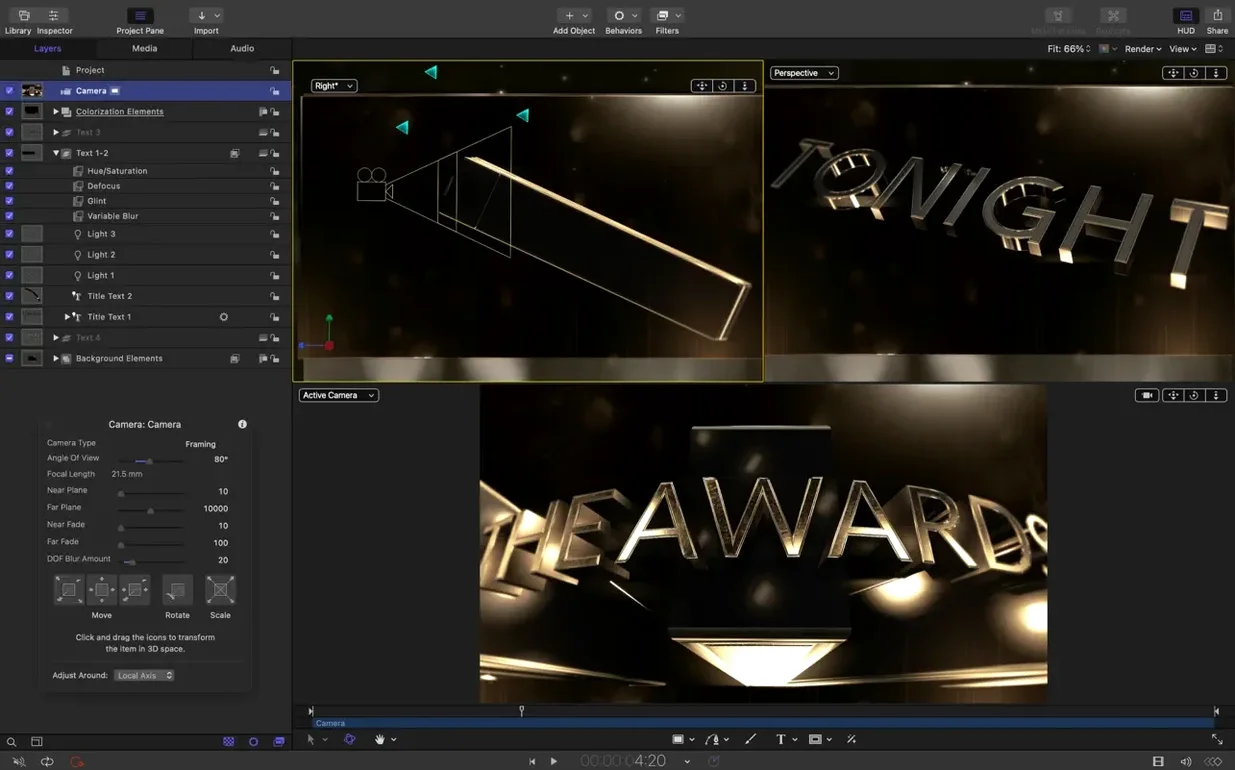
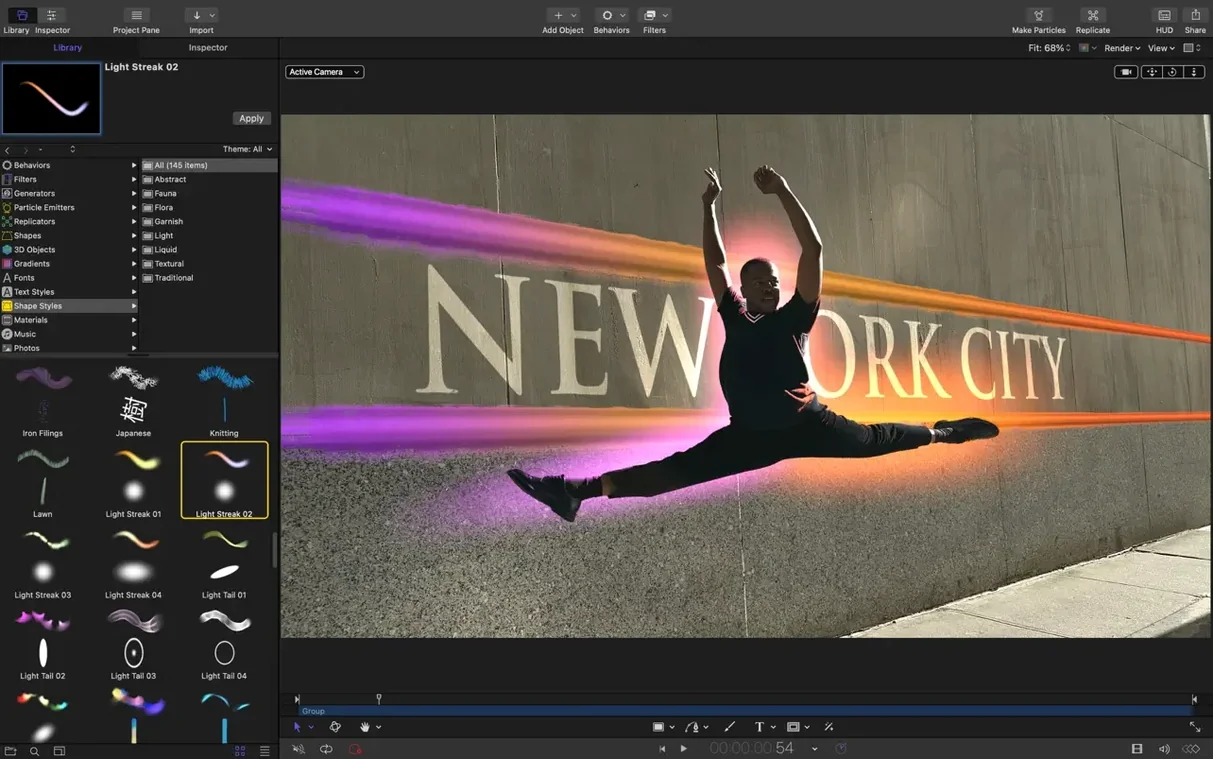
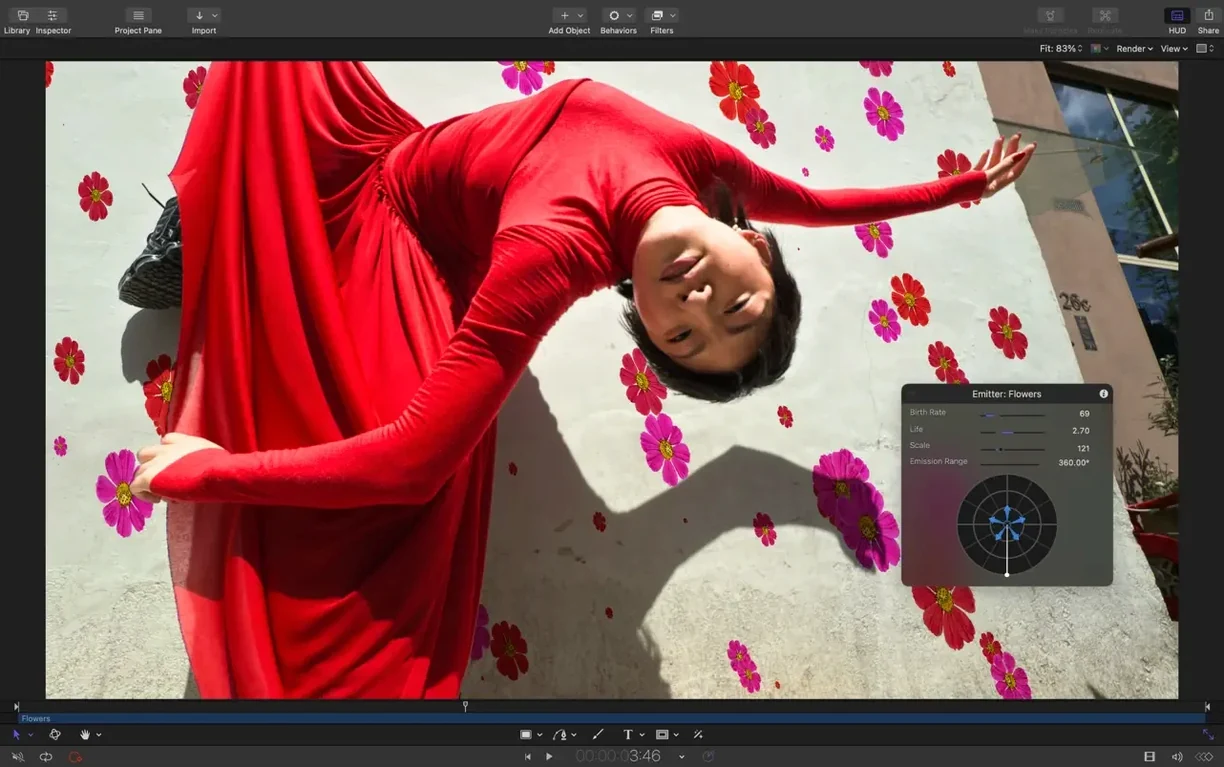
Every project in Motion starts with a 16K canvas — a resolution most monitors won't see for years, but one that tells you exactly who this app is for. It's a playground for title sequences, particle effects, and transitions that need to hold up on cinema screens as comfortably as they do in a web video.
Cinematic 3D text and real-time FCP templates
- Cinematic titles. Build 2D and 3D text treatments that animate with realistic lighting and shadows, all playing back in real time while you tweak.
- Final Cut Pro X integration. Save a template once — a lower third, a transition, a generator — and it appears inside Final Cut, ready for an editor to drop onto a timeline without touching a keyframe.
- Real-time effects design. Particle emitters, replicators, and behaviours let you build smoke, spark bursts, or abstract backgrounds and see the result immediately, not after a render.
- Smooth transitions. Design your own wipes, glitch passes, or lens-based moves that go far beyond the built-in cross-dissolve.
Requires macOS 15.6 and works best as a Final Cut companion
- macOS 15.6 or later required. Motion tracks Apple's operating system closely; if your Mac is on an older release, you won't see the update.
- It's a companion, not a standalone editor. Motion works best when it feeds Final Cut Pro X. You can build standalone animations, but the real payoff is the round-trip workflow with an editor.
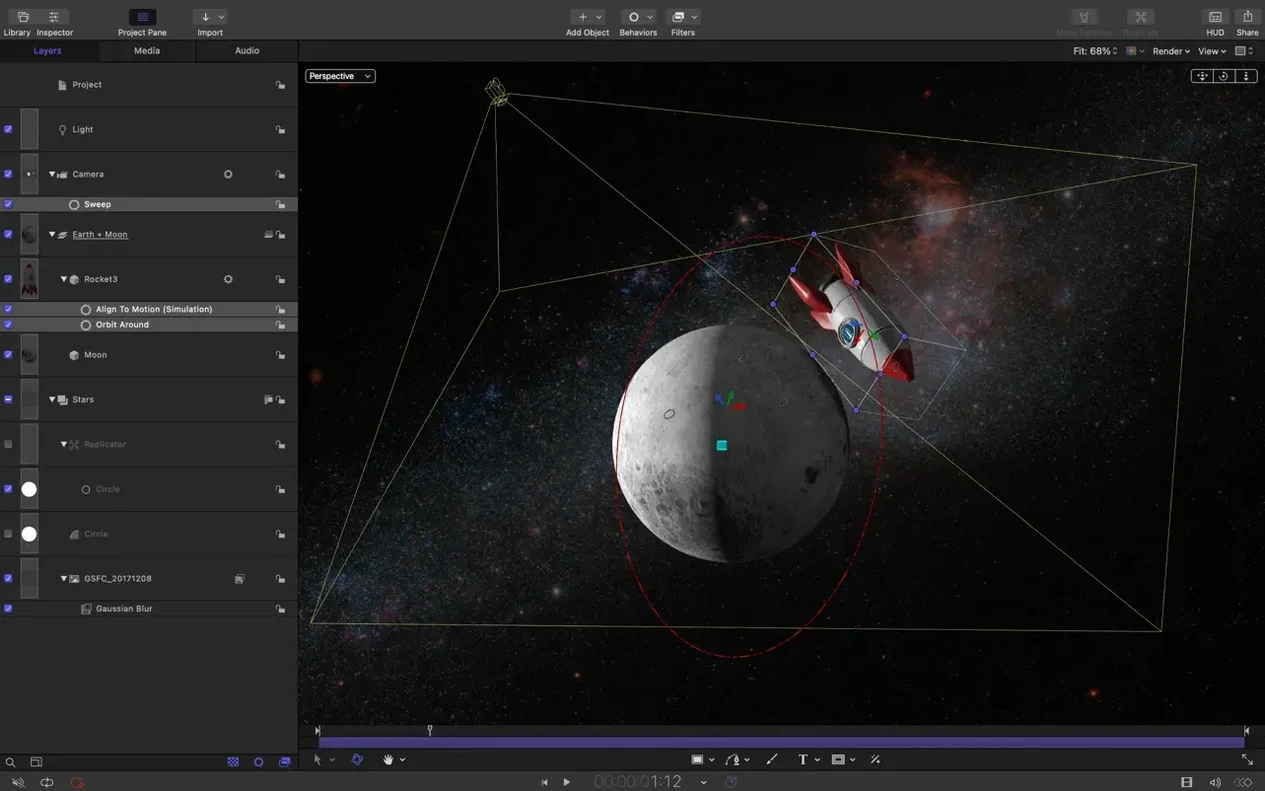
- Learning curve for 3D. The 3D text and camera tools are deep; expect to spend time with the manual before results feel natural.
Wrong project duration and missing file thumbnails explained
Motion rewards patience, but a few stumbling blocks catch almost everyone in the first week. The good news is they're rarely bugs — just behaviours that make sense once you know the logic behind them.
Project starts at the wrong frame rate. Motion doesn't guess your timeline settings; it defaults to whatever you last used or to a generic broadcast preset. If your Final Cut project runs at 25 fps and your Motion template opens at 29.97, you'll get judder on every imported clip. Before you build anything, press Command-J and check the Preset dropdown. Match it to the footage you'll be dropping in later. If you're publishing to Final Cut, set the codec to ProRes 4444 or 422 — Motion uses uncompressed frames internally, and the wrong codec choice can make alpha channels vanish in the round trip.
Particles or replicators chug on playback. You've added an emitter, cranked the birth rate, and suddenly the canvas turns into a slideshow. Motion does its best work with the Playback menu set to Dynamic — the app drops resolution on the fly rather than dropping frames. If that still isn't smooth, open the Project Properties and knock the Draft Mode resolution down temporarily. The 16K canvas is always there underneath; you're just asking the display engine to take a lighter jog rather than a sprint while you experiment.
Behaviours stacking unexpectedly. Drop a Throw behaviour on a shape, then add a Gravity underneath it, and the shape drifts diagonally instead of falling straight down. Motion's behaviour system is additive — every behaviour you attach contributes its vector to the final motion. The fix is a Stop behaviour layered at the point where you want a parameter to settle, or a Simulation group that isolates physical forces so they don't bleed into other animations. Think of each behaviour as a hand pushing the object; the more hands, the busier the path.
SVG import loses colour or stroke weight. The new SVG support in version 6.3 reads vector files cleanly, but Motion translates SVG fills into its own material system. A gradient defined in Illustrator might land as a flat colour until you open the Inspector, switch the fill to Gradient, and pick up the original stops by hand. Strokes come through as a separate shape element — look for a thin path sitting alongside your main graphic in the Layers list.
Set your default preset before building anything ambitious
You've dragged the app from the disk image into Applications, opened it from Launchpad, and stared at an empty project window. Here's where to point your attention before you try to build anything ambitious.
Set your default project preset. Launch preferences are tucked under Motion > Settings > Project. Pick the frame size and frame rate you use most — broadcast 1080p25 or 4K DCI 24, whatever matches your editing timeline. From that moment, every new project springs up in the right dimensions, and you stop fighting the canvas before you've drawn a single rectangle.
Learn the Library pane before the Inspector. Most people dive straight into parameter sliders because they look familiar. But Motion ships with hundreds of pre-built particle presets, text styles, and behaviours that live in the Library tab. Spend twenty minutes dragging a few Particle Emitters onto an empty canvas just to see what's already built. Modify the presets by swapping the image source — replace the default spark with your own logo graphic — and you'll have something usable while you're still learning how emitter cells work under the hood.
Make one Final Cut template on day one. Even if it's just a simple lower-third title with a fade-in behaviour, saving it as a Final Cut Title and seeing it appear inside Final Cut's Titles browser is the moment the workflow clicks. Group your layers under a container, mark the group as Publish to FCP, and choose which parameters an editor can adjust later — text string, colour, maybe the animation speed. Export the template, switch to Final Cut, and drop it onto a clip. That round trip teaches more about Motion's purpose than any tutorial.
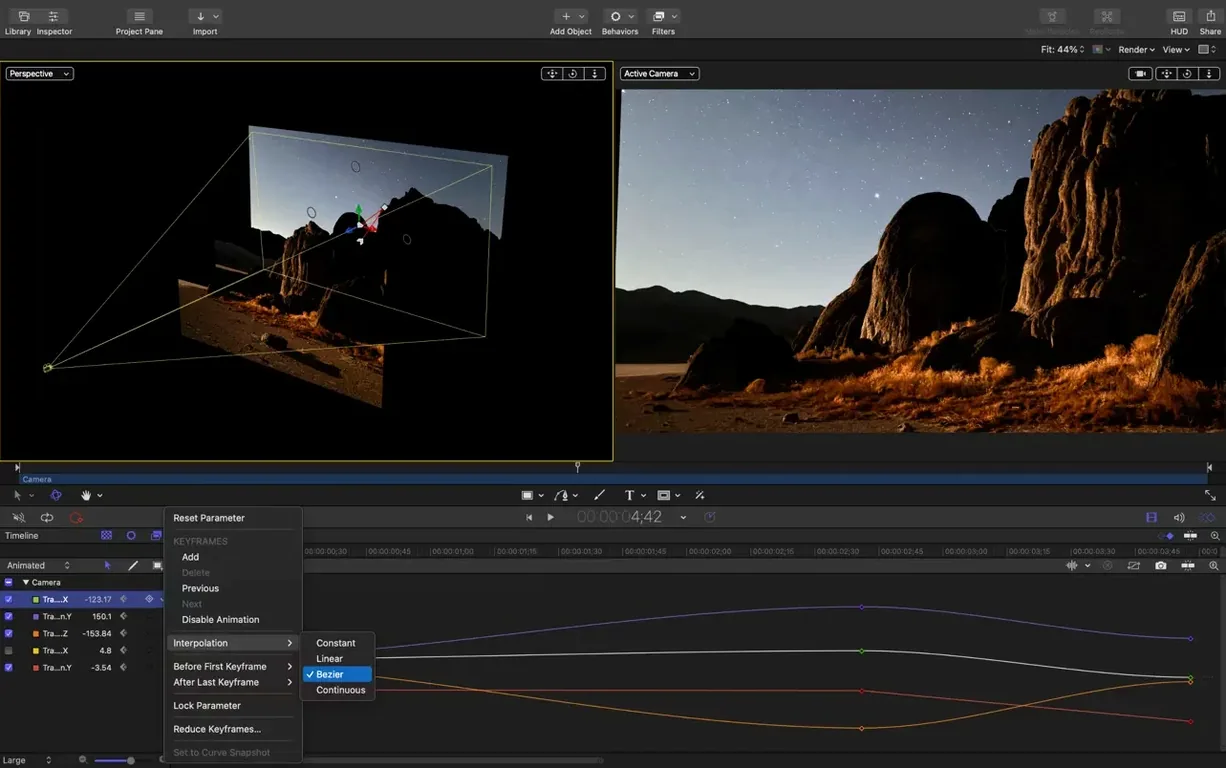
Tame the keyframe editor early. The default animated behaviours are brilliant until you need precise control over one specific property. Select any layer, press Command-K to drop a keyframe, and the Keyframe Editor opens along the bottom. Drag the tangent handles on a keyframe dot and you'll see the difference between linear, ease-in, and ease-out motion instantly. Muscle memory for those handles pays off faster than memorising every filter in the library.
You can use Motion without Final Cut Pro
Motion sits in a strange space between a plug-in and a full application, so the questions tend to be practical rather than philosophical.
"Does it work without Final Cut Pro?" Yes, and plenty of people use it that way. You can build a standalone animation — a logo sting, a particle sequence, a short title card — and export it as a ProRes 4444 movie with alpha channel, then drop it into DaVinci Resolve, Premiere Pro, or any video editor that reads QuickTime files. What you lose is the live template link. Build it once in Motion, and a Final Cut editor can reuse that template a hundred times, changing the text each time without ever opening Motion. Without Final Cut, you're rendering self-contained clips, which is perfectly viable but less fluid for fast-turnaround work like episodic television or daily social content.
"Is it a replacement for After Effects?" Not quite, and the difference matters. After Effects is a compositing and animation tool that grew out of visual effects pipelines; it layers dozens of pre-comps, handles complex rotoscoping, and talks to Cinema 4D natively. Motion is a motion graphics engine built tightly around Apple's real-time playback architecture. It's faster for title design and broadcast graphics — especially when the deliverable needs to become a reusable Final Cut template — but it doesn't try to match After Effects on character animation rigging or multi-layered VFX comps. The two can coexist: design your titles and transitions in Motion, assemble the hero comp in After Effects if the job demands it.
"Will my old projects break after updating?" Apple is disciplined about backward compatibility on the timeline side — projects created in Motion 5 and later typically open without complaint in 6.3, though you'll want to check any third-party plug-ins you've installed. The bigger question is macOS. Motion 6.3 demands macOS 15.6 or later, so if your production machine is deliberately held back on an older OS for driver or plug-in reasons, you won't see this version until you upgrade the whole system. Plan that around a quiet week.
Building a ten-second animated title sting for a wildlife series
Imagine a Tuesday afternoon. A producer has asked for a ten-second animated title sting for a documentary series about urban wildlife. The brief says "modern, clean, a hint of movement that suggests foliage without being literal." You open Motion and start with a blank 4K project at 25 fps — the same settings as the edit timeline sitting in Final Cut.
Build the text. You press T for the text tool, click the canvas, and type the series name. In the Inspector you switch the typeface to something geometric, bump the tracking up, and tick the 3D Text checkbox. The letters gain depth and respond to a default lighting rig that casts soft shadows across the canvas. You rotate the camera around the text to check the extrusion depth — forty points feels solid without turning chunky — and settle on a dark green material with a subtle metallic sheen.
Add the organic element. From the Library you pull a Particle Emitter preset called "Drifting Leaves" — not because the series is about leaves, but because the drift motion has the right weight. You swap the particle image for a small vector shape you imported earlier as an SVG: an abstract wing-like curve that reads as foliage without being too obvious. The emitter's Birth Rate comes down to fifteen and the Speed drops so the shapes float rather than swarm. You add a Gravity behaviour to pull the particles gently toward the bottom left of frame, and a Wind behaviour with a low variance to introduce some lateral drift.
Animate the entrance. The text needs to arrive with purpose. You select the text layer, press F1 to jump to the Properties tab, and set a keyframe for Position at two seconds — text fully visible, centred. Then you jump back to the start of the timeline, drag the text below the canvas so it's off-screen, and set a second keyframe. Motion interpolates a smooth rise. You add a Fade In behaviour from the Basic Motion category and set its duration to match the position move. The text now slides up and fades in together, with the particle drift beginning half a second earlier so the background feels alive before the words arrive.
Preview and adjust. You hit the space bar and watch the full ten-second loop in real time. The particles drift correctly but the text shadow looks a little harsh under the default spotlight. You open the Lighting controls, soften the shadow with a wider Shadow Spread, and nudge the ambient light up a few points so the dark green material doesn't crush to black in the shadows. The canvas updates immediately — no render bar, no waiting.
Publish to Final Cut. The sting works as a standalone animation, but the producer will want to localise the title text for different markets. You group the text layer and the particle emitter under a new parent group, open the Publish panel, and check Text String and Text Colour as editable parameters. You save the project as a Final Cut Title, switch over to Final Cut, and drop the title onto a clip in the timeline. The inspector pane in Final Cut shows the text and colour controls you published. You type a new title into the field and watch it ripple through, particles and all, without touching Motion again. The round trip is complete.
SVG import now bypasses Illustrator and rasterised PNGs
Motion 6.3 arrived alongside a broader update to Apple's professional video tools, and the changes are practical rather than cosmetic. The SVG import alone shifts a workflow that used to require a trip through Illustrator and a rasterised PNG intermediate — now you drag a vector file straight onto the canvas, scale it to any size, and watch the edges stay sharp
Version 6.3 brings a small but genuinely useful collection of fixes and one long-awaited format addition. SVG files can now be imported directly and will scale cleanly to any canvas size.
- New controls let you stagger, cascade, or reverse the timing of clips on the timeline — a quick way to build rhythmic reveals without nudging keyframes one by one.
- Performance updates keep playback responsive, even with complex 3D text and particle setups.
- Several rendering bugs are squashed: Bezier Mask vertex selection by dragging now works correctly, 3D text and particle emitters no longer grab the wrong texture media during playback, and some colour correction filters render at the correct brightness on macOS 26.
- macOS 15.6 or later
- Works on both Intel and Apple Silicon Macs
- Interface languages: English, German, Spanish, Simplified Chinese, French, Japanese
Questions I keep hearing
Does Motion 6.3 fix the issue where dragging on a Bezier Mask didn't select vertices?
Yes, this update addresses a bug that prevented vertex selection by dragging on a Bezier Mask, along with fixes for incorrect textures on some 3D text and particle emitters.
Questions from the class 0
Sign in or join the class to ask a question.
Nobody has asked anything yet. If you have used it on a real job, say what the file did.
Also on the Mac Apps shelf
The whole Mac Apps shelf MotionVFX mInfographics
Drops animated charts and percentage counters straight into a Final Cut Pro timeline.
MotionVFX mInfographics
Drops animated charts and percentage counters straight into a Final Cut Pro timeline.
 Moom
Saves and restores exact window layouts so you never drag and resize the same arrangement twice.
Moom
Saves and restores exact window layouts so you never drag and resize the same arrangement twice.
 MotionVFX mKBHD
Gives video editors a shortcut to Marques Brownlee’s clean, kinetic on-screen graphic style.
MotionVFX mKBHD
Gives video editors a shortcut to Marques Brownlee’s clean, kinetic on-screen graphic style.
 MotionVFX - mLowers Universal for FCP
Places seventy animated lower-third titles onto your timeline without jarring style clashes.
MotionVFX - mLowers Universal for FCP
Places seventy animated lower-third titles onto your timeline without jarring style clashes.
 MotionVFX mModules
Fills Final Cut Pro’s Titles Browser with sixty self-contained animated elements and backgrounds.
MotionVFX mModules
Fills Final Cut Pro’s Titles Browser with sixty self-contained animated elements and backgrounds.
 Mole
Clears cached clutter, logs, and forgotten files to reclaim disk space on your Mac.
Mole
Clears cached clutter, logs, and forgotten files to reclaim disk space on your Mac.
 Motionvfx - mTitle Cinematic
Drops fifty film-trailer title templates with lens flares and slow-building reveals into Final Cut Pro.
Motionvfx - mTitle Cinematic
Drops fifty film-trailer title templates with lens flares and slow-building reveals into Final Cut Pro.
 Moho Pro
Builds rigged 2D characters and turns flat vector layers into 3D scenes with real shadows.
Moho Pro
Builds rigged 2D characters and turns flat vector layers into 3D scenes with real shadows.