 ASPNetWorld

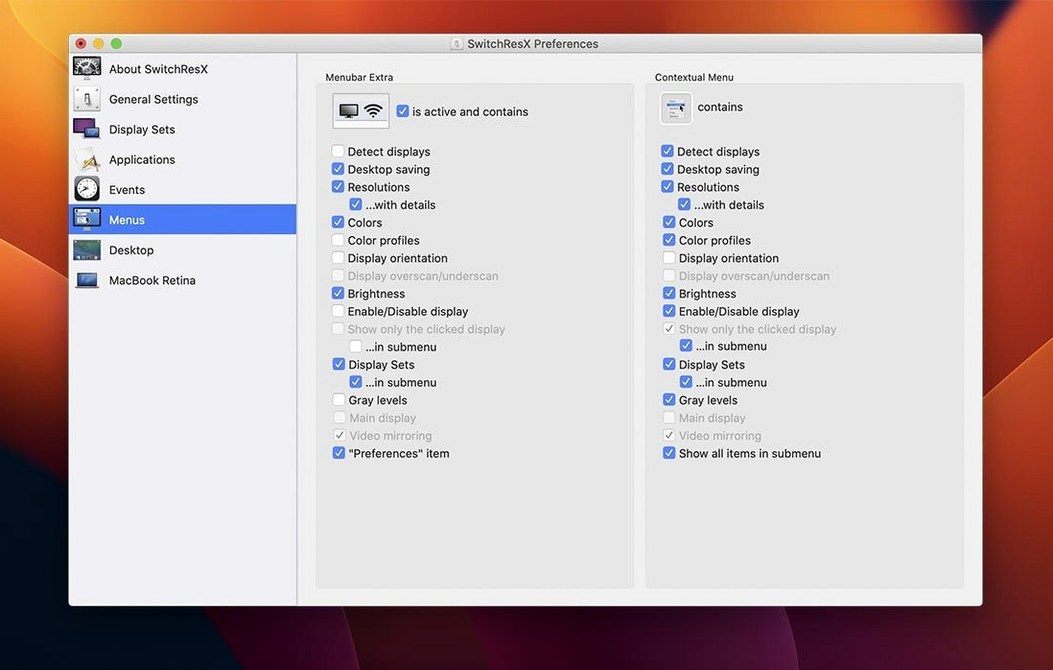
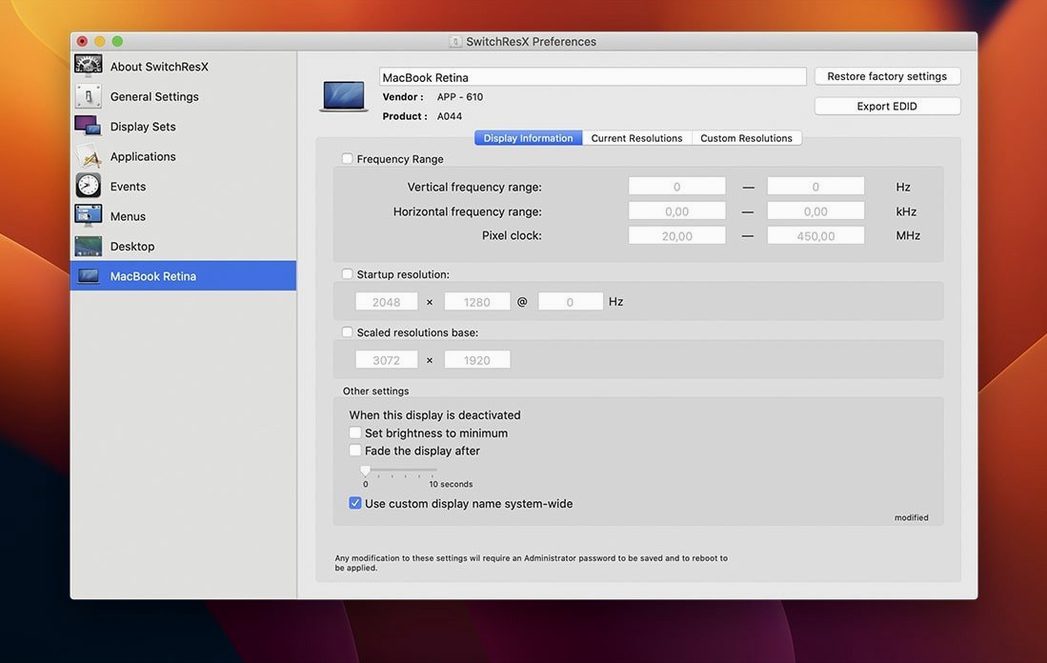
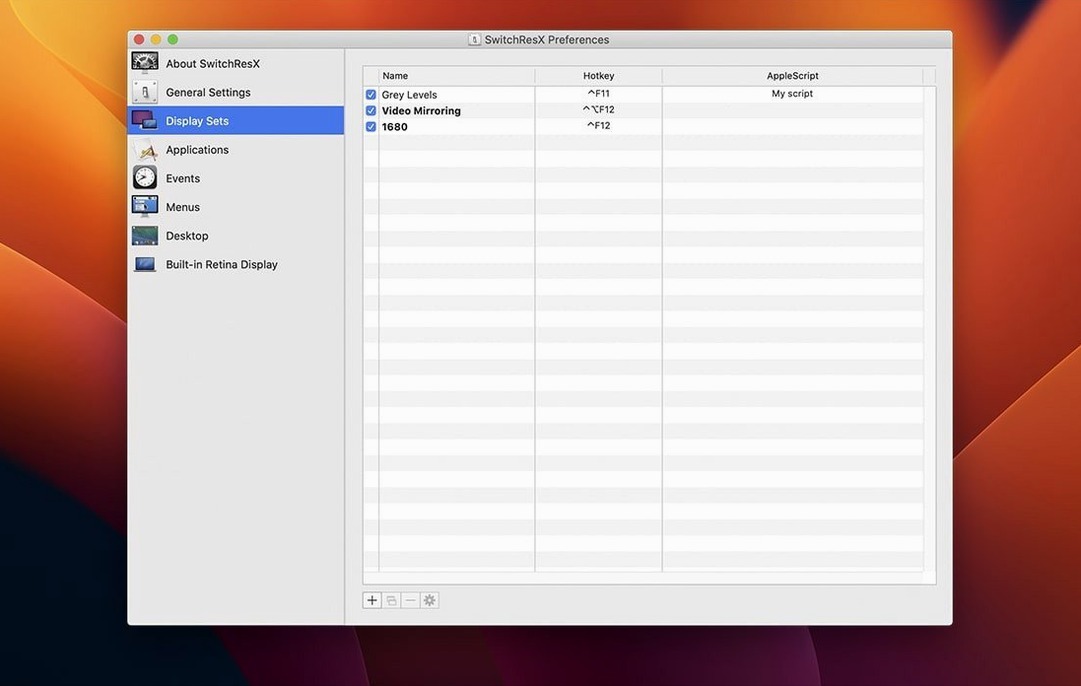
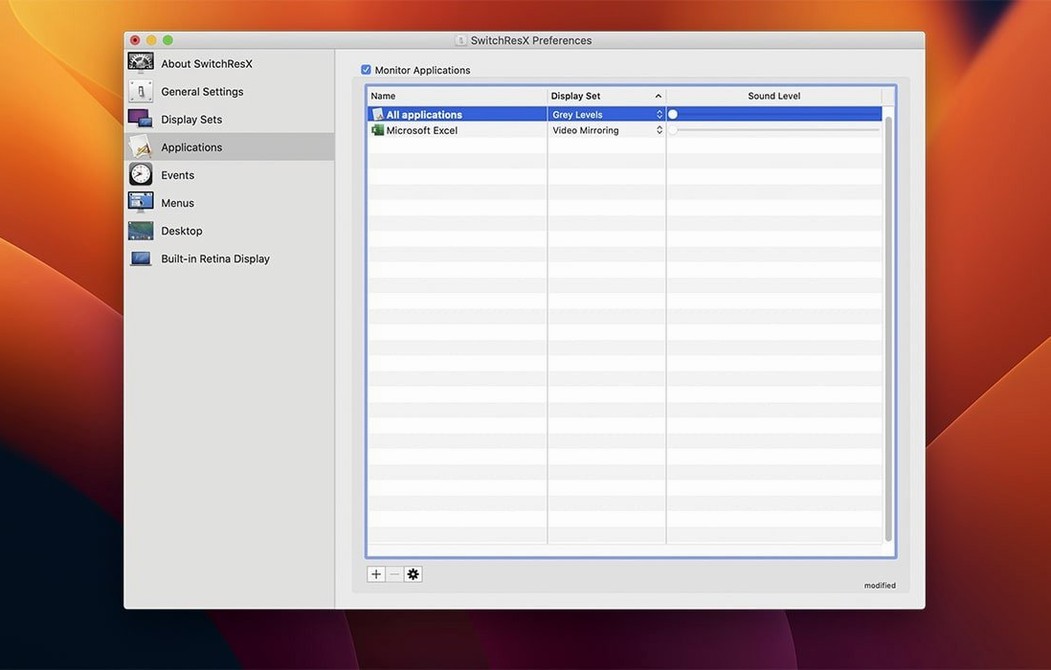
SwitchResX runs on any Mac from the last decade or so, asking only for macOS 10.10 Yosemite or newer. It works natively on both Intel and Apple Silicon machines, so an M3 MacBook Air and an old cheese-grater Mac Pro are equally at home. If your Mac drives a monitor — built-in, external, or something more exotic — SwitchResX can probably talk to it.
The backstage pass to your display’s hidden resolution list
Think of this utility as a backstage pass to your display hardware. Where System Preferences gives you a tidy list of scaled resolutions, SwitchResX opens the full inventory the panel inside your monitor actually advertises. It slips in alongside your existing workflow rather than demanding you learn a whole new one. AppleScript support means you can fold a resolution switch into a larger automation — perhaps part of a script that also launches Final Cut Pro and enables a reference video output. The app can also assign specific resolutions to individual applications, so launching Lightroom automatically flips your second monitor to a proofing-friendly colour profile without you touching a menu.
What you can actually control
The feature set goes well beyond simple resolution picking. You can command colour profiles, rotate a display 90 or 270 degrees for coding or reading, and set up intricate mirroring arrangements across a second screen. The hardware support list is deliberately broad: third-party desktop monitors, plasma panels, HDTVs and projectors all get the same detailed access. A serial unlocks the full version once you have run the standard installer; the disk image includes the necessary activation file to get you started.
Once the disk image is mounted and the standard installer has finished its work, SwitchResX sits quietly in System Settings as a pane rather than a standalone application. The first visit can feel like walking into a lighting rig control room — everything is exposed, nothing is hidden behind wizards. A few adjustments early on make the whole experience friendlier.
Show the menu bar item even for a single MacBook screen
Head straight to the General tab inside the SwitchResX preference pane. The default behaviour shows a menu-bar item only when more than one display is connected; for anyone who regularly toggles resolutions on a single MacBook screen, ticking Show SwitchResX in the menu bar even with only one display is a small act of kindness to your future self. Directly below it, the option to Launch SwitchResX when starting up is disabled by default. Turn it on. Custom display profiles become far less useful if you have to remember to enable their engine every time you boot.
While you are in the neighbourhood, switch to the Monitor tab for your primary display and tick Show monitor name in the menu bar. The menu-bar item normally shows the current resolution in numbers that flash past the eye without much meaning. Adding the monitor’s name costs nothing in menu-bar real estate and removes all ambiguity the moment you glance up. If you work with a laptop that spends its days docking and undocking, the Display Sets tab deserves a visit next. Creating a Display Set for each physical arrangement — lid open on a desk, lid closed with an external monitor, projector connected — lets you recall an entire configuration with one click instead of rebuilding it each time.
A real-world scenario: café to desk in one click
Picture a freelance editor who starts the morning at the kitchen table with just the MacBook screen. By ten o’clock she is at a desk with a 4K external display, an ageing 1080p monitor rotated vertically for email, and the laptop lid shut. Without automation, this transition means opening System Preferences, rearranging display positions, fixing the rotation, and perhaps re-selecting a scaled resolution that macOS forgot overnight.
With SwitchResX she can build a Display Set called Desk — Lid Shut. It stores the exact resolution for the 4K screen (maybe a custom 3008×1692 HiDPI that macOS never offered), the 1080p monitor at 90-degree rotation, and the colour profile used for grading. A second Display Set named Mobile holds the MacBook’s native Retina setting and nothing else. Arriving at the desk, she opens the menu-bar drop-down, picks Desk — Lid Shut, and the whole room snaps into place — displays wake in the right arrangement, the internal screen goes dark, the vertical monitor flips back to portrait. The entire sequence takes roughly as long as putting down a coffee cup. A switchresx serial makes saved Display Sets stick; the unregistered version will let you explore but politely declines to remember your work between sessions.
Unlocking a comfortable HiDPI resolution between 1440p and 4K
Say you have connected a 1440p gaming monitor to a Mac Mini, and the default macOS resolution list jumps straight from 2560×1440 to an uncomfortably small 3840×2160 scaled option. You want something in between — a HiDPI resolution that renders sharply but keeps interface elements readable. Here is the path through SwitchResX, step by step.
- Open the SwitchResX preference pane and select the external monitor from the left-hand column. If the monitor is listed only by a generic EDID string, the latest version 4.14.2 has a fix for unnamed displays that now surfaces a more useful label.
- Click the Custom Resolutions tab, then the plus button at the bottom left.
- A sheet appears with two radio buttons at the top: Scaled resolution and Custom resolution. Choose Scaled resolution — this tells macOS to render at a higher pixel count and scale down, which is how Retina-like sharpness works even on non-Retina panels.
- Set the horizontal and vertical values. For a 1440p display that you want to behave like a roomy 3200×1800 workspace, type 3200 and 1800.
- Below the dimensions, the Refresh rate field defaults to whatever the monitor is currently using. Leave it unless you have a specific reason — most users on a stable switchresx download will stay at 60 Hz or 144 Hz.
- Click OK. The custom resolution now appears in the list with a status indicator. If the status reads Not installed, select it and click the Install button. A reboot is required the first time; subsequent additions install without one.
- After the restart, return to the Current Resolutions tab for the same monitor. The new 3200×1800 HiDPI entry sits among the standard options. Select it, and macOS scales the interface as requested.
What makes this worth the initial reboot is that the resolution now appears everywhere — in the menu-bar drop-down, in application-specific resolution assignments, and in any Display Set you build later. The system treats it as a native choice. If the monitor ever shows a blank screen after testing an experimental resolution, leave it fifteen seconds; SwitchResX times out the test and reverts. No safe-mode recovery required.
One checkbox that bypasses a monitor’s faulty EDID data
The preference pane rewards a slow scroll. At the bottom of the Monitor tab sits a checkbox labelled Bypass monitor native resolution. On some older panels that misreport their capabilities, this single tick can unlock resolutions the EDID data wrongly claimed were unsupported. It is the kind of toggle you forget exists until a cheap portable monitor refuses to offer anything beyond 1024×768.
Application-specific resolution assignments, found under the Applications tab, have a subtle power: they watch the frontmost app, not just the launch event. Move from Photoshop to a web browser and the resolution can switch back automatically. The drop-down for each app entry includes an On quit behaviour that restores the previous state, so you never have to clean up after a session.
One more detail worth knowing — the Display Sets tab has an AppleScript name field for every set you create. Calling a Display Set from a script means you can trigger it with a keyboard shortcut via a third-party launcher, or tie it to a calendar event so your desk configures itself before you walk into the room. A small community of users who keep a switchresx cracked version around for testing often discover this scripting hook late; it is the kind of thing you do not go looking for until you need it, and then it saves real time.
Lastly, if you ever find yourself searching for a SwitchResX torrent to try before committing, you will be glad to know the official disk image includes the activation file you need. There is no missing piece to hunt down separately — mount, install, and the software is ready to work.
Version 4.14.2 sweeps away a few long-standing gremlins. Settings no longer loop through repeated self-updates when no display is attached, and displays that macOS insists have no name are handled properly. There is also a fix for a sequence bug when deleting a Display Set that was used right after another, and on Apple Silicon Macs the system now allows the Dock to quit during a display-disabling operation — a small but satisfying victory for anyone who regularly juggles monitors.
- macOS 10.10 Yosemite or later
- Runs natively on Intel and Apple Silicon Macs
Questions I keep hearing
Can SwitchResX change settings when I open a specific application?
Yes. You can bind a particular resolution, colour profile or rotation to an application, and SwitchResX applies those settings automatically when the app launches.
Does it work with televisions and projectors?
Absolutely. It supports external devices including HDTVs, plasma panels, projectors and third-party computer monitors, giving you the same fine-grained control macOS offers for built-in displays.
What got fixed in version 4.14.2?
This update resolves a few edge-case bugs: displays that appear with no name in macOS are now handled correctly, deleting a Display Set used after another set no longer causes issues, and the Dock can quit when disabling a display on Apple Silicon Macs.
Questions from the class 0
Sign in or join the class to ask a question.
Nobody has asked anything yet. If you have used it on a real job, say what the file did.
Also on the Mac Apps shelf
The whole Mac Apps shelf Sweet Home
Designs home interiors in 3D.
Sweet Home
Designs home interiors in 3D.
 TablePlus
Manages databases in a visual interface.
TablePlus
Manages databases in a visual interface.
 Tayasui Sketches Pro
Draws and paints with natural-feeling brushes.
Tayasui Sketches Pro
Draws and paints with natural-feeling brushes.
 TechSmith Snagit
Captures screens and records your screen.
TechSmith Snagit
Captures screens and records your screen.
 SuperDuper!
Makes bootable backups of your entire Mac.
SuperDuper!
Makes bootable backups of your entire Mac.
 Techtool Pro
Diagnoses and repairs Mac hardware issues.
Techtool Pro
Diagnoses and repairs Mac hardware issues.
 Super Vectorizer Pro
Traces pixel images into scalable vectors.
Super Vectorizer Pro
Traces pixel images into scalable vectors.
 Sublime Text
Edits code quickly and reliably.
Sublime Text
Edits code quickly and reliably.