 ASPNetWorld

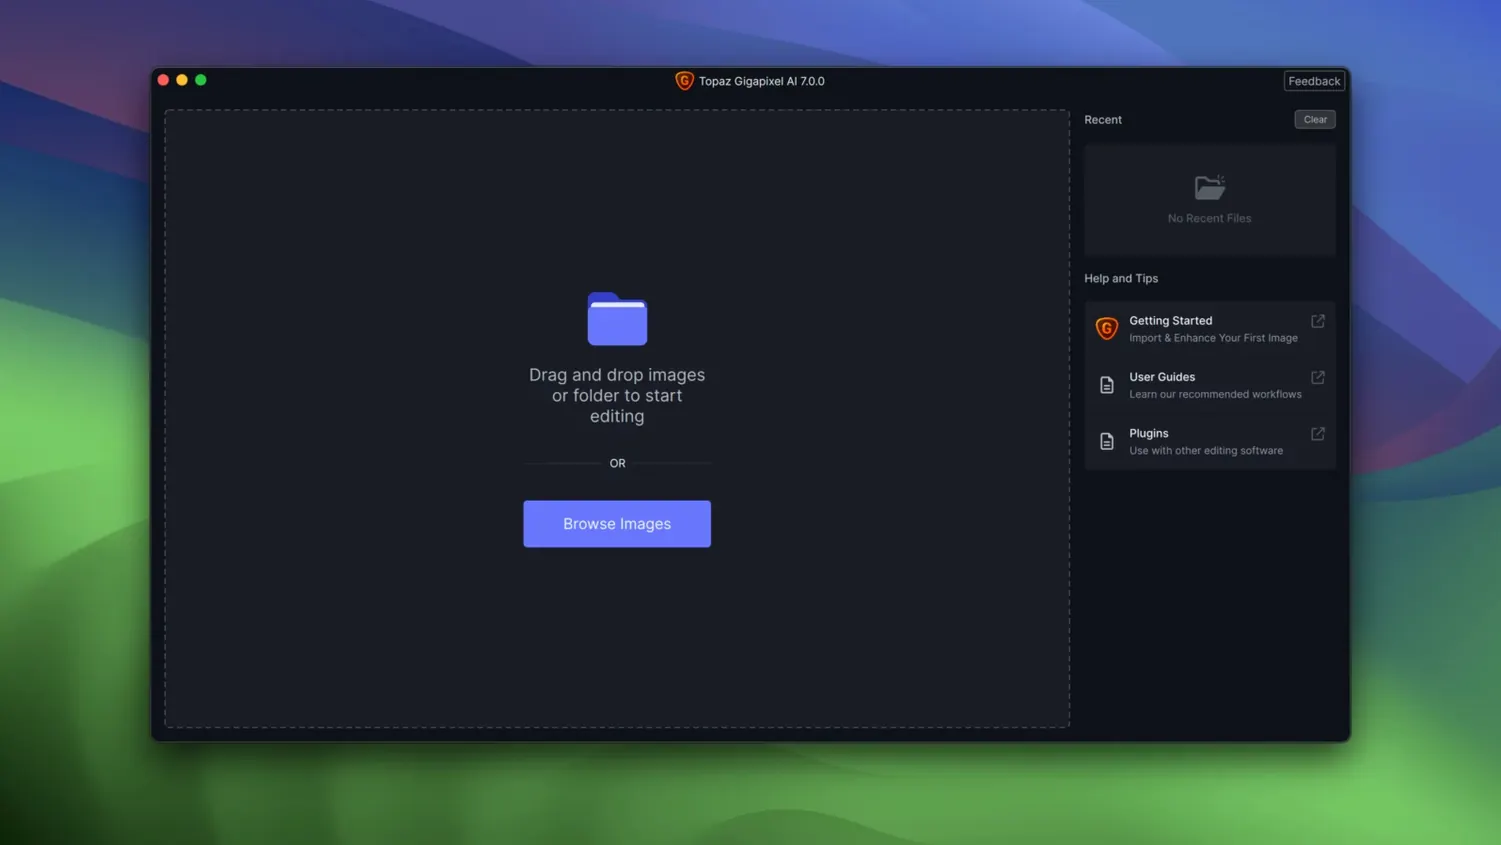
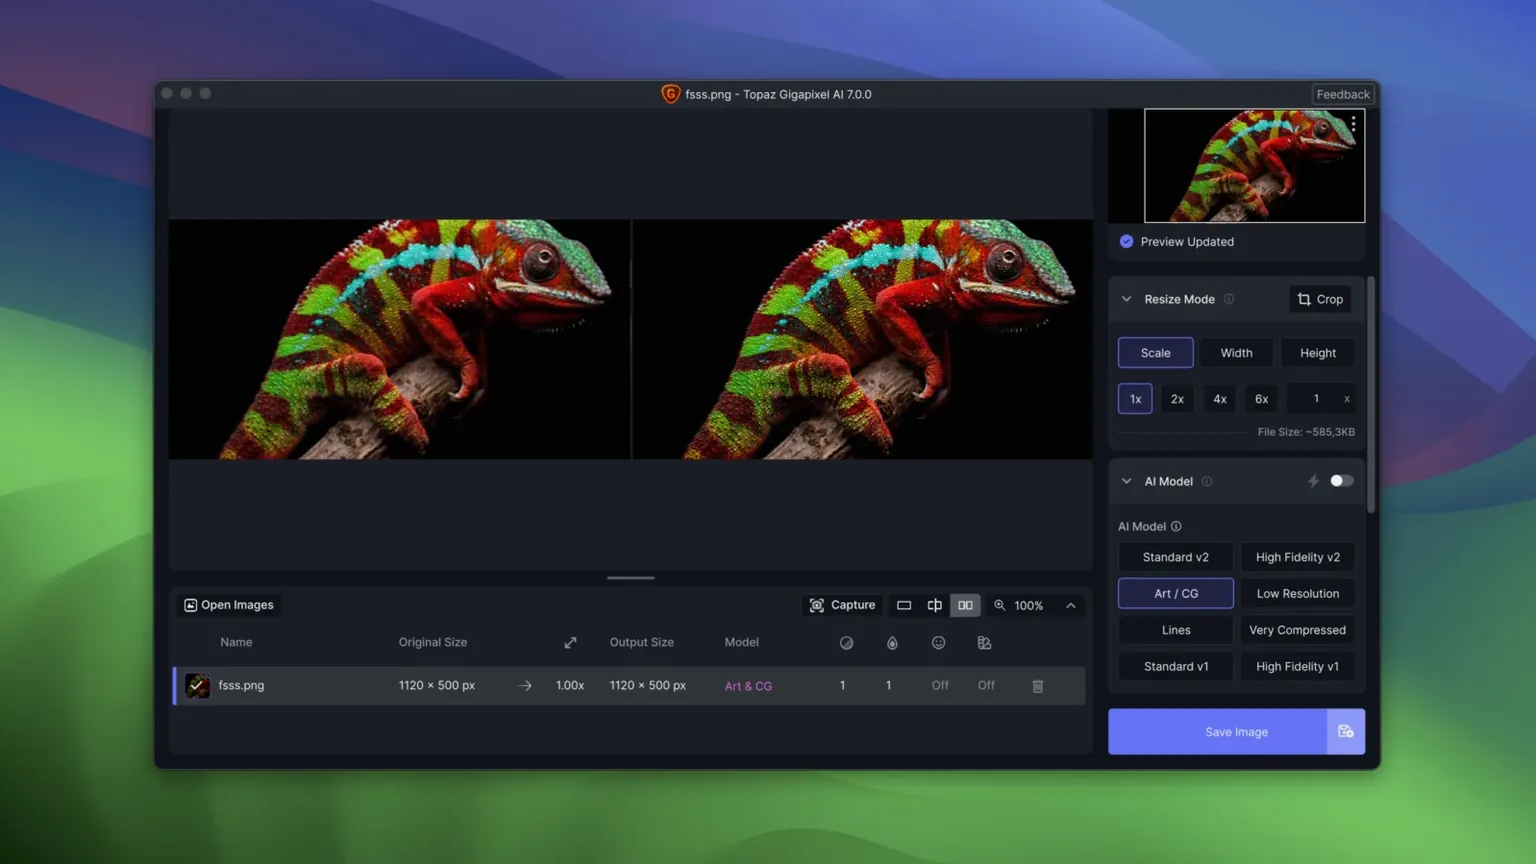
Photographers and print designers tend to reach for Topaz Gigapixel AI when a source file is simply too small for the job. The app works as a desktop tool on Mac and Windows, enlarging images while keeping edges and textures looking natural rather than smeared. The Russian description for this build points to lossless enlargement, along with cleaning up low-quality line art and PNG files — the kind of work that comes up often when restoring old scans or preparing artwork for large-format output.
The legacy Gigapixel line
Gigapixel AI is the older product family that Topaz Labs later replaced with Topaz Gigapixel, ending the legacy line at version 8.4.4. Version 1.3.5 is the macOS 12-and-newer build, and it ships as separate packages for Apple Silicon and Intel 64-bit Macs. The Russian page labels those builds ARM only and Intel only, which matters if you are installing on a machine where Rosetta is not available.
A dedicated upscaler for raster art, low‑res photos, and scans
If you regularly upscale raster artwork, low-resolution photographs, or scanned line art, the appeal is straightforward: a dedicated enlarger with fewer steps than doing it by hand in an editor. It is a niche tool rather than a general-purpose image manager, and on older Mac hardware the performance will depend on which architecture package you install correctly.
Why a heavily compressed JPEG at 6× will disappoint
One pattern I see in my evening classes is someone loading a heavily compressed JPEG, setting the scale to 6×, and then frowning at the result. Gigapixel AI can pull detail from surprisingly little, but it cannot invent a crisp eyelash where the original file stored only a 4-pixel blur. Start with the best source you have — a raw file, a TIFF, or at least a JPEG saved at a quality above 85. If you only have a web thumbnail, lower your expectations for the fine textures.
Another early slip is picking the wrong AI model for the content. The app offers several models, and the default will not always be the best. A landscape with distant foliage benefits from the Standard or Art model, while a portrait needs the face‑refinement model switched on. Processing a detailed line drawing with the Standard model can introduce faint halos around the strokes that look fine at screen size but show up in print. The fix is quick: process a small test crop at 100% view before committing to the full image.
Batch‑processing without checking one output first is another classic mistake. It is tempting to drop forty images into the queue and walk away, but if the suppression setting for noise reduction is too high on the first image, it will be too high on all forty. Run a single file through, inspect it at actual pixels, then lock in the settings and start the batch.
Option‑drag the zoom slider to check true 1:1 sharpness
A few shortcuts are easy to overlook. Holding Option while dragging the zoom slider snaps the preview to 100%, which is the only view that tells you whether the upscaling genuinely worked. The comparison view, toggled with C, splits the preview pane into before and after — but you can also click‑and‑hold anywhere on the preview to momentarily flash the original. That single gesture replaces several trips to the view menu.
If you work with the same output dimensions regularly, say 3600 pixels on the long edge for an A3 print at 300 dpi, save a custom preset. The preset stores scale, model choice, and suppression sliders together. It sits in a dropdown that most people ignore for the first month, and it cuts a six‑click setup down to one.
The file list panel supports drag‑and‑drop reordering, which is useful when you want outputs numbered sequentially. Dragging images into the order they will appear in a catalogue layout saves renaming later. Also, right‑clicking a file in the list and choosing Remove Processed clears the clutter after a batch run without disturbing the unprocessed ones.
The “damaged” warning on Apple Silicon points to a missed patch
A stubborn one on Apple Silicon Macs is the app refusing to open after installation with a “damaged” warning. This usually means the patch step was missed or the wrong architecture package was installed. If you are on an M‑series machine, use the ARM‑only package. The Intel build works through Rosetta, but activation can be less reliable there. Re‑running Patch.command and entering the Mac password almost always settles it.
Another snag is the progress bar freezing during a large batch. This is often not a crash — the app is chewing through a particularly dense TIFF, and the elapsed‑time estimate simply stops updating. Wait it out for five minutes before force‑quitting. If it genuinely stalls on the same file repeatedly, that file likely contains a colour profile the engine struggles with. Converting it to sRGB or Adobe RGB in Preview or an editor before upscaling usually clears the blockage.
Sometimes people report that the output looks softer than the preview promised. The culprit is nearly always the Suppress Noise slider pulled too far right. The preview window, by default, shows a small region, and noise suppression can look pleasing on a facial cheek but erase the grain that gave a landscape its texture. Back the slider off to around 20–30 for natural‑looking results, and only push it higher for genuinely noisy scans.
Using Lightroom Classic’s Edit In command to hand off a raw file
Gigapixel AI works best as a step in a wider pipeline, not as an island. Many photographers treat it as an external editor from Lightroom Classic. You right‑click an image, choose Edit In > Topaz Gigapixel AI, and Lightroom hands over a TIFF. When you save from Gigapixel, the upscaled file pops back into the catalogue stacked alongside the original. The same workflow works from Apple Photos via the Edit With command, though Photos sends a flattened version, so any non‑destructive adjustments should be baked in first.
For graphic designers working in Affinity Photo or Photoshop, the round‑trip is manual but easy. Open the image in your editor, crop and colour‑grade it, export a TIFF, enlarge it in Gigapixel, then bring the enlarged file back for final sharpening and text overlay. Keeping the upscaling step separate means you never accidentally re‑upscale an already‑upscaled layer, which creates odd artefact patterns.
The app also plays nicely with the macOS Finder’s Quick Actions, though you need to set that up yourself via Automator. A simple workflow that opens selected images in Gigapixel saves you launching the app and dragging files in. Combined with the preset system, you can select five scans on the desktop, run the Quick Action, and come back to finished enlargements in your output folder.
A start‑to‑finish print workflow
Imagine you found an old 2008 digital photo taken on a 6‑megapixel camera — a family portrait you want to print at A3 size. The original JPEG is 3000×2000 pixels, which at 300 dpi gives you roughly a 10‑inch print on the long side, smaller than A3. Here is the path through Gigapixel AI.
First, open the file in your photo editor and set the white point and contrast, but do not sharpen yet. Sharpening at the original size magnifies tiny JPEG artefacts that Gigapixel will then treat as real detail, so leave that for after the upscale. Export a 16‑bit TIFF in Adobe RGB.
Open the TIFF in Gigapixel AI. Set the AI model to Standard, enable face refinement, and set the scale to 2×. That gives you a 6000×4000‑pixel file — slightly above the 3600‑pixel‑long‑edge target for A3, which is fine; you can crop or resize down later. Set Suppress Noise to 25 and leave Remove Blur at zero unless the original is genuinely soft. Process a 100%‑view crop of the face to check that the eyes look natural and not over‑synthesised. If they look waxy, lower the face‑refinement strength in the preferences and re‑run the crop test.
Once the settings look right, process the full image. Save the output as a TIFF. Back in your editor, downsample to exactly 3600 pixels on the long edge using bicubic sharper resampling, then apply a light output sharpening appropriate for the paper type — matte papers need a little more bite than glossy. The result is a print where the grain looks like the original film‑era texture, not digital noise, and the faces hold up at close viewing distance.
For those hunting down a working build on older hardware, a search for topaz gigapixel ai mac crack tends to turn up a mix of versions, and this 1.3.5 release is the one that balances feature set with compatibility on macOS 12 and beyond. If your Mac is stuck on an older OS, a query like topaz gigapixel ai 6.3.3 crack or topaz gigapixel 1.0.4 may surface an earlier version, but you lose the face‑refinement improvements and the native Apple Silicon support that make the current ARM‑only package the cleaner choice for M‑series machines.
- macOS 12 or newer
- Apple Silicon or Intel 64-bit Mac
- English interface
Questions I keep hearing
Which Macs does Topaz Gigapixel AI 1.3.5 support?
It runs on macOS 12 and newer, with separate packages for Apple Silicon and Intel 64-bit Macs.
Is Topaz Gigapixel AI the same as Topaz Gigapixel?
No — Gigapixel AI is the legacy product line, which ended at version 8.4.4 and was later replaced by Topaz Gigapixel.
Questions from the class 0
Sign in or join the class to ask a question.
Nobody has asked anything yet. If you have used it on a real job, say what the file did.
Also on the Mac Apps shelf
The whole Mac Apps shelf Topaz Photo AI
Analyses a photo and applies the exact sharpening and noise reduction it actually needs.
Topaz Photo AI
Analyses a photo and applies the exact sharpening and noise reduction it actually needs.
 Topaz Video AI
Reconstructs watchable detail from old, low-quality video footage frame by frame.
Topaz Video AI
Reconstructs watchable detail from old, low-quality video footage frame by frame.
 TouchDesigner
Assembles real-time visuals by wiring together operators for points, textures and geometry.
TouchDesigner
Assembles real-time visuals by wiring together operators for points, textures and geometry.
 Transmit
Moves files between your Mac and remote servers through a fast, dual-pane browser.
Transmit
Moves files between your Mac and remote servers through a fast, dual-pane browser.
 Trimma
Trims the start or end off a video without opening a library or creating a project.
Trimma
Trims the start or end off a video without opening a library or creating a project.
 TunesKit iPhone Unlocker
Removes a forgotten screen passcode or an Apple ID from a locked iPhone.
TunesKit iPhone Unlocker
Removes a forgotten screen passcode or an Apple ID from a locked iPhone.
 Tuxera NTFS
Lets your Mac read and write Windows-formatted drives without a second thought.
Tuxera NTFS
Lets your Mac read and write Windows-formatted drives without a second thought.
 TG Pro
Monitors every temperature sensor in your Mac and lets you set custom fan curves.
TG Pro
Monitors every temperature sensor in your Mac and lets you set custom fan curves.