 ASPNetWorld

You’ve pulled an old MiniDV tape from the cupboard, digitised it, and on a modern screen the footage looks like a mosaic struggling to remember what a face is. That’s the moment you start searching for a topaz video torrent, hoping the software can work backwards from a pixel soup to something watchable.
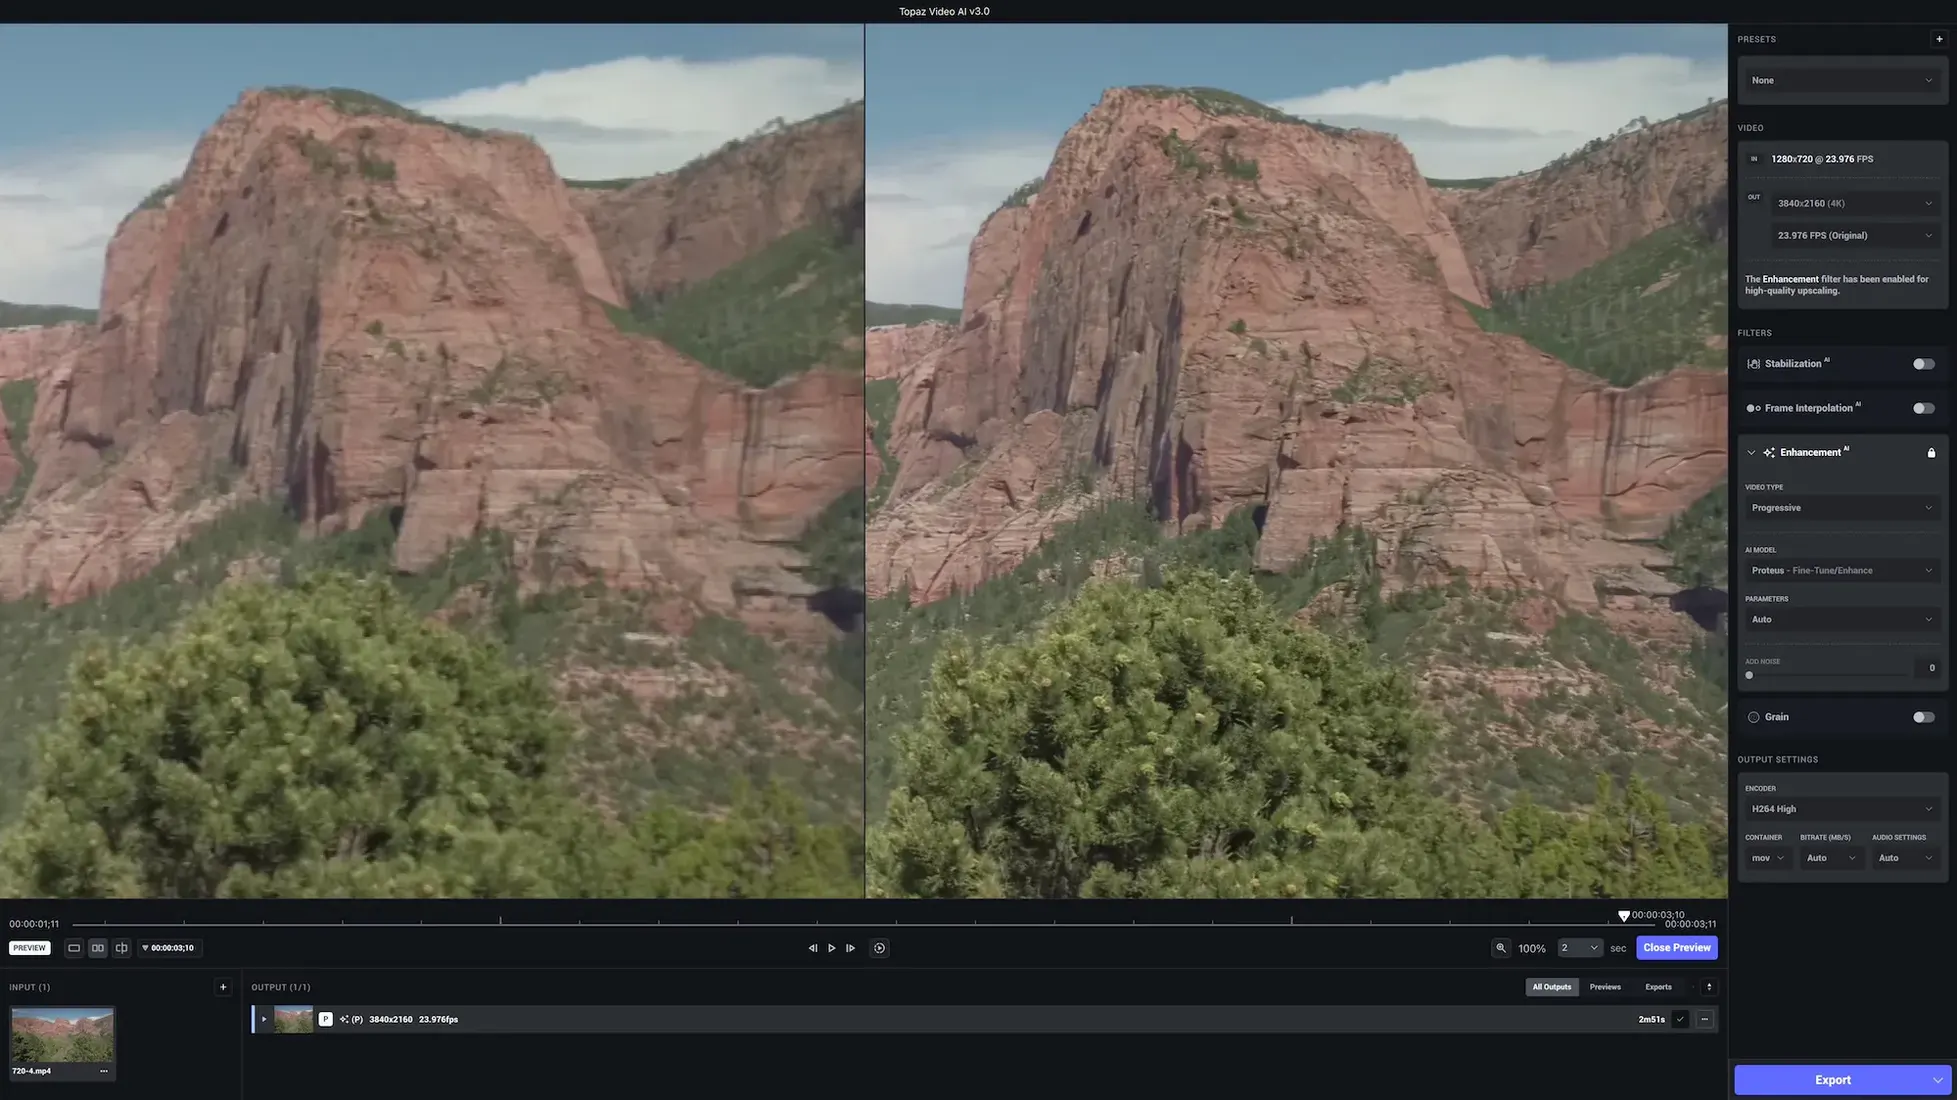
What you’re actually getting with Topaz Video AI is a desktop tool built specifically for this kind of rescue job. It can take standard-definition video and upscale it to HD or 4K, sharpening details without turning people into waxworks. The same engine handles denoising on footage shot in dim light—think evening wedding videos where the camera pushed its ISO to breaking point.
Frame-rate conversion is the other trick worth knowing about. Rather than simply blending or dropping frames, the app generates entirely new intermediate frames to make motion look natural. Converting 24p film to smooth 60p playback becomes plausible, not just a checkbox on an export menu. The software was formerly called Video Enhance AI, and the underlying models have been trained to maintain temporal consistency—so a panning shot doesn’t shimmer like a heat haze—all the way up to 8K output.
Compatibility lands at macOS 11 and later, with native support for both Intel and Apple Silicon machines. If your project is restoring focus on slightly soft archival material, or enlarging HD up to a resolution that holds up on a large monitor, the same installation handles all of it from a single interface.
Running clips through the rescue pass after the rough cut
Nobody opens Topaz Video AI to start a project from scratch. It sits between the rough cut and the grade—a processing pass you run once you know which clips need rescue work. On a Mac, that usually means handing it footage from Final Cut Pro, DaVinci Resolve or Premiere Pro, then bringing the cleaned-up file back into the timeline.
The simplest hand-off is an exported ProRes file. You render a short section from your NLE, drag it into Topaz Video AI, pick a model and a resolution, and let the app write out a new clip. Because the software works on whole files rather than linking into an edit, it pays to trim generously—you can always slip the clip later. Some editors keep a dedicated watch folder on the desktop and use the app’s batch queue to process a whole evening’s worth of grainy B-camera shots while they sleep.
QuickTime Player, surprisingly, becomes part of the chain too. After processing, you’ll want to check the result at full resolution before re-importing, and QuickTime’s loop-playback and frame-stepping shortcuts are quick enough for a sanity check. If the footage is heading to YouTube, a quick A/B comparison against the original in a Finder-column preview saves you from uploading something that looks overcooked.
On the macOS side, two system features quietly help. Spotlight indexes the app’s output folder, so searching by clip name pulls up the enhanced version alongside the original—useful when a project folder sprawls across several drives. And if you’ve set up a Time Machine exclusion for the render cache, you avoid backing up multi‑gigabyte temporary frames that the app writes during processing.
Mistakes that catch people out early on
The most common one is feeding the app an already-compressed file and expecting miracles. If your source is a highly compressed H.264 from a phone or a screen recording, the AI models have less real detail to work with, and artefacts get sharpened along with the image. Transcoding to ProRes first doesn’t add information, but it does stop the models from interpreting compression blocks as texture.
Another misstep is treating the preview window as final quality. The live preview renders at reduced resolution to keep the interface responsive, so it can look softer than the exported file. I’ve seen people dial the sharpening up to compensate, then end up with a result that glints unnaturally on hair and fabric. Switch to the side-by-side view and export a ten‑second test clip before committing to a full render.
Choosing the wrong AI model for the job is the third classic stumble. Artemis is tuned for high-quality source footage that just needs a resolution bump; Proteus handles heavy noise and compression artefacts; Gaia targets natural detail in landscapes and faces. Dropping Gaia onto noisy CCTV footage produces a waxy, over‑smoothed look, while Proteus on clean HD leaves fine texture intact but doesn’t add the crispness you wanted. The model selector isn’t a quality slider—it’s genuinely a different set of assumptions about what the source looks like.
Beginners also tend to upscale straight to 4K when the original is barely standard definition. The models do their best, but the jump from 480 lines to 2160 is enormous. An intermediate step—upscaling to 1080p, checking the result, then going to 4K if the HD version holds up—often produces a more natural final image than a single aggressive pass.
Finally, frame-rate conversion without checking motion consistency. Converting 25p to 50p works well for moderate movement, but fast pans or objects crossing the frame can still produce a rippling effect at the edges. The “reduce motion deblur” checkbox helps, yet it’s worth scrubbing through the output at full speed before deleting the original.
Processing time on Apple Silicon for a two-minute clip
Will this run on an M1 Mac without melting it? Yes, and it runs natively, not under Rosetta. On an M1 Max with 32 GB of memory, a two-minute 1080p clip processed through Artemis takes roughly six to eight minutes. The fan stays quiet for the first few passes, though sustained batch work does warm the chassis. On older Intel machines—particularly the 2018 Mac mini with integrated graphics—the same clip can take forty minutes or more, and the fan becomes part of the room’s ambience.
Does it work as a plug-in inside Final Cut or Premiere? No. Topaz Video AI is a standalone desktop application. You export from your editor, process the file, and bring the result back in. There’s no send-to-Topaz command or timeline integration, and the company has shown no sign of building one.
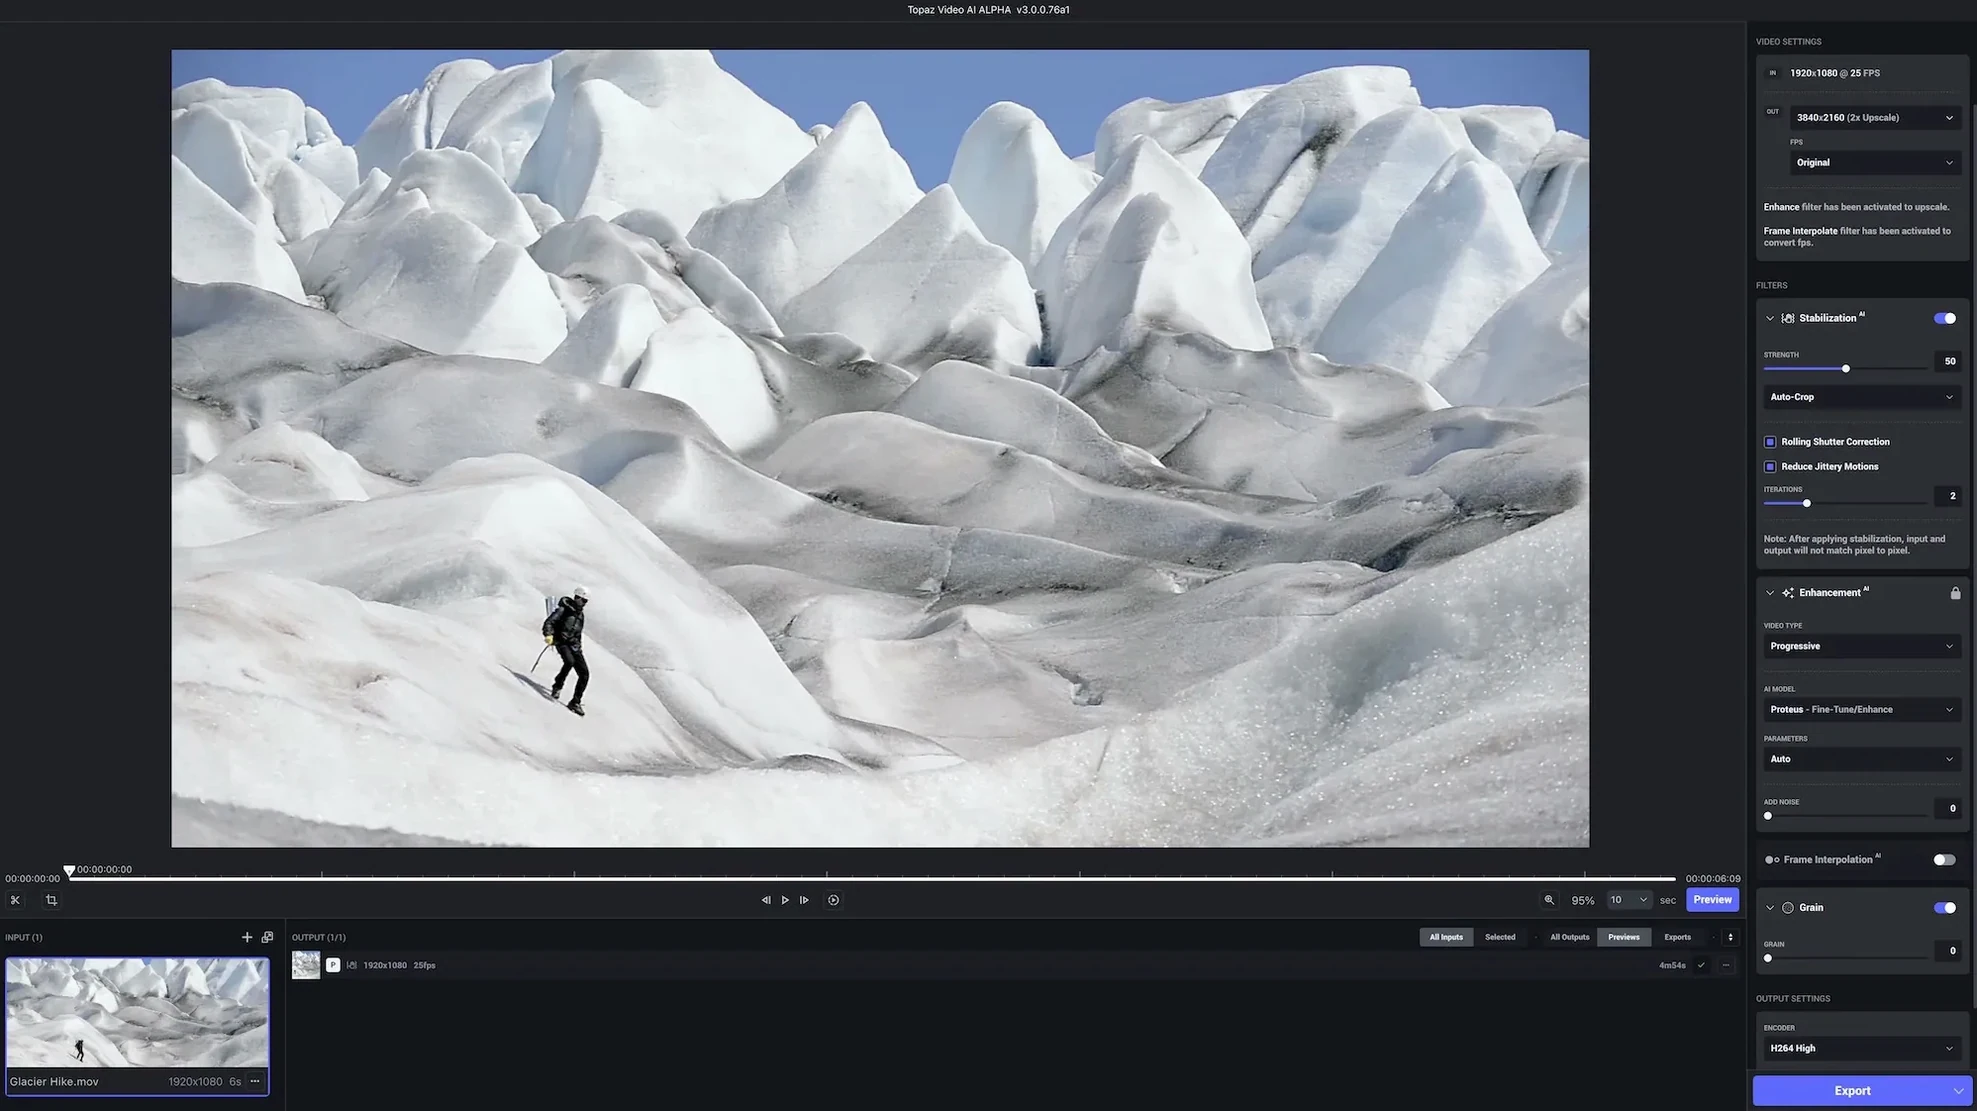
Can it remove camera shake from handheld footage? The stabilisation is included, but it’s not a replacement for a dedicated tracker. It works on mild wobble and rolling-shutter artefacts, using optical-flow analysis rather than gyroscope data. If your clip looks like it was filmed during an earthquake, you’ll still want to pre-stabilise in your editor first, then hand the steadier result to Topaz for the detail work.
Is the Mac version missing features compared to Windows? The two platforms share the same AI models and export options. The interface is slightly different—the Mac version follows macOS conventions for window management and file dialogs—but the processing pipeline is identical. If you read a tutorial written on Windows, the steps translate directly.
Opening files that QuickTime plays without complaint
One snag that appears regularly is the app refusing to open a file that QuickTime plays without complaint. This is usually a codec wrangle. Topaz Video AI relies on its own decoder for some formats, and MKV containers with unusual audio tracks can trip it up. Rewrapping to MP4 with a tool like Shutter Encoder—changing nothing about the video stream itself—often fixes the problem in under a minute.
Another is the “out of memory” error on machines with Apple Silicon and 8 GB of unified memory. Processing 4K footage with multiple models enabled can push the working set past what’s available, especially if other applications are holding GPU resources. Closing everything else helps, but the more reliable fix is to reduce the output resolution or process one enhancement at a time—upscale first, then stabilise—rather than stacking all the corrections in a single pass.
Occasionally the preview panel shows a green frame or a flash of garbled pixels. This is a display render issue, not a problem with the export. Let it finish a short test export; nine times out of ten the output file is clean. If it isn’t, toggling the “enable hardware acceleration” checkbox in preferences forces a different rendering path that sidesteps the glitch.
If you’re on an Intel Mac and the app takes an age just to load a clip, check whether the “auto-detect scene changes” option is on. It analyses the entire file on import to suggest model changes per scene, which is useful for long archival footage but punishing when you just want to process a thirty-second drone shot. Turning it off cuts import time dramatically.
AI models that can grow past ten gigabytes
Topaz Video AI is not light. The installer itself is large, and the downloaded AI models live in a folder that can grow past ten gigabytes once you’ve pulled down a few variants. Disk space matters, and you’ll want the models on a fast internal SSD—running them from an external USB drive adds noticeable stutter during preview renders.
Once it’s running, the application has the feel of a specialised tool that knows it’s chewing through heavy maths. The interface stays responsive while a job is processing; you can queue up more clips, tweak settings for the next one, and browse the model catalogue without slowing the current render. On an M1 Max, I’ve had it running for six hours straight in a batch queue without a crash, though I’ve learned to save the queue as a preset beforehand—the app recovers gracefully from a forced quit, but it doesn’t auto-save queued jobs.
Memory pressure is the main thing you’ll notice in Activity Monitor. A 4K upscale with Proteus can push the app’s memory footprint beyond 16 GB, and the system starts compressing aggressively if you only have 8 GB. On a 16 GB M1 Pro, the machine remains usable for email and browsing while Topaz works; on 8 GB, you’ll be stepping away to make tea.
Export speed varies wildly by model. Gaia is the slowest, sometimes processing under one frame per second on complex material, while Artemis can breeze through at several frames per second. The progress bar is honest about time remaining once it settles, but the initial estimate jumps around for the first minute. A good habit is to start a render, note the time after five percent, and multiply—it’s usually accurate within ten percent.
Stability on macOS 11 through to the current release is solid, with one quirk: the application occasionally loses its connection to the model server during long idle periods, showing a “model unavailable” message until you quit and reopen. It’s a minor irritation rather than a workflow blocker, and it’s been present across several versions.
For anyone who’s searched for a topaz ai crack mac, the reality is that the application’s processing demands mean it pushes hardware hard. A machine that barely meets the minimum spec will feel slow regardless. The M-series chips are where the software makes practical sense—on an M1 Air, a short 1080p clip finishes in time to keep a editing session moving; on a 2015 MacBook Pro, the same clip turns into an overnight job.
Resource use extends beyond the CPU and GPU. The app writes temporary frame files constantly during processing—expect several gigabytes of scratch data for a long 4K export, cleaned up automatically when the job finishes. If your boot drive is tight on space, point the cache to an external SSD in the preferences. The setting is tucked away under “processing options,” but it’s worth finding before you start a big batch.
In daily use, the tool earns its place on the dock if you regularly handle footage that needs repair rather than just trimming. It’s not a render-every-clip kind of application; it’s the one you reach for when a shot is too dark, too soft, or too low-resolution to use, but too important to cut. That focus on salvage rather than enhancement-for-its-own-sake is what stops it feeling like a gimmick after the first few renders.
- macOS 11 or newer
- Supports Intel and Apple Silicon Macs
Questions from the class 0
Sign in or join the class to ask a question.
Nobody has asked anything yet. If you have used it on a real job, say what the file did.
Also on the Mac Apps shelf
The whole Mac Apps shelf Topaz Photo AI
Analyses a photo and applies the exact sharpening and noise reduction it actually needs.
Topaz Photo AI
Analyses a photo and applies the exact sharpening and noise reduction it actually needs.
 Topaz Gigapixel AI
Enlarges low-resolution images while keeping faces and textures crisp and natural.
Topaz Gigapixel AI
Enlarges low-resolution images while keeping faces and textures crisp and natural.
 TouchDesigner
Assembles real-time visuals by wiring together operators for points, textures and geometry.
TouchDesigner
Assembles real-time visuals by wiring together operators for points, textures and geometry.
 Transmit
Moves files between your Mac and remote servers through a fast, dual-pane browser.
Transmit
Moves files between your Mac and remote servers through a fast, dual-pane browser.
 Trimma
Trims the start or end off a video without opening a library or creating a project.
Trimma
Trims the start or end off a video without opening a library or creating a project.
 TunesKit iPhone Unlocker
Removes a forgotten screen passcode or an Apple ID from a locked iPhone.
TunesKit iPhone Unlocker
Removes a forgotten screen passcode or an Apple ID from a locked iPhone.
 Tuxera NTFS
Lets your Mac read and write Windows-formatted drives without a second thought.
Tuxera NTFS
Lets your Mac read and write Windows-formatted drives without a second thought.
 Typeface
Browses a visual grid of every installed font and compares them side by side.
Typeface
Browses a visual grid of every installed font and compares them side by side.