 ASPNetWorld
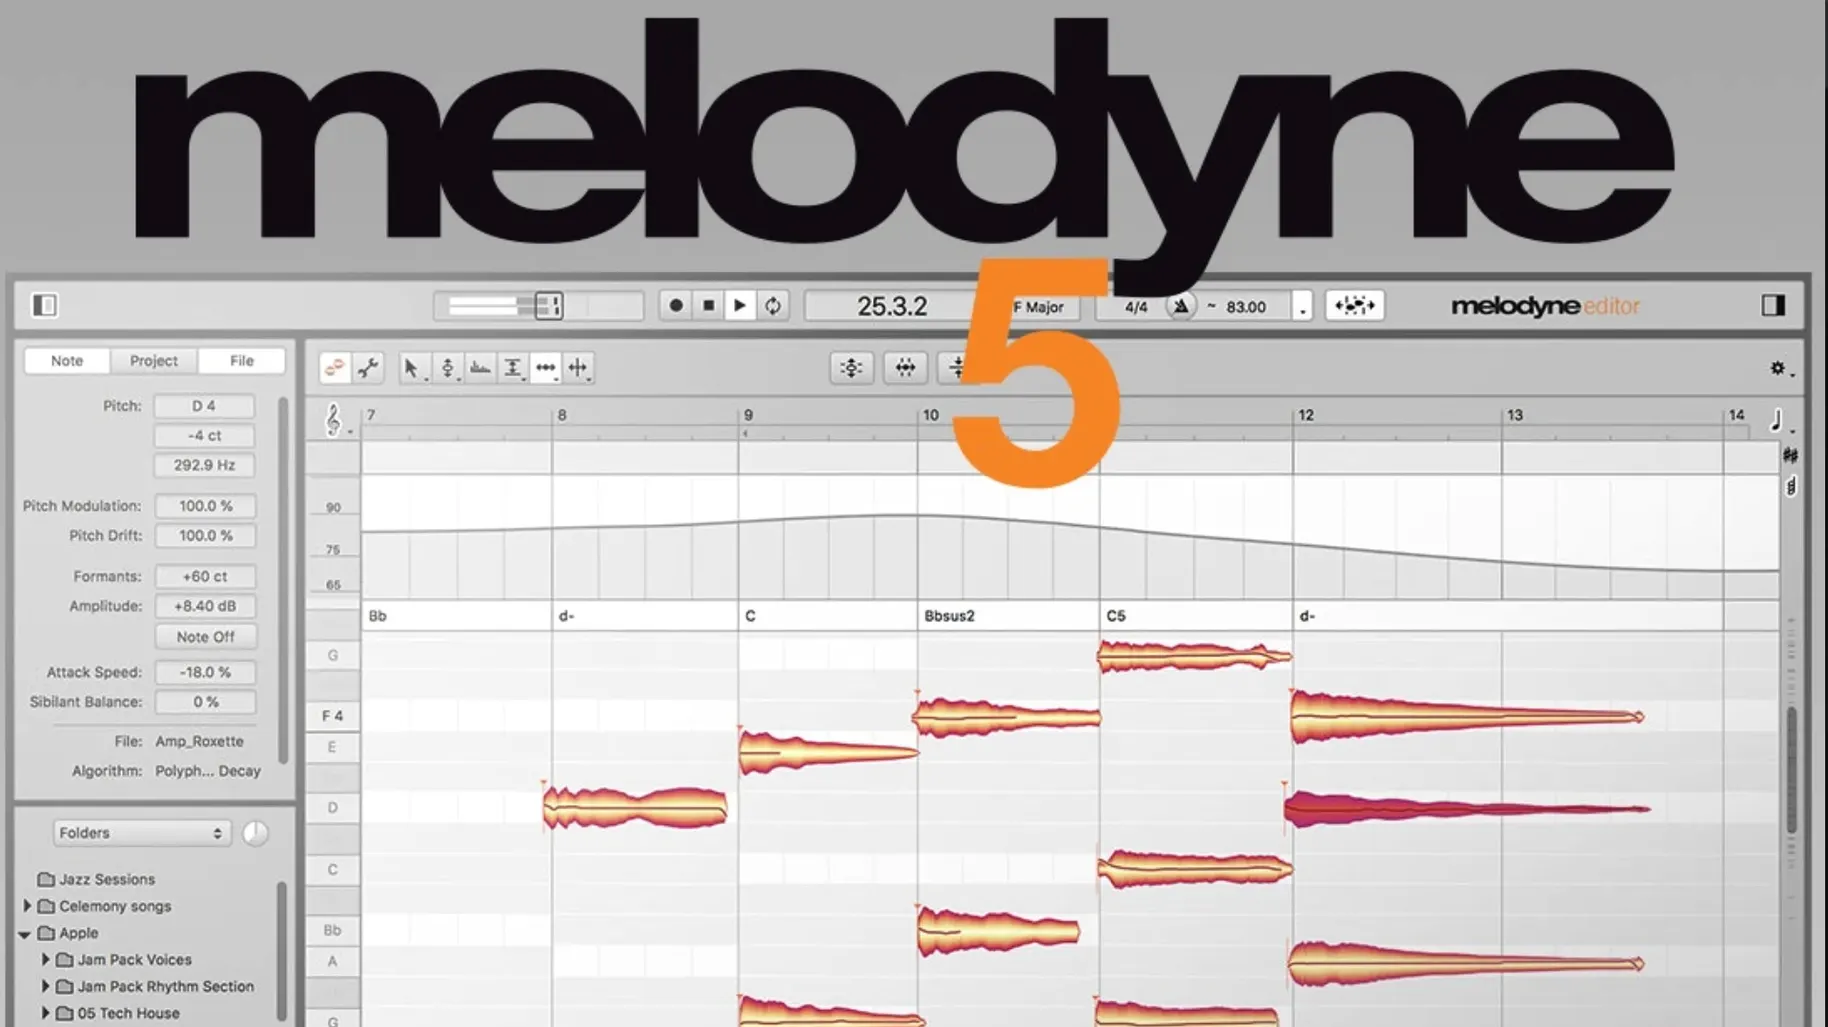
You open a vocal take where the singer drifted slightly flat on the bridge. Instead of reaching for a real-time tuner, you see the audio laid out as distinct blobs on a grid — each blob a note, complete with its own pitch, timing and vibrato curves. A quick drag upwards fixes the intonation, and you nudge the following consonant back by a few milliseconds to tighten the phrase. That is the everyday reality of editing with Melodyne, and version 5.4.2 keeps that core experience steady while quietly bringing the underpinnings up to date.
The software works by analysing audio note by note, mapping everything from fundamental pitch and duration to sibilants, breath noise and formants. You can adjust the volume of individual syllables manually, or use the Fade Tool and Leveling Macro for dynamic, note-based fades that feel more like mixing than editing. The analysis also extends beyond vocals: an additional Percussive Pitched algorithm handles instruments that sit somewhere between definite pitch and unpitched noise, giving you the same blob-based control over a wider range of recordings.
Under the hood, the current release adds official adaptations for macOS Sequoia, squashes a crash that could appear when opening Melodyne in ARA and plug-in use cases, and improves trackpad scrolling so the interface feels more responsive under your fingers. These are not flashy changes, but they matter when you are deep in a session and need the software to stay out of your way. The Mac version runs natively on Apple Silicon, and ARA mode remains the tightest way to work, letting your DAW and Melodyne share audio data without the old-school transfer step.
What has not changed is the fundamental approach: chords, keys, tunings and tempos are recognised automatically, and every detected note remains editable for pitch, timing, vibrato, length and formants. The 5.4.2 update is about reliability, not reinvention, which is exactly what a tool this embedded in production workflows needs.
Common Snags and How to Sort Them Out
The most frequent head-scratcher is silence where you expected sound. You transfer a region into Melodyne, the blobs appear, but playback stays mute. Nine times out of ten this is a routing issue in your DAW — the plug-in slot is active but the track's monitoring path is not feeding back through Melodyne to the output. In ARA mode, check that the DAW sees the analysed data; in older plug-in workflows, make sure you have actually recorded the transfer by hitting play and letting the audio pass through before editing. A quick toggle of the monitor button usually clears it.
Another classic is the "missing algorithm" message that appears when Melodyne has chosen Percussive Pitched for a guitar line that you know is melodic. Right-click the track header or the blob area, switch to Polyphonic or Universal, and re-transfer. The software guesses based on the audio content, but it does not always read your intentions. If you load a melodyne download mac from a fresh install, the algorithm set for each track type is a sensible default, but you can override it per track before the first transfer.
Timing edits that sound phasey or granular usually come from separating notes too aggressively with the Note Separation tool. The fix is simple: use longer default separation lengths in the Algorithm preferences, or undo and let the detection run again with a gentler sensitivity setting. For vocal tracks, check that the vibrato detection has not split a held note into a stutter of tiny blobs. You can merge them by selecting the blobs and choosing Edit > Merge Notes, then reapply any pitch drift by hand.
Some users find that Melodyne stops responding to keyboard shortcuts after switching windows. This is a known focus quirk, especially when running multiple plug-in instances. Click once on the Melodyne window's title bar — not the blob area — to return keyboard focus, and the shortcuts come back. On macOS Sequoia, version 5.4.2 fixed several focus-related oddities, so if you are still seeing it, check that you have the point release installed and not an older build you found via a Melodyne 5 torrent that predates the update.
If the tempo map drifts and blobs no longer line up with your DAW's bars, the first thing to confirm is that the DAW is sending tempo information to Melodyne. In ARA mode this happens automatically. In plug-in mode, you may need to enable tempo sync in Melodyne's Transport menu. For complex tempo changes, re-transferring the audio after locking in the DAW's tempo map often produces a tighter result than manually adjusting the grid inside the editor.
A Typical Working Session, Step by Step
Imagine a Tuesday evening. You have a lead vocal track that needs tuning, a double-tracked harmony that feels lazy in the chorus, and a fingerpicked acoustic guitar recorded without a click. You open your DAW and instantiate Melodyne on the lead vocal first. With ARA engaged, the analysis runs the moment you open the plug-in — blobs appear across the timeline, coloured by pitch and sized by amplitude. You immediately spot a wobbly sustained note in the second verse. You select the Note Separation tool, split the blob at the exact point where the pitch starts to wander, and drag the offending section up a semitone. The transition between the two blobs sounds a little abrupt, so you open the Note Editor panel and increase the transition time to 40 ms, which smooths the join without losing the correction.
Next, the harmony track. The singer rushed the entry on the word "stay" in every chorus. You switch to the Timing tool, select the blob for "stay," and hold Option while dragging it left — this overrides the snap grid and lets you position it by ear, a few milliseconds behind the lead. Because you want the consonant "s" to stay crisp, you split the note into its onset and sustain portions using the Separation tool, move only the vowel, and leave the sibilant locked to the original timing. The Leveling Macro then evens out the remaining volume bumps across the phrase without squashing the performance.
The acoustic guitar is a different challenge. The player did not follow a click, so the tempo fluctuates. You use Melodyne's Tempo Editor to map the performance's natural ebb and flow — the software detects the transients and draws a tempo curve that the DAW can follow. Once synced, the guitar sits in the project grid without warping. A few stray string squeaks that landed louder than the notes get pulled down with the Amplitude tool, reducing them by 6 dB so they become texture rather than distraction.
You finish by opening the chord track view. Melodyne has identified the chord progression from the guitar take, and you use that as a guide to tune the harmonies — dragging individual notes inside the detected chords until the stacked vocals lock into a tighter harmonic pocket. The whole session, from loading the first plug-in instance to printing the tuned audio back into the DAW, takes under forty minutes.
Practical Tips for the First Days After Installing
Resist the urge to edit everything in sight on day one. The most productive first step is to spend twenty minutes with a single vocal track, learning how the blob display corresponds to what you hear. Zoom in vertically until you can see the subtle pitch drift inside a held note — the thin wavy line inside the blob is your actual pitch curve, and the flat line is the target pitch after correction. Understanding that visual language prevents over-editing later.
Set up your default algorithm preferences before you transfer any audio. In the Preferences window, under Algorithms, you can assign specific algorithms to different track types. If you mostly work with vocals, set the default to Universal and tell Melodyne to store that as the starting point for new projects. This saves you from the "wrong algorithm" headache I described earlier. If you grabbed a melodyne free download mac from a trusted source to try it out, this preferences tweak makes the trial period far less frustrating.
Get comfortable with the keyboard shortcuts for the main editing tools, because they are much faster than the toolbar. 1 through 8 on the main keyboard cycle through the tools: 1 is the Main tool (the one you will use most), 2 is Pitch, 3 is Formant, 4 is Amplitude, 5 is Timing, 6 is Note Separation, 7 is Pitch Modulation, and 8 is Pitch Drift. Tattoo those numbers onto your muscle memory and you will stop reaching for the mouse every few seconds.
Do not overlook the Note Editor panel, which sits quietly at the bottom of the window. It gives you numeric control over pitch, timing, length, vibrato depth and formant shift for whichever blob is currently selected. When you need to tighten a double-tracked vocal, select all the blobs from the doubled track and nudge the timing value by -10 ms in the Note Editor — far more precise than dragging and hoping.
One final early-days tip: if you are working with a Melodyne 5 Studio crack or an unverified build, you may encounter random crashes or missing features like the chord track. The 5.4.2 release from Celemony is stable on Sequoia, so if odd behaviour crops up, a clean install of the build alongside the MORiA activation tends to fix it. Many users have found the current patched version solid in testing.
Small Conveniences and Shortcuts That Are Easy to Miss
Holding Shift while dragging a blob constrains the movement to either horizontal or vertical, depending on which direction you start moving. This sounds trivial until you are trying to fix timing without accidentally shifting the pitch by a few cents. Another modifier gem: Command-Option while clicking a blob resets its pitch to the nearest semitone, which is quicker than dragging to the centre line and hoping you hit it.
The scroll wheel behaviour changed in 5.4.2, and it is worth mentioning here because the improvement is subtle but meaningful. Vertical scrolling now feels more responsive, and you can hold Shift while scrolling to zoom vertically on the pitch axis — a shortcut that is not labelled anywhere obvious but becomes indispensable when editing vibrato depth across several notes at once.
The Fade Tool deserves more love than it gets. You can draw fades directly onto the blob display, and the curve is applied per note, not per region. This means you can create a natural decrescendo across a piano chord by fading each note individually, with different fade lengths for each string. Combine it with the Leveling Macro for a one-two punch: the macro evens out note volumes, and the Fade Tool adds the expressive shape back in.
For anyone working with samples, the Percussive Pitched algorithm has a hidden trick. After analysis, you can use the Formant tool on individual percussive hits — a snare drum, for instance — to shift its resonant frequency without changing its pitch. This turns a standard snare into something drier or more ringing, all inside the same plug-in. It is not in the manual's tutorials, but it works beautifully.
The Note Ruler, that thin horizontal strip above the blob area, is easy to ignore until you realise it is interactive. Clicking on a note name in the ruler plays that pitch as a reference tone through Melodyne's output, which is useful when you are tuning harmonies by ear and want to check intervals against a fixed pitch. The ruler also highlights which scale degrees are currently active, based on the detected key — a subtle visual guide that helps you stay within the song's harmonic framework without staring at a chord chart.
Which Kinds of Mac Users Get the Most Out of Melodyne and Why
Vocal producers and topliners are the obvious first group, and for good reason. Melodyne's note-by-note approach to pitch and timing means you can tune a lead vocal without the processed sheen that real-time correction often leaves behind. But the deeper value is in comping and arrangement: you can extract individual syllables from different takes, re-pitch them to fit a new chord progression, and assemble a performance that never happened in the recording booth. The sibilant and breath detection also lets you shape the texture of a vocal without sending it to a separate processor.
Film and media composers, particularly those working with orchestral samples, find the chord recognition and tempo mapping indispensable. When you import a reference track or a rough piano sketch, Melodyne analyses the harmonic content and gives you a chord track that your DAW can follow. This means you can score to an existing piece of music without manually transcribing the changes — a huge time-saver when a director hands you a temp score and says "do something like this." The formant editing also comes into play when you need to pitch-shift a sampled string line up a minor third while keeping the section size and timbre believable.
Sound designers and sample-library builders are a quieter but passionate user base. The ability to edit pitch, formant, amplitude and timing per note makes Melodyne a surgical tool for reshaping found sounds into playable instruments. You can take a field recording of a rusty gate, detect its tonal components with the Percussive Pitched algorithm, tune them to a scale, and export the result as a chromatic instrument. No other tool in the Mac audio ecosystem combines analysis and editing in quite the same way, which is why a melodyne free mac search often leads sound designers to stick with it long-term.
Restoration engineers and archivists form a smaller but devoted niche. When a historic recording has wow, flutter and pitch drift baked into the tape, Melodyne's Pitch Drift tool — separate from the main pitch correction — can smooth out the slow warble without affecting the musical intonation. Coupled with the amplitude editing, it becomes possible to rescue performances that would otherwise be unlistenable by modern standards, all without leaving the familiar blob-based interface.
The common thread among these groups is that they all benefit from Melodyne's depth. Casual users who only need quick pitch fixes might find the learning curve steeper than a simpler tuner, but anyone who edits audio as a craft rather than a chore will eventually hit a point where the tool's granularity becomes essential. The 5.4.2 release does not change that equation — it just makes sure the software keeps working reliably on the latest Macs, which for the people who depend on it day in and day out is precisely the right priority.
The 5.4.2 update is a maintenance release that brings the software comfortably onto macOS Sequoia. Alongside the usual round of optimisations and bug fixes, it improves trackpad scrolling so zooming and navigating feels more fluid, and addresses a crash that could occur when opening Melodyne in ARA and plug-in use cases.
- macOS 10.12 or later
- Apple Silicon and Intel Macs supported
- English interface
Questions I keep hearing
Does Melodyne 5.4.2 run on Apple Silicon Macs?
Yes, it runs natively on Macs with Apple Silicon processors, so there is no Rosetta translation overhead.
What is ARA mode and why would I use it?
ARA lets your DAW and Melodyne share audio data directly, removing the need to manually transfer clips back and forth between the two.
Can Melodyne edit things other than vocals?
Absolutely. It includes a Percussive Pitched algorithm for instruments like plucked strings, and you can edit pitch, timing and dynamics on any monophonic or polyphonic material the analysis detects.
Questions from the class 0
Sign in or join the class to ask a question.
Nobody has asked anything yet. If you have used it on a real job, say what the file did.
Also on the VST Plugins shelf
The whole VST Plugins shelf MeldaProduction MCompleteBundle
Provides a full suite of effects and instruments with consistent controls.
MeldaProduction MCompleteBundle
Provides a full suite of effects and instruments with consistent controls.
 Metric Halo Production Bundle
Shapes individual instruments and buses with studio-grade processors.
Metric Halo Production Bundle
Shapes individual instruments and buses with studio-grade processors.
 MiniMeters
Displays audio metering so you can see what your mix is doing.
MiniMeters
Displays audio metering so you can see what your mix is doing.
 Minuit Solstice
Rearranges samples on a spectral map for otherworldly textures.
Minuit Solstice
Rearranges samples on a spectral map for otherworldly textures.
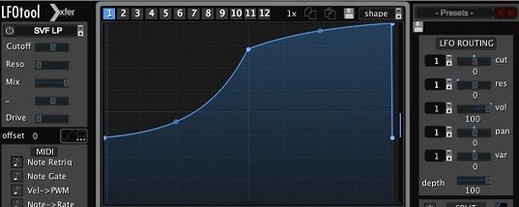 LFOTool
Shapes volume, pan, filter, or MIDI CC data with tempo-synced drawn curves.
LFOTool
Shapes volume, pan, filter, or MIDI CC data with tempo-synced drawn curves.
 Native Instruments Massive X
Generates deep, moving bass and lead sounds through a polyphonic wavetable synthesis engine.
Native Instruments Massive X
Generates deep, moving bass and lead sounds through a polyphonic wavetable synthesis engine.
 LANDR Vocal Bundle
Sculpts a vocal through a single channel strip that layers EQ, compression, and saturation intelligently.
LANDR Vocal Bundle
Sculpts a vocal through a single channel strip that layers EQ, compression, and saturation intelligently.
 LANDR Mastering Plugin PRO
Applies adaptive mastering to a mix in real time as you make changes.
LANDR Mastering Plugin PRO
Applies adaptive mastering to a mix in real time as you make changes.